Clonezilla to Clone HDD to SSD in Windows
Here are the detailed steps on how to clone HDD to SSD using Clonezilla or an easier workaround in Windows 11/10/8/7.
By Lucas / Updated on May 12, 2023
Why clone HDD to SSD?
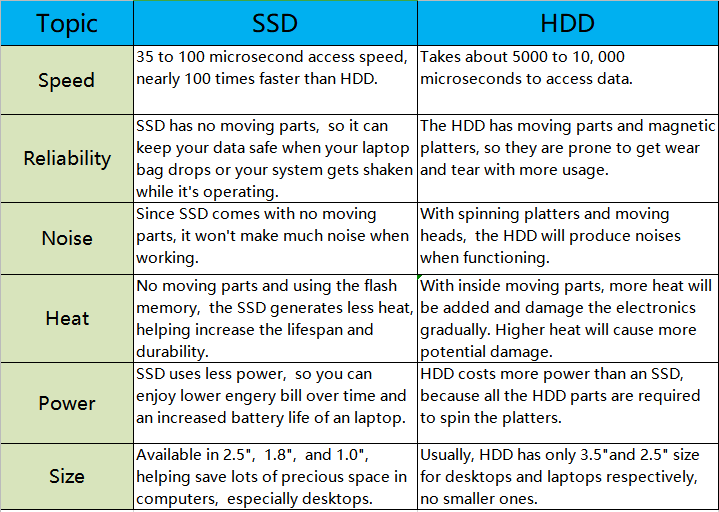
A classic rotating hard disk is referred to as an HDD. Mechanical components of HDDs include platters, read/write heads, and so forth. It uses spinning disks to read, write, store, and cache data. While SSD is a solid-state device that is utilized under the hood and is more sophisticated than HDD. All data in SDD is saved in flash memory chips. Data can be kept even when there is no electricity. Because there are no moving components in an SSD, it is more energy efficient and resistant to wear and tear.
Due to all advantages of SSD, cloning HDD to SSD is commonplace in replacing hard drive among thousands of PC users.
Clone HDD to SSD via Clonezilla
Clonezilla is free and open-source software for disk imaging and cloning. It can be used in both Microsoft Windows OS and GNU/Linux. In the aspect of disk cloning, Clonezilla requires the target disk (SSD in the article) should be equal to or larger than the source disk (HDD). Therefore, it is not easy to clone HDD to smaller SSD through Clonezilla. Yet not easy doesn’t mean there is no way out. If your source disk does not contain that much stuff, you can shrink its partition size in Disk Management first to meet the target disk.
1. You need the essential physical disk SSD and an external disk closure and a USB cable if you don’t want to install the SSD to your PC directly.
2. A running operating system.
3. Download the Clonezilla zip file on the SSD and make it bootable. To make it bootable, you need to extract the zip file and create a 200 MB partition on SSD as the boot partition. Or, you can create a bootable USB using Diskpart and place the Clonezilla ISO file there if you don’t want to use the SSD as the boot device.

How to clone HDD to SSD with Clonezilla?
Step 1. Boot your PC using the bootable SSD, and in the boot menu, choose “Other modes of Clonezilla live”. In the next interface, you can choose “To RAM” to release the boot partition on the SSD.
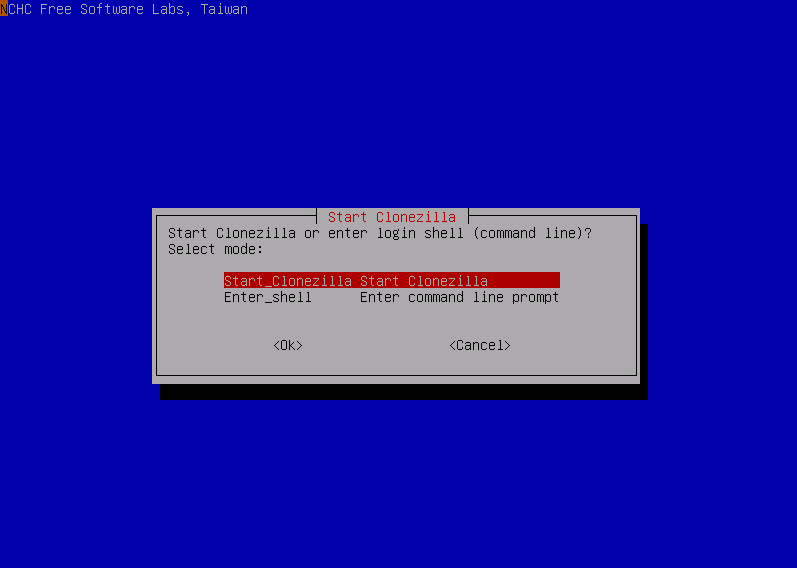
Step 2. Choose the language, and keyboard layout, and then “Start Clonezilla”.
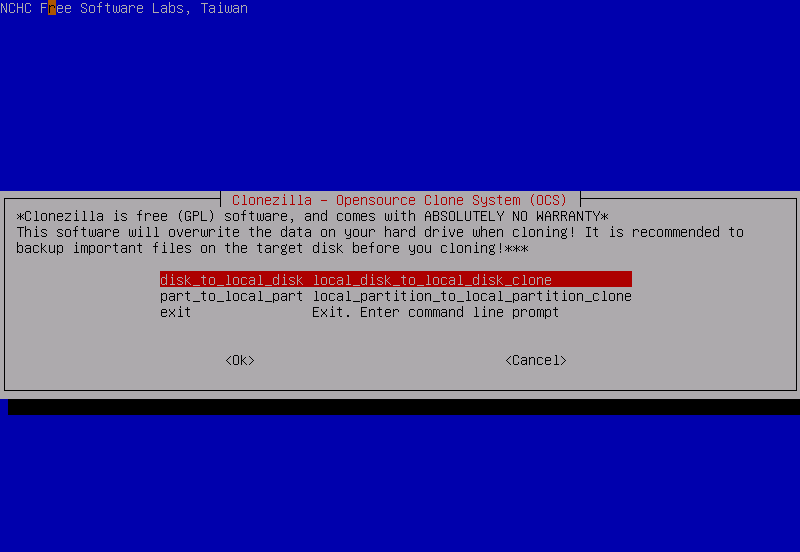
Step 3. Choose “device-device work directly from a disk or partition to a disk or partition”. Then “beginner mode: Accept the default options”, and next “disk_to_local_disk local_disk_to_local_disk_clone”.
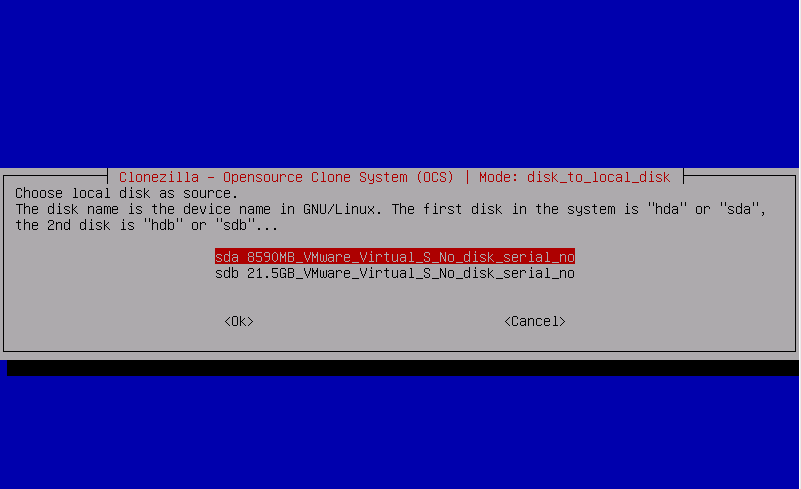
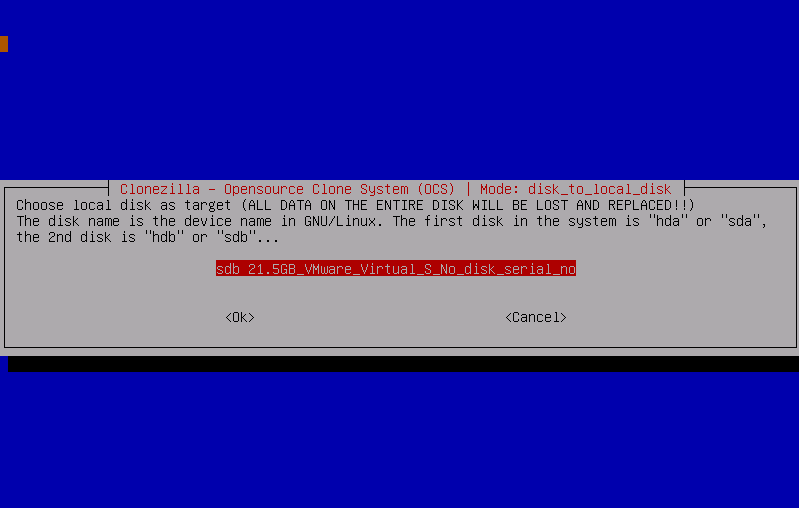
Step 4. Select the source disk and the target disk in turn now. You may be asked to check the source file system here. Just skip or check based on your needs.
Step 5. It will start to clone and ask for other several confirmations. Wait for the cloning process to be completed.
A better alternative to Clonezilla to clone HDD to SSD- AOMEI Partition Assistant
To clone a hard drive like clone HDD to SSD in Windows 7/8/8.1/10/11 using Clonezilla above is a little time-consuming and cumbersome since you have to prepare a boot device beforehand. What’s worse, it doesn’t have a graphical user interface, which is quite difficult for common PC users who are new to computers in particular. But that is not something to worry about because you always get a “plan B”, the alternative to Clonezilla, AOMEI Partition Assistant Standard.
The “Disk Clone” in AOMEI Partition Assistant allows you to clone HDD to a smaller SSD with “Clone Disk Quickly” mode. Further, you have options to personalized edit the partition size on the target disk before starting cloning. It is easy, to install the software, configure the parameter and then leave it to complete the task alone.
Step 1. Connect the SSD to your PC. Install and launch AOMEI Partition Assistant. Click Clone on the top bar and select Clone Disk, then choose your desired copy method.


Only clone the used space to the destination disk, and after the clone, you can adjust the size of partitions. If you need to clone an HDD to a smaller SSD, you can clone just the utilized space.
◤ Sector-by-Sector Clone:
Clone all sectors on the source disk no matter used or not, including blank sectors or logically faulty sectors.
Step 2. Disk 1 is selected by default. Select the target disk. Check the option "Optimize the performance for SSD". To change the source disk, please go to All Tools > Disk Clone Wizard to select a new one.

Step 3. Edit the partition size if you wish to, and read the Note in the next window carefully.


Step 4. Click Apply to execute all operations, and you will go to the final confirmation. If nothing goes wrong, click Proceed to reboot your PC and let it complete there.


To sum up
Comparatively speaking, AOMEI Partition Assistant has the advantages of multifunction, simple operation, and an intuitive interface for users. That is to say, it is more effective than Clonezilla when cloning HDD to SSD in Windows OS.
Speaking of multifunction, you may have noticed that there are many features in the Wizards pane. Say migrate OS to new hard drive with Migrate OS to SSD feature; create a bootable USB drive with Make Bootable Media wizard; and conversion between MBR and GPT with MBR to GPT Converter.