Fixed: Cloned Hard Drive Shows Wrong Size
Are you looking for a way to fix cloned hard drive shows wrong size? Fortunately, you can find the answer you want from this post.
By Dervish / Updated on May 12, 2023
Scenario: Cloned hard drive shows wrong size
I bought a larger SSD last week, so I cloned the data from the old hard drive to this new SSD to complete the data migration. But after the cloning was completed, I found a problem: the new SSD still shows the capacity of the old hard drive in Windows Explorer, but it shows the correct capacity in Disk Management. I restarted my computer, but the result did not change. Can anyone tell me why the new hard drive showing wrong size? How can I make it normal? Thanks in advance!”
Why cloned hard drive shows wrong size?
To know why cloned hard drive shows wrong capacity, we need to figure out the principle of cloning first. Cloning can not only copy the data on the disk, but also copy the original structure of the disk. In other words, the cloned SSD is exactly the same as the old hard drive. If you clone the original hard drive to a larger target hard drive, the part that exceeds the size of the original hard drive will be recognized as unallocated space. The unallocated space is invisible in Windows Explorer because it cannot be used. This is the root cause of the problem.
Warning: If your destination disk is MBR partition style, you should know that the maximum capacity of MBR disk is 2 TB, and the excess will be recognized as unallocated space. If you want to make full use of the hard drive, you must convert MBR to GPT.
How to fix cloned hard drive shows wrong size?
Because the cloned hard drive capacity shows wrong size due to the invisible unallocated space, then we need to make full use of the unallocated space.
You can extend the partition through Disk Management, but if the unallocated space is not adjacent to the partition, the Extend Volume will be grayed out.
Therefore, I recommend that you use the free third-party software AOMEI Partition Assistant Standard to extend partition, even if the unallocated space is not adjacent to the partition. This is one of the best partition managers on the market, it can solve various partition and disk problems for you. The whole operation is very simple, only need to use the mouse to click to complete.
In addition to extending partitions, you can also use unallocated space to create one or more partitions.
Step 1. Install and run AOMEI Partition Assistant Standard. Right-click the partition you want to extend and select "Merge Partitions" from the "Advanced" option.
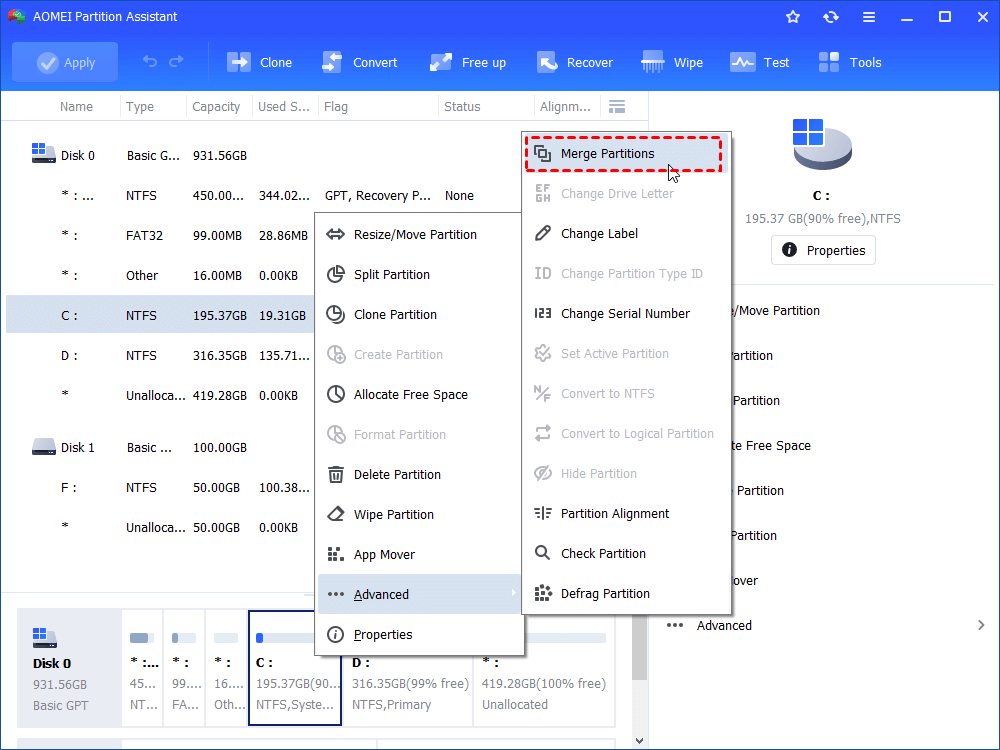
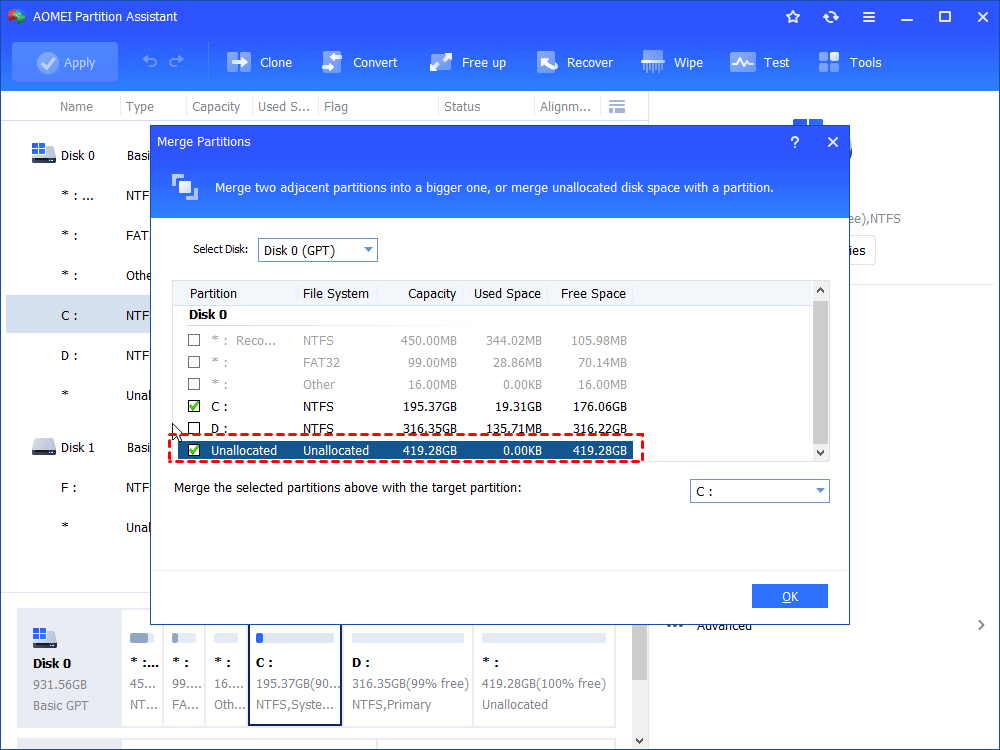
Step 2. Then, tick the box before the unallocated space.
Step 3. After that, click "Apply" to execute it.
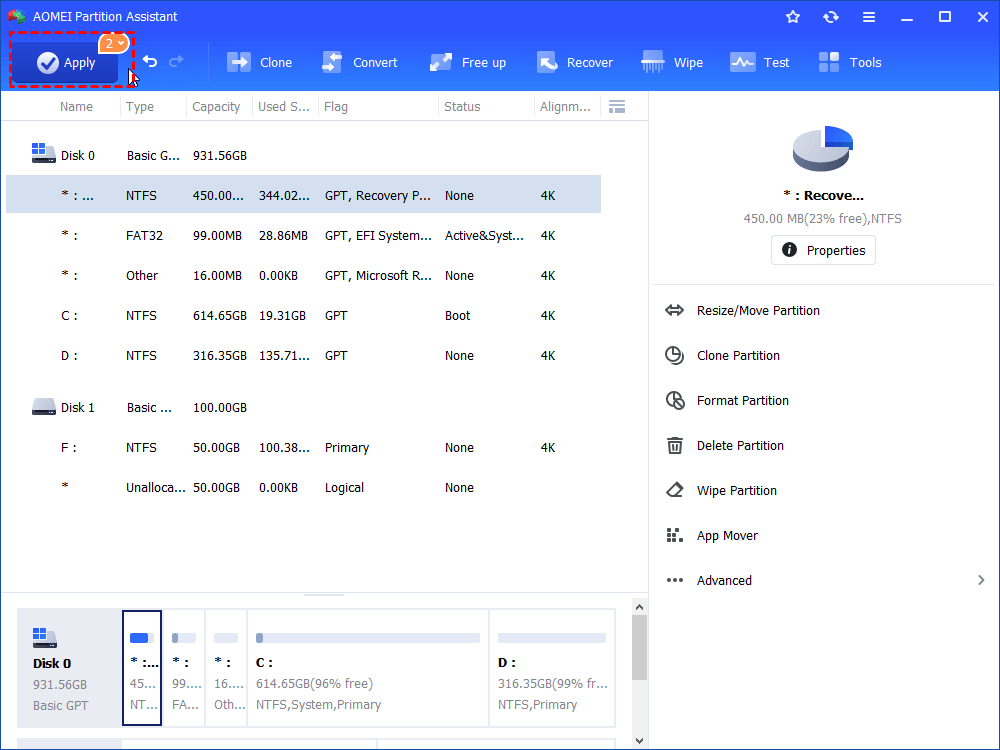
After you have used up the unallocated space, you will find that your new hard disk has displayed the correct size when you return to Windows Explorer.
Avoid cloned hard drive shows wrong size permanently
Although the above methods can help you solve the problem, do you think it will be troublesome to perform such operations every time after cloning the hard disk. In order to avoid this trouble forever, I suggest you use AOMEI Partition Assistant Standard to clone the hard drive. It can help you to clone disk easily. More important, the cloned hard drive will not display wrong size.
There are two clone method are provided: Clone Disk Quickly and Sector-by-Sector Clone. The former is to clone the used part of the disk, and the latter is to clone the entire disk.
Please note: For data disks, the Standard version supports cloning hard disks from MBR to MBR. If you want to clone data disks from MBR to MBR/GPT or GPT to GPT/MBR, you need to upgrade to AOMEI Partition Assistant Professional, which can also clone system disk between MBR and GPT.
Step 1. Install and run the free cloning software. Click “Clone" > "Clone Disk .

Step 2. In the pop-up, you can two ways to clone hard drive: "Clone Disk Quickly" and "Sector-by-Sector Clone". Usually, the first way is recommended.

Step 3. Disk 1 has been chosen as the source disk by default. Here you need to choose the destination disk to contain all data of the source disk.

Tip: If you clone disk to SSD, please tick "Optimize the performance of SSD" to align partitions.
Step 4. In this window, you can adjust partitions on the destination disk.

PS.: There are three options but only two are available if you clone a large hard drive to a smaller SSD.
Step 5. You’ll return to the main interface, click “Apply” and “Proceed” to execute this task.

Conclusion
See it? This is the solution to the cloned hard drive shows wrong size problem. With AOMEI Partition Assistant, you can easily merge partitions with the unallocated space or simply clone the hard drive to avoid the hard drive shows wrong capacity issue. And it also applies to cloning all kinds of SSDs, such as clone SATA SSD, clone NVMe SSD, etc. If you are using Windows Server, please try AOMEI Partition Assistant Server.