Partition and format Western Digital hard disk with Windows Disk Management
Windows users know that Western Digital (WD) hard disk is a wonderful hard drive and it is acclaimed by users. However, in order to get a better performance, you have to partition and format it. Windows OS has a built in tool called Windows Disk Management, which is specially for managing your hard drive disk including the Western Digital hard disk. But, to partition and format disk, it has many restrictions.
Windows Disk Management only allows you to extend, shrink, delete and format the volumes on your WD hard disk. As a built-in tool, it does really reliable to users. But sometimes, when you extend volume with it, you will find the Extend Volume option is grayed out because of there is no unallocated space adjacent to it. Even the shrink volume option is grayed out when you try to use it to shrink volume. Besides, if your WD hard drive needs more utilities beyond the features of Windows Disk Management, a free third party software is a better choice.
The best free WD hard disk partitioning and formatting software
The third party software AOMEI Partition Assistant is designed for managing disk. To partition and format your WD hard disk with this software would be a piece of cake, and it provides free edition for Windows PC users. To use AOMEI Partition Assistant, you need to download the standard edition, then, follow the simple steps.
To partition WD hard disk, this freeware could be very useful.
★Create partition. You can create partition on the WD hard disk for storing different data.
★Resize partition. If you are not satisfied the size of the WD hard disk, you can resize it.
★Delete partition. If you do not want the partition, you can delete it without hesitation.
★Merge partitions. This function will help you integrate the partitions.
★Split partition. You can split partition to create new one for your personal files storage.
★Format partition. For formatting partitions to NTFS, FAT32, EXT2,EXT3. You only need a few clicks. Take an example for how to format the partition F: from NTFS to FAT32.
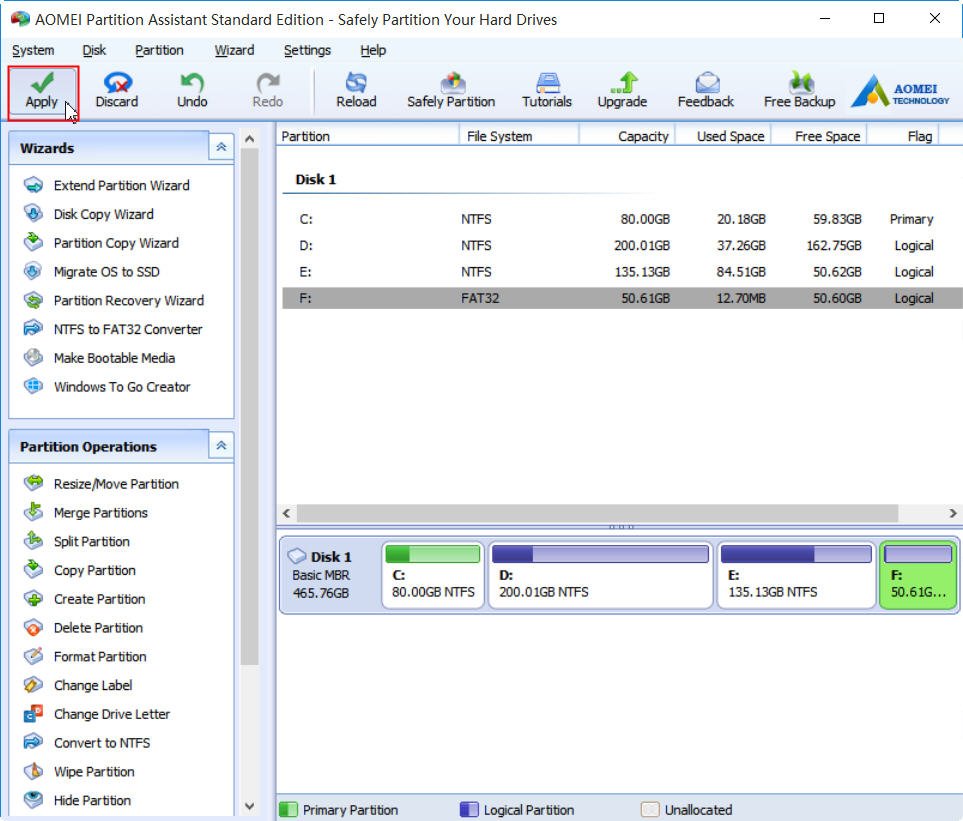
Step1. Install and launch this freeware. It will show you the simple main interface. Right click the F: partition, select Format Partition.

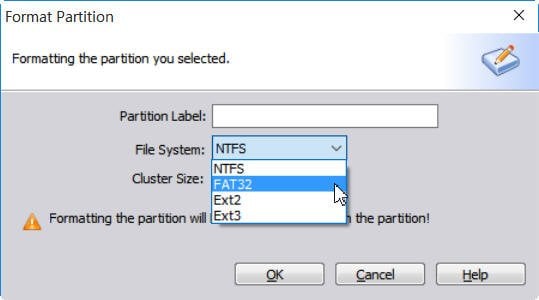
Step2. It will pop out a window for formatting the partition like the following screen shot. You can edit a partition label for it, and select the file system at the drop down menu, and you can select the cluster size for the partition. After all the settings, click OK to move on.
Step3. You can see that the F: partition has already been formatted as FAT32. But don’t forget to click Apply at the toolbar to submit the whole operations.
When the progress reaches 100%, you have finished the job that format your WD hard disk.
In fact, partitioning WD hard disk with the freeware AOMEI Partition Assistant is as simple as convert NTFS to FAT32 without destroying data. It breaks out all the limitations of Windows Disk Management. You can use it to partition and format WD hard disk for Windows 10/8/7 and Windows Vista/XP in freely. Besides the basically partitioning utilities, you can also use the Partition Recovery Wizard of this freeware to restore partitions. It also provides you migrate OS to SSD freely, and do many other things for your Western Digital hard disk. It is worth to be the best free WD hard disk partition and format software.