Why Need to Move Windows 7 Installation to another Disk?
After a long time your disk has wear out, which may make damage to it. On the other hand, with time goes by, the increasing installed programs, temporary files, caches or other data will take up much of the space and there will be less and less free space. In this situation, the performance of Windows 7 such as booting up speed, data accessing speed will decline.
No matter which situation you have met, you need to upgrade your present hard disk to another one, a larger Hard Disk Drive-HDD or Solid State Drive-SSD. Actually, you can finish the task by reinstalling system on the new disk, but the fact is that many of users don’t expect to reinstalling system due to it’s a time consuming work. So just move Windows 7 installation from one disk partition to another is the direct way to avoid reinstalling system.
Move Windows 7 Installation to another Disk with AOMEI Partition Assistant
Transferring Windows 7 installation to another disk refers to move the exactly same system files of Windows 7 to another disk, after the movement you can boot up Windows 7 from the new disk directly.
AOMEI Partition Assistant Professional is an all-in-one software which is specialized in partition management. It is able to help users migrate OS to SSD or HDD without any data loss. In additional, the easy-to-use interface allows users finish this task with few simple steps.
Before you do
- Make sure the destination SSD or HDD has an unallocated space which is equal to or larger than the used space of current OS partition.
- If you would like to migrate OS from MBR disk to GPT disk, make sure your motherboard supports EFI or UEFI boot.
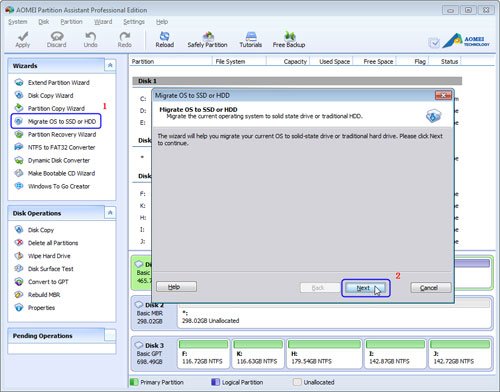
Step1: Download, install and launch AOMEI Partition Assistant Pro. Click Migrate OS to SSD or HDD and then click Next.
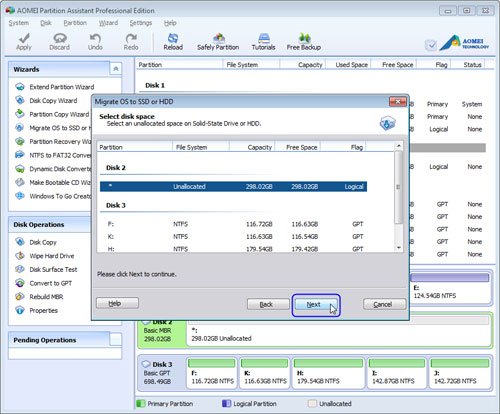
Step2: Select another disk as destination and then click Next to continue.
 Step3: In this window, you could modify the information (including size, location, and drive letter) of the partition on new disk, of course, you can keep default settings.

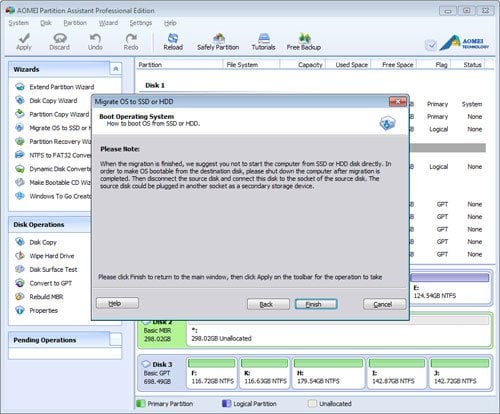
Step4: Please Click Finish after you have read the note.
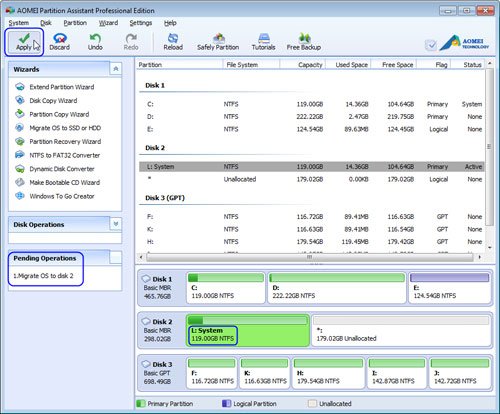
Step5: Click Apply to perform the operation.
Note:
- If you migrate OS between MBR and GPT disks, please enter BIOS and change boot setting (about boot setting, please check your motherboard or computer manual) when OS migration is completed.
- This operation involves the system partition and it will be completed under the PreOS Mode.