I have a laptop with Windows 7 operating system, and there is an unallocated space in hard disk. So I want to create a new partition to save my favorite movies. But when I try to do this in Disk Management, the error message come out- you cannot create a new volume in this unallocated space because the disk already contains maximum number of partitions. What should I do to solve this problem and get the partition I want?
Basic information about Windows 7 partition
After searching many information and in forums, I know some basic information about disk management in windows 7. When we install Windows 7 system, it will create all partitions as primary partition if we don’t manually set up primary partitions and extended partition. Often, the disk format of computer is MBR, and one hard disk whose is MBR contains up to four primary partitions or three primary partitions and one extended partition (extended partition including multiple logical volumes). Once four primary partitions are created, it cannot create logical partition any more, thus the left free space cannot be used any more. Coincidently, my laptop have four primary partitions.
To solve this problem, we should convert one primary partition to logical and create new partition with unallocated space, which included in the same extended partition, otherwise there will be an error message – you cannot create a new volume in this unallocated space, because the disk already contains maximum number of partitions. How to deal with it easily is a question. I found a third-party partition manager to solve this problem easily.
Convert to logical and create partition with third-party partition manager
When I typed my question to Google, there is millions of partition manager software showing up in the screen. What makes me confused about which one can solve my question perfectly? I selected third-party partition software called AOMEI Partition Assistant. AOMEI Partition Assistant Pro Edition a reliable and powerful disk management toolkit for Windows 8 and 8.1, Windows 7, Vista, XP (all editions, support 32-bit and 64-bit). It allows us to resize/move partition without reboot, merge partitions to solve low disk space problem, align partition, convert dynamic partition to basic partition, wipe disk and partition, etc. With all the basic and advanced features, we can convert primary partition to logical partition easily.
It has five editions and every edition has different function. I had downloaded the standard edition, and I thought it can solve my problem. But it informed me that this edition is a kind of freeware, and it does not support covert partition between primary and logical. So, I have to download the paid edition— Partition Assistant Pro Edition, though it is not free charge, but it solved my problem perfectly.
There are step-by-step guides that were copied from its official website. Specially share with people whose knowledge about computer is worst. There are two cases that contain converting partition from primary to logical and creating partition.
Case 1. how to convert partition from primary to logical
step1. Right-click the primary partition which you want to convert and then choose “Advanced” and “Convert to Logical
 Choose “Convert to Logical”
step2. Click “OK” to confirm the operation in the following pop-up window.
Make sure to convert
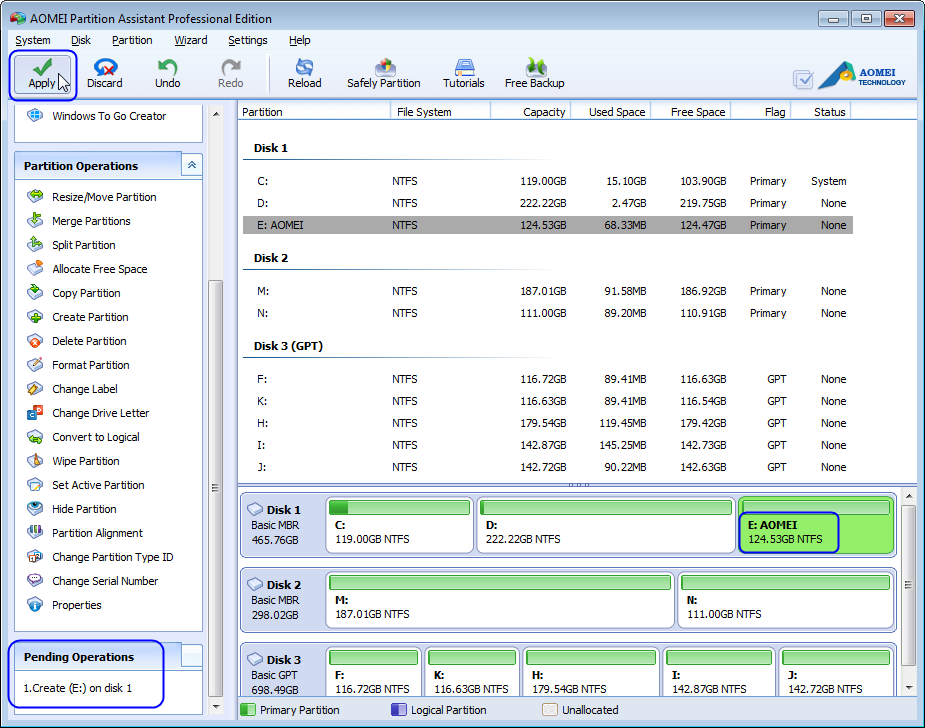
step3. Commit the operation by clicking “Apply” on the tool bar.
 Clicking “Apply”
Here are some tips I have to say:
- Don’t convert a boot partition to logical. Otherwise, you computer will likely to stop working.
- The location and the size of the primary partition will be slightly changed after converting. Since the logical partition is 63 sectors bigger than primary partition.
Case 2. How to create partition with unallocated space.
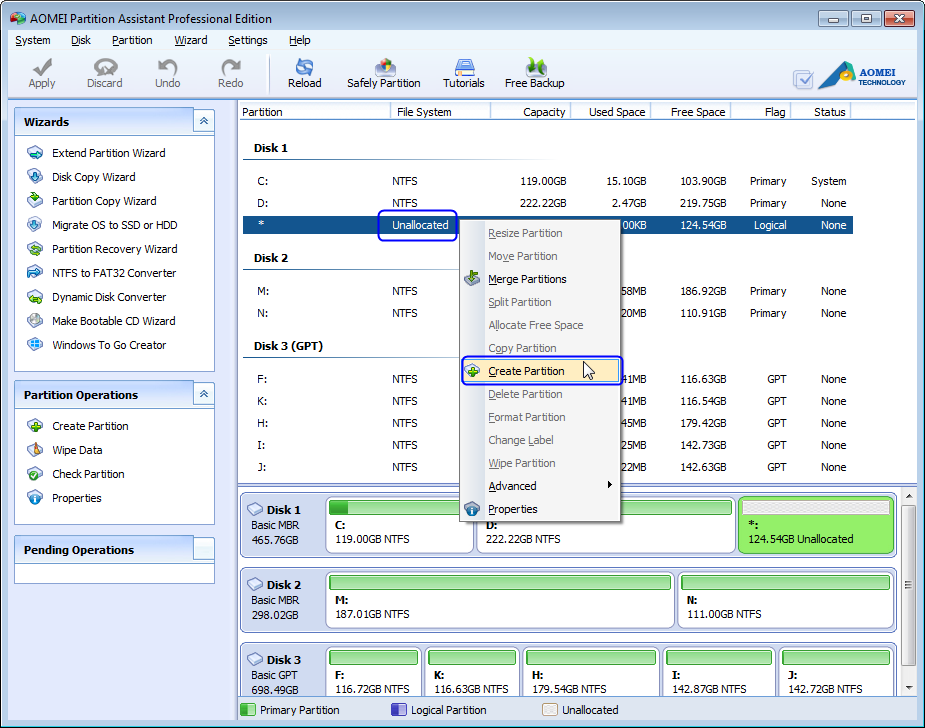
Step1. Install and launch AOMEI Partition Assistant. Right click the unallocated space and select “Create Partition” in the drop-down menu (if there is no unallocated space, please go to Way 2).
Step2. In the pop-up window, click “Advanced<<” to specify the information for the new partition, including partition size, partition label (here is AOMEI), drive letter (here is E:), files system (NTFS or FAT), and partition type (logical or primary). You could also specify the size of the new partition by dragging the both edge (marked in red circle). When all settings are completed, click “OK” to continue.

Step3. Now you can preview the new created partition. Click “Apply” on the toolbar to commit the “Pending Operations”.
Is it very simple and easy to understand how to create a new volume if follow steps above? To be honest, I want to say it is more fast and convenient for common users to operate and manage our computer. Although AOMEI Partition Assistant Pro Edition is charge, it is absolutely worth users pay for it. Besides the paid edition, this software has freeware, if computer disk need to be partitioned, it’s free edition will a greater helper.