Have you found the Partition Magic freeware for Server 2008? Why
don't you turn to this place? Here you can find what you have wanted for a long
time—partitioning hard disk in Windows Server 2008 by using partition manager
server. It can help you to shrink, move and extend volume safely, and
you needn't lose your data or reinstall the system.
C drive lacks of free space in Windows Server 2008
As we all know, whether the space of C drive is enough will have a great impact on
the running of computer. If C drive is lack of free space, you will have some problem with upgrading or other operations. The worst situation may be that the machine collapses and refuses to work. So the only way to avoid is to extend C
drive.
You may once pin the hope on the built-in Disk Management tool in Windows Server 2008
because it has the function of shrinking volume and extending volume. Yes, it can
resize partition indeed. But question is that it only can extend the partition which
has a contiguous unallocated space at its right side. What if there is no such
condition? Deleting the shields between them? It's not a good suggestion considering
the bad consequence and tedious process. Therefore, another better way should be
found.
Resize partition Server 2008 by AOMEI Partition Assistant Server Edition
AOMEI Partition Assistant Server Edition, just like the Partition Magic Server 2008,
comes to us with many special features which can help us to manage hard disk
partition very well. It does not need any money and can run in many servers,
including Windows Server 2000, 2003, 2008 (R2), 2012 (R2), 2016, 2019.
Another advantage is that the interface of it is very clear to understand. Whether
you are a professional or a newbie, you can operate it easily because the wizard
will guide you step by step.
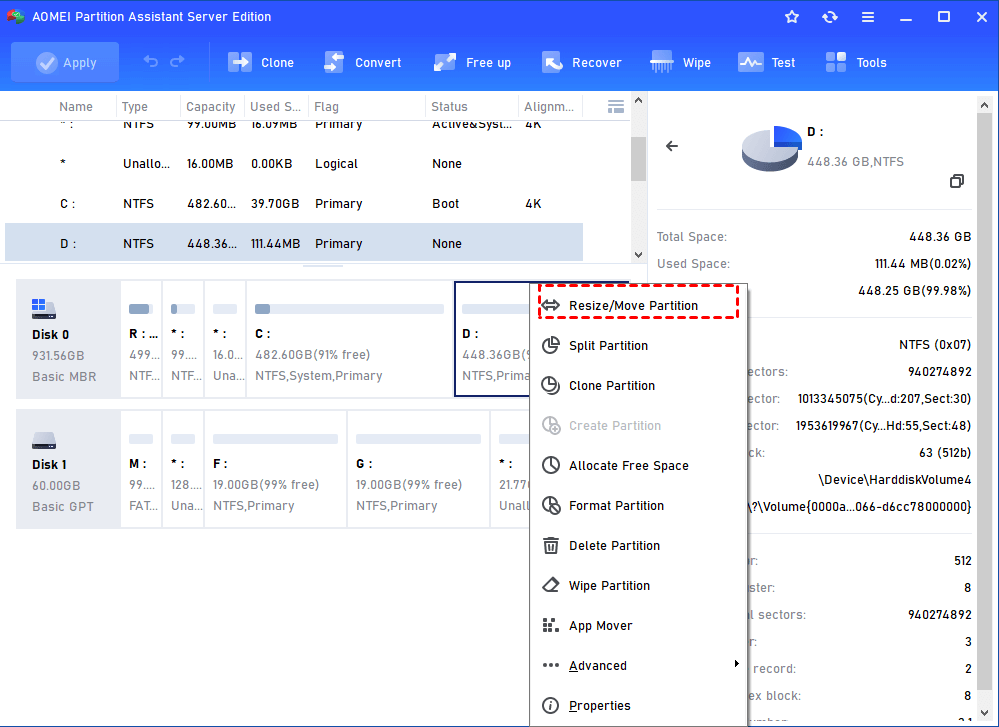
Step1: Open the surface of Partition Assistant Server Edition, right click D
partition and choose "Resize Partition"

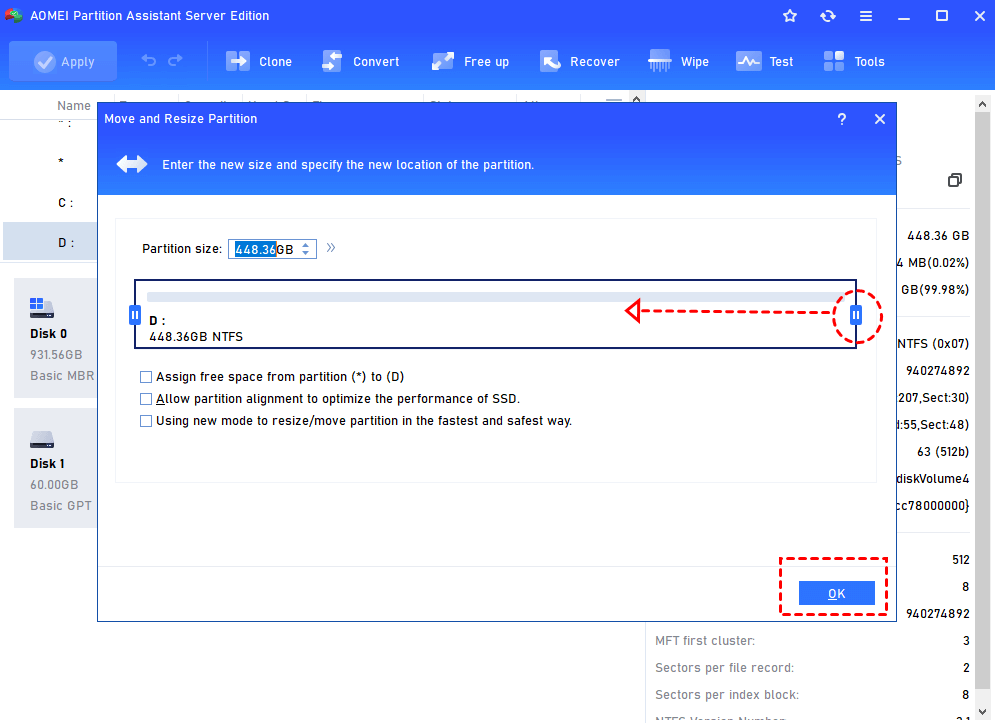
Step 2:In the pop-up window, drag the right slider bar leftwards as the
following picture. Press "OK" to admit this change. You will see an unallocated
space has been released form the D partition. (TIP: After shrinking, the
unallocated space behind D partition must be larger than it. Otherwise, the next step
will not continue.)

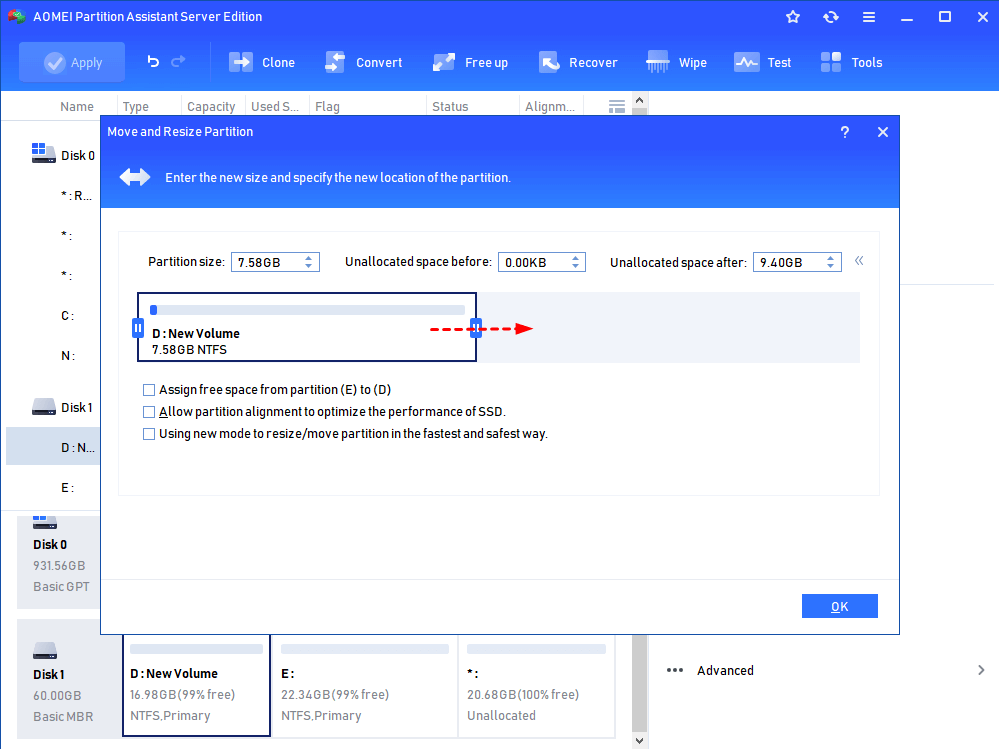
Step3:Right click D partition, select "Move Partition". Then drag
the arrow in the pop-up window to the right side. After Clicking"OK", the
unallocated space will move to the location behind C drive. Then resize C drive just
like resize D partition.

Step4: At last, click "Apply" on the toolbar to run the
operation


