Easily Securely Erase SSD Windows 10 without Affecting Performance
This post aims to tell you how to securely erase SSD in Windows 10, 8, 7 without damaging its performance and lifespan. Then you can completely wipe all data on the SSD and protect your privacy.
Do you need to secure erase SSD?
Microsoft has well prepared Windows 10 for SSDs. When you install Windows 10 on an SSD drive, you will see a great performance boost. However, after a massive data usage, you may find the SSD performance drops without reason.
If you have not changed other settings that may affect SSD performance, then it is time to do Secure Erase SSD in Windows 10. Secure Erase will wipe everything from your SSD and restore your SSD performance without hurting its lifespan. In addition to, wiping or erasing a solid-state drive is also necessary in the following situations:
-
Dump or resell the SSD: deleting everything from the SSD drive by securely erasing can prevent others from accessing your personal files.
-
Eliminate virus and malware on the device: if your SSD drive is infected by a stubborn virus or malware, you can completely remove it by erasing or wiping the drive.
Choose a reliable tool to securely erase SSD in Windows 10
Some of the SSD manufacturers provide a utility for ATA Secure Erase in Windows 10/8/7. Based on the brand of your SSD, you can download Samsung Magician, SanDisk SSD Toolkit, Intel Solid-State Toolbox, or OCZ Toolbox. If you have multiple brands of SSD drives, a universal SSD eraser tool that works on all SSDs is a better choice.
To save your time and energy, here we recommend using AOMEI Partition Assistant Professional. This reliable tool comes with a feature called “SSD Secure Erase” is able to securely erase all types of solid-state drives. At the same, the erasing process will not damage the SSD performance and shorten its lifespan. Apart from erasing SSD drive, it can also wipe HDD with zero filling sectors, random data filling sectors, DoD 5220.22-M, Gutmann methods.
As a versatile hard disk manager, AOMEI Partition Assistant Professional is also widely used to extend NTFS system drive without rebooting computer, migrate OS to SSD with secure boot, convert system disk between MBR and GPT without deleting partitions, clone SSD drive, allocate free space from one partition to another, etc.
How to securely wipe or erase in Windows 10?
In this section, we will show how to securely erase SSD via AOMEI Partition Assistant Professional step by step.
Before proceeding:
1. Back up important files on the SSD you don’t want to lose to cloud or external hard drive because they will be unrecoverable after secure erasing.
2. Connect the target SATA SSD drive to a working Windows 7 computer.
3. Install and launch AOMEI Partition Assistant Professional on Windows 7 computer as well. You can download the Professional Demo version to have a try first.
Then follow the steps to erase an SSD drive and delete everything from it.
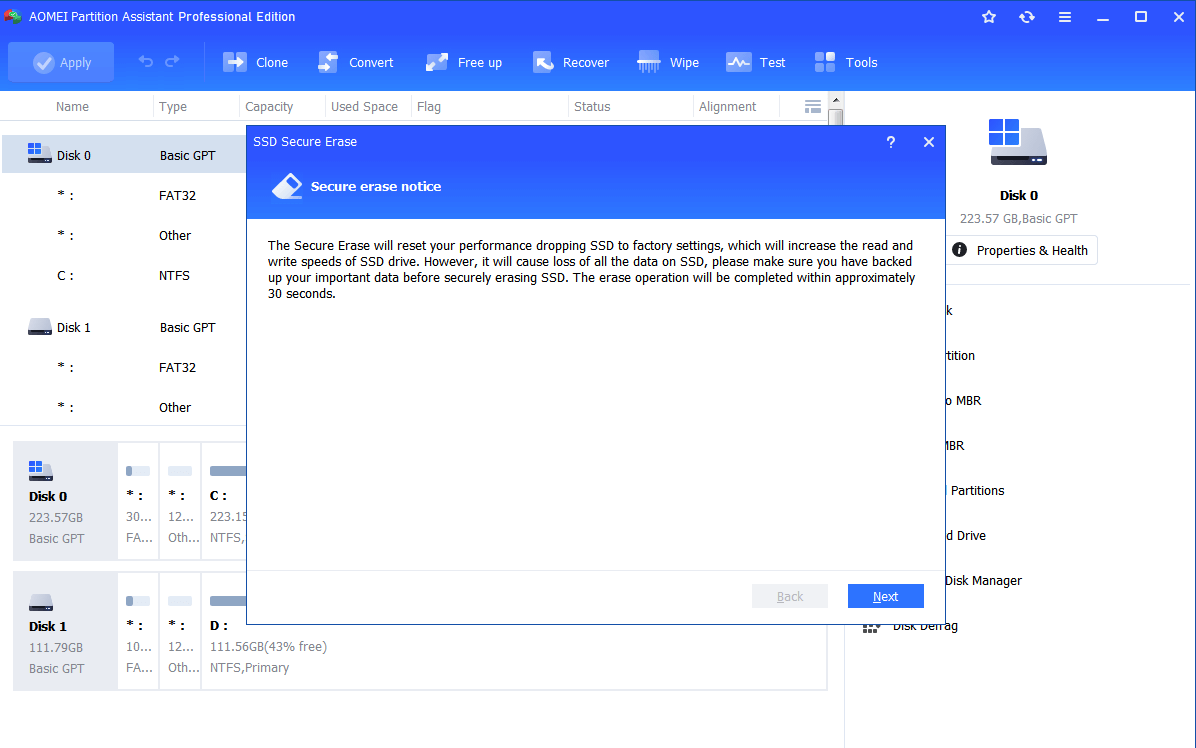
Step 1. Click “SSD Secure Erase” from the Wipe options on the main interface. And click “Next” in the pop-out notice window.
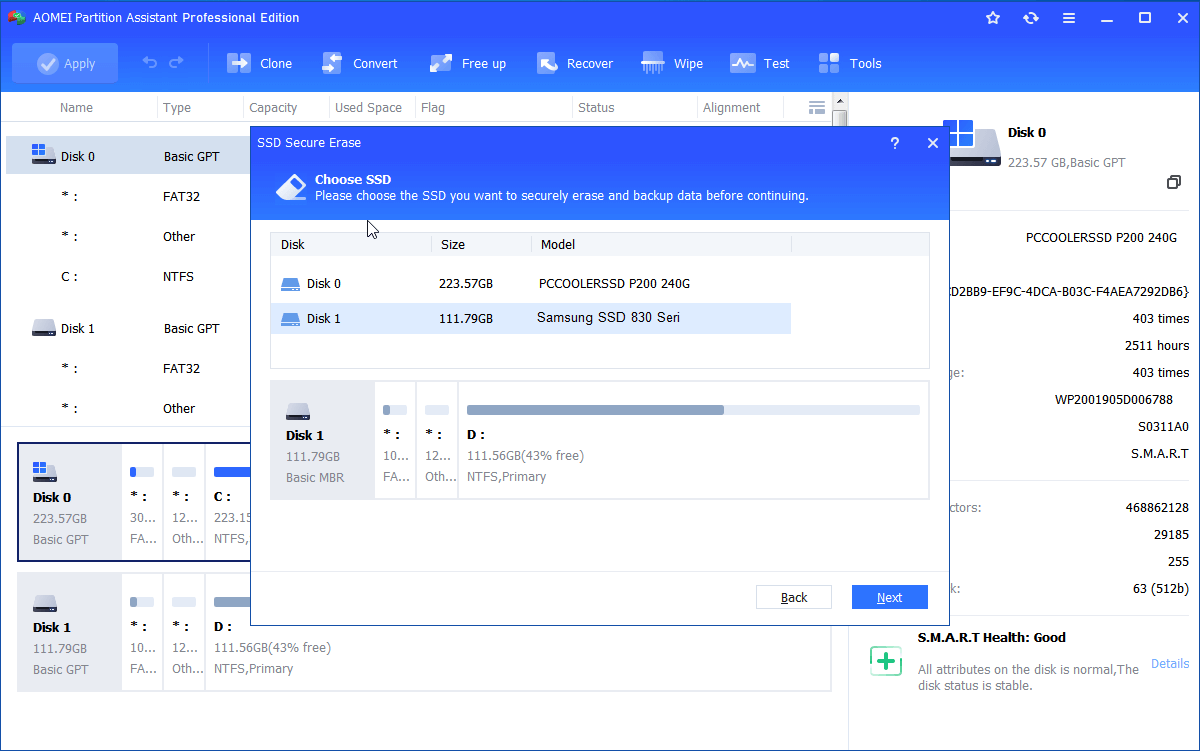
Step 2. In this step, choose the SSD drive you need to wipe completely and click “Next”.
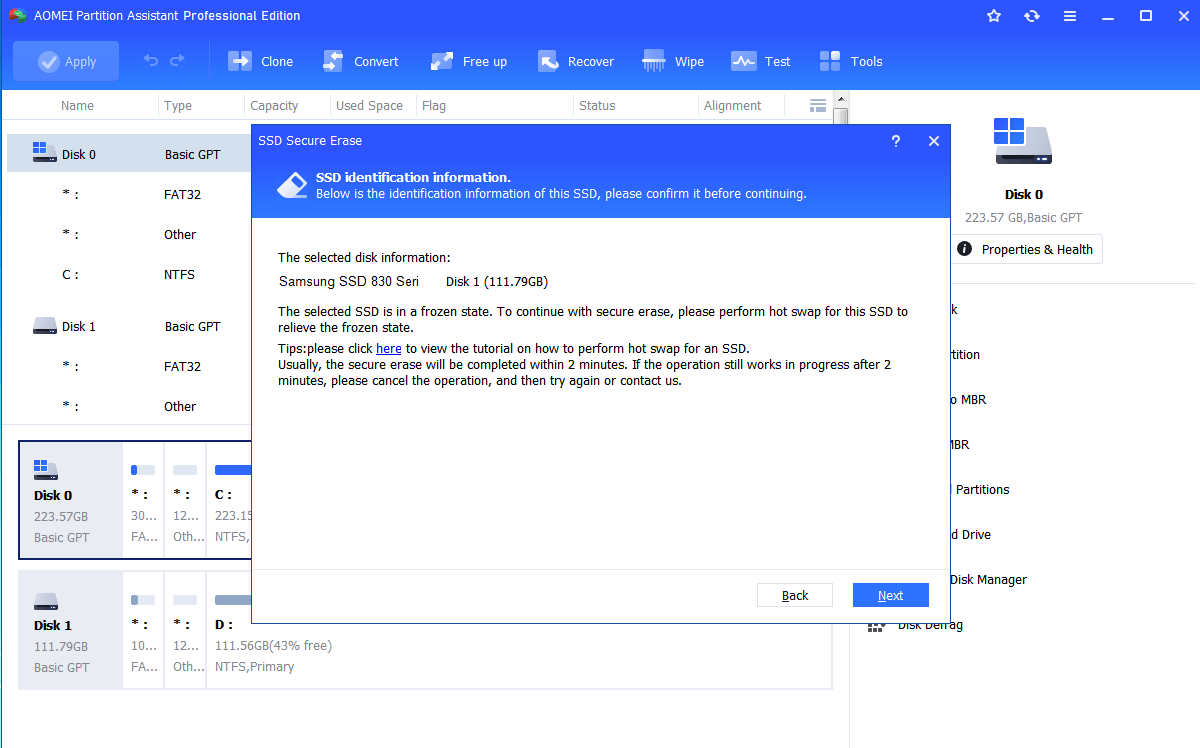
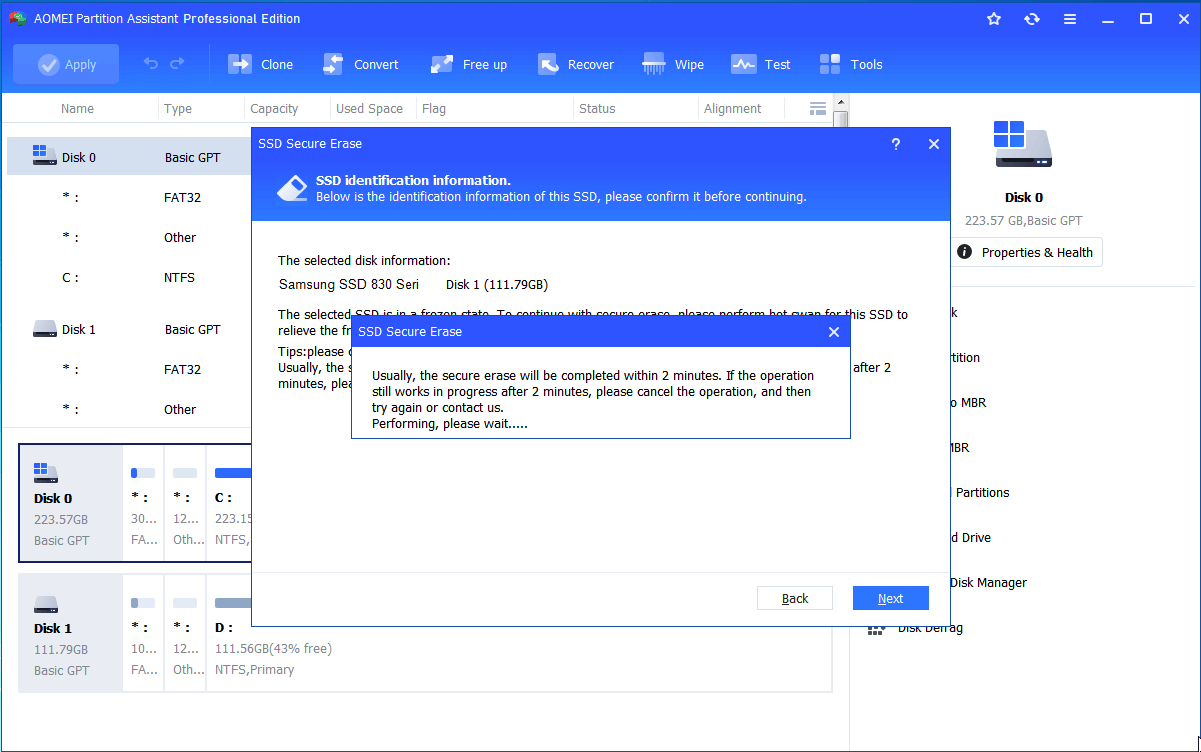
Step 3. In this window, you can see the information of the selected disk. To continue, click “Next”.
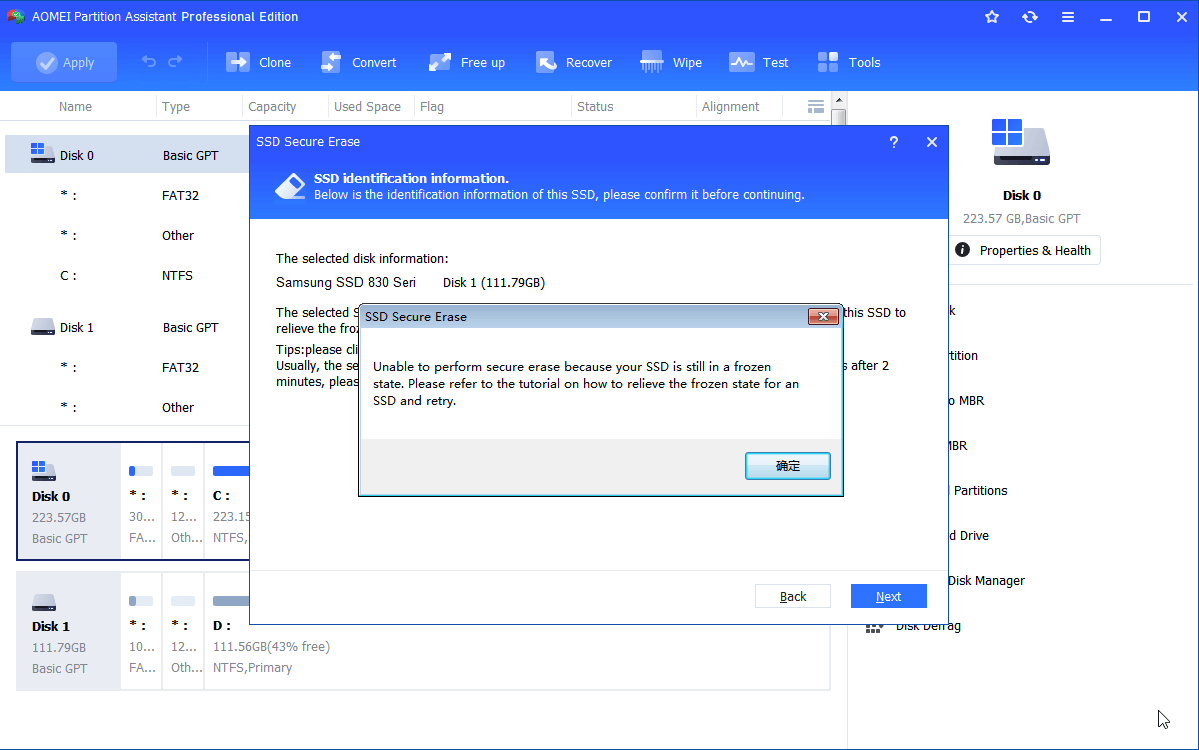
Step 4. If you meet the error message as shown below, that means your SSD drive is in a frozen state. So you need to relieve the frozen state first.
✍ See how to relieve SSD frozen state:
1. Open your computer case. If it is a laptop, open the computer's rear cover or drive shell.
2. Locate the SSD that needs to be securely erased. And unplug the power cable from the SSD drive.
3. Disconnect the SATA data cable from the SSD.
4. Then reconnect the SATA cable to the SATA port on the SSD.
5. Finally, plug the power cable back into the SSD's power connector.
Step 5. After the hot-swap, now you can click “Next” again to proceed. And wait for the process to finish.
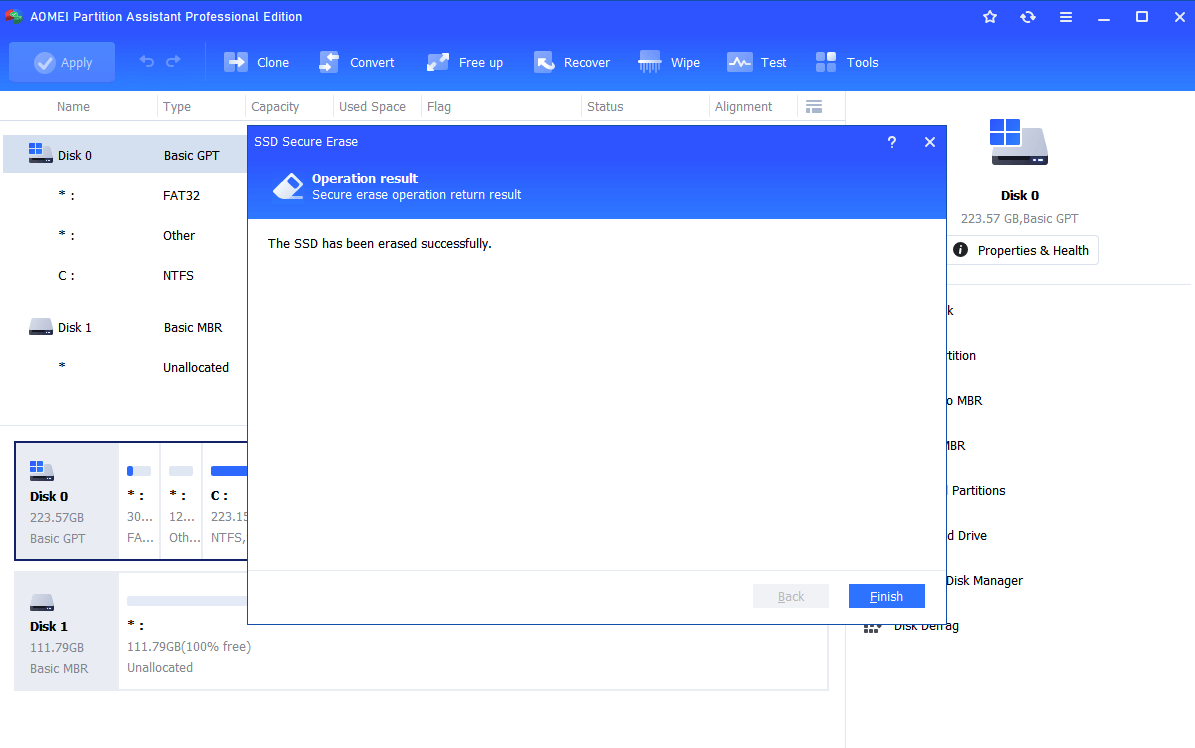
Step 6. When the SSD has been erased successfully, click “Finish”.
Wrap up
Now, you should know how to securely erase SSD in Windows without damaging its performance and lifespan. After you securely erase SSD, you can also use this software to create partitions before installing Windows. If you want to make such operations on Windows Server 2019/2016/2012/2008/2003, please try AOMEI Partition Assistant Server.

