2 Free Methods to Change Partition Size without Losing Data in Windows
In this article, we will show you 2 methods, which can help you change partition size without losing data in Windows 10/8/7 computer no matter whether you want to increase or decrease the partition size.
By Emily / Updated on May 12, 2023
“Can I change partition size without losing data?”
“I have a huge main hard drive but didn't allocate nearly enough space to the system drive. I want to get about 20 or 30 GB from the other two partitions of the same drive, but when I right-click on the "C" drive (my system partition) in Disk Management and check “Extend Volume”, it is greyed out. Is there a fast and easy way to move some of the unused space on my "D" and "E" drives (the to my "C" drive)?”
When need to change partition size in Windows 10/8/7?
Resizing partitions is to change the size of a partition as you need, either extending to make it bigger or shrinking to make it smaller. Users might need to resize partition without losing data for different reasons such as:
▶Partition is running out of space: As time goes by, more and more data can eat up the volume space quickly. Besides deleting some unnecessary data to free up disk space, you can also resize this partition to make it bigger.
▶Partition size is not reasonable: Too many partitions exist on the disk, but some of them are too large in size, and others are too small. You might need to resize those partitions to make them reasonable in size.
▶Create a new partition: When you need to create a new partition, you always need to first get an unallocated space by shrinking a certain partition.
▶Add unallocated partition: After you clone disk to larger disk, or convert over 2TB MBR disk into GPT, there will be unallocated space at the end of the disk. Then you can add the space into an existing partition through adjusting the partition.
How to change partition size without losing data in Windows PC?
Now, we would like to share 2 methods to free adjust partition on Windows 10/8/7 without data loss no matter you are planning to shrink or enlarge partition size. One is Windows built-in tool and another one is a third-party disk partition manager.
-
Method 1. Change partition size with Disk Management (Restricted)
-
Method 2. Adjust partition size with free partition manager (Flexibly)
▌Method 1. Change partition size with Disk Management (Restricted)
Windows Disk Management comes with “Shrink Volume” and “Extend Volume” functions. They can change partition size without losing data in Windows 10/8/7. To perform such tasks via the Disk Management tool, first, open it: right-click “This PC/My Computer”, select “Manage”->“Disk Management” under “Storage”. Then you can get information on all your disk partitions.
Part 1. Decrease partition size
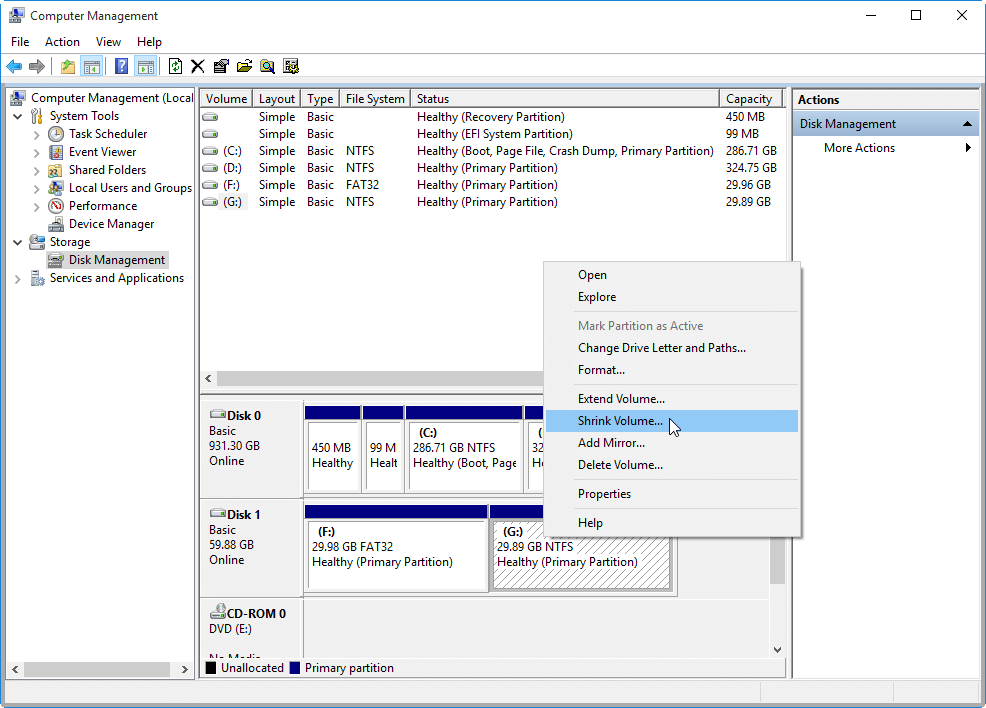
1. Right-click the partition you want to resize and click “Shrink Volume”.
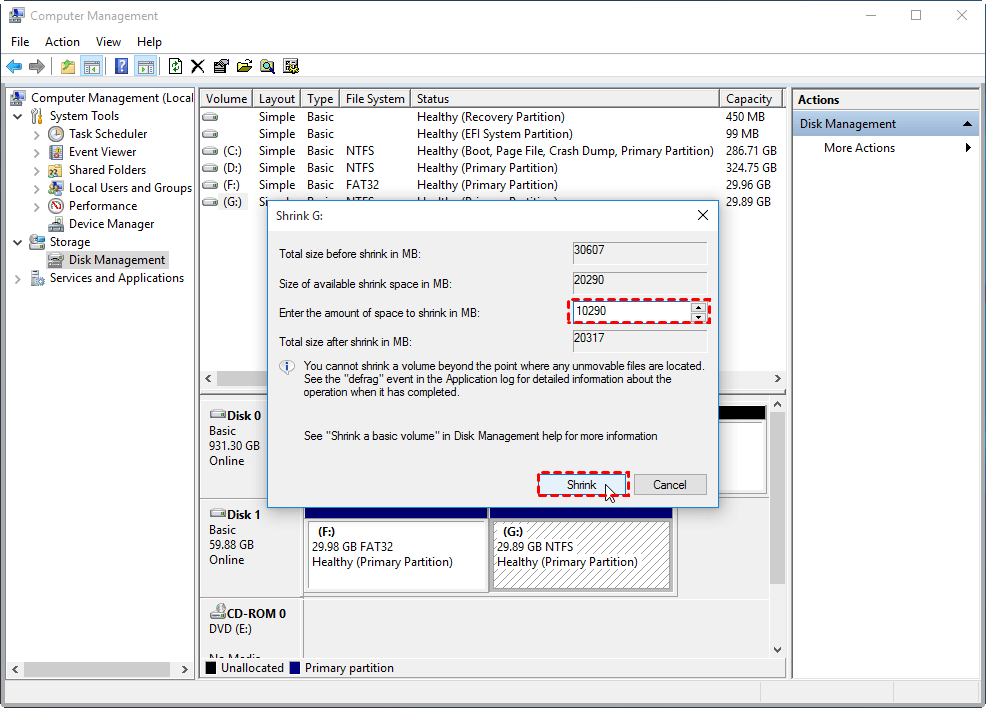
2. In the pop-out window, you can enter the specific amount of space to shrink and click “Shrink” to execute the operation.
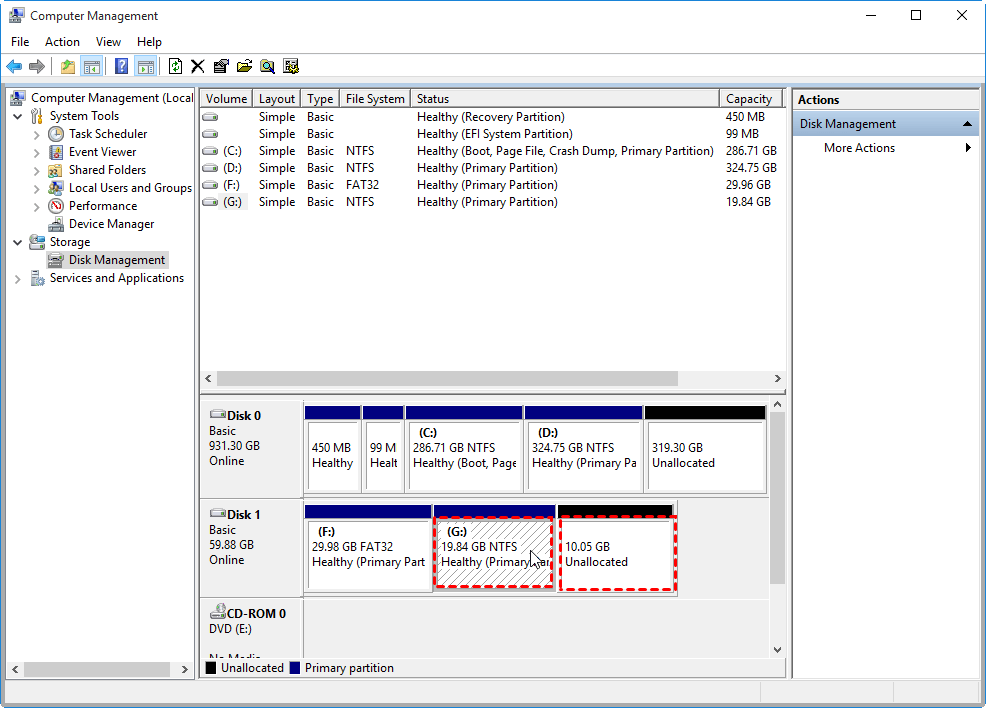
3. In a while, this selected partition will be shrunken to be smaller. You will see unallocated space on the right side of the shrunken partition.
Limitations:
①You can only shrink NTFS partitions, but it is impossible to shrink FAT32 and other types of partitions.
②The generated unallocated space will be and only be located on the right side of the original partition.
Part 2. Increase partition size
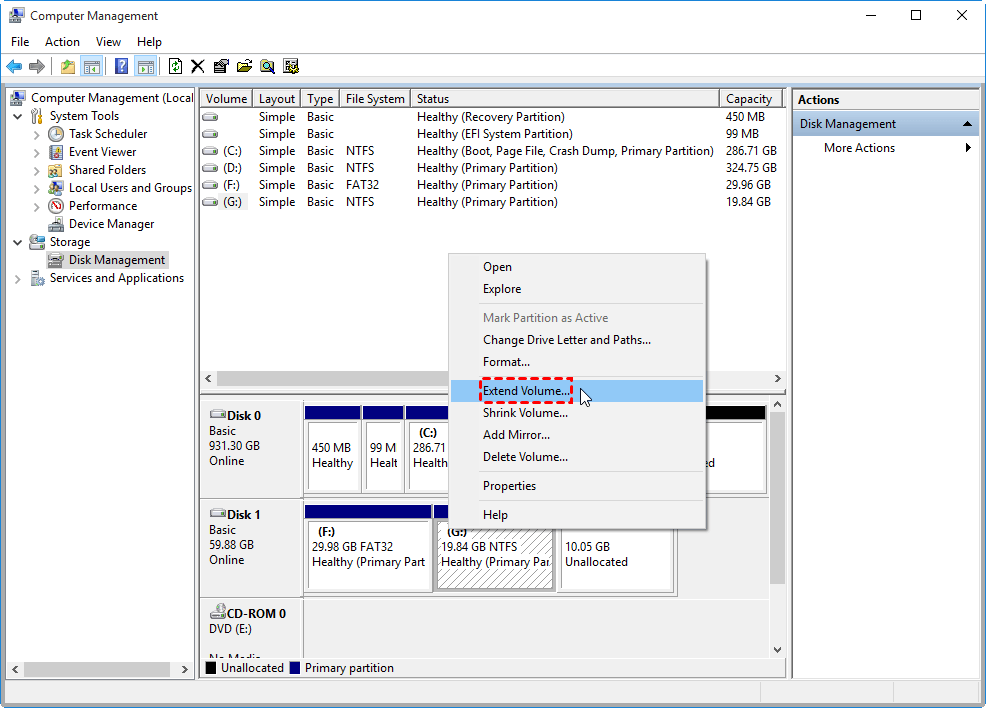
1. Right-click the target partition and choose “Extend Volume”.
2. Then the “Extend Volume Wizard” will appear, you can set and add more size to your target partition and click “Next” to continue.
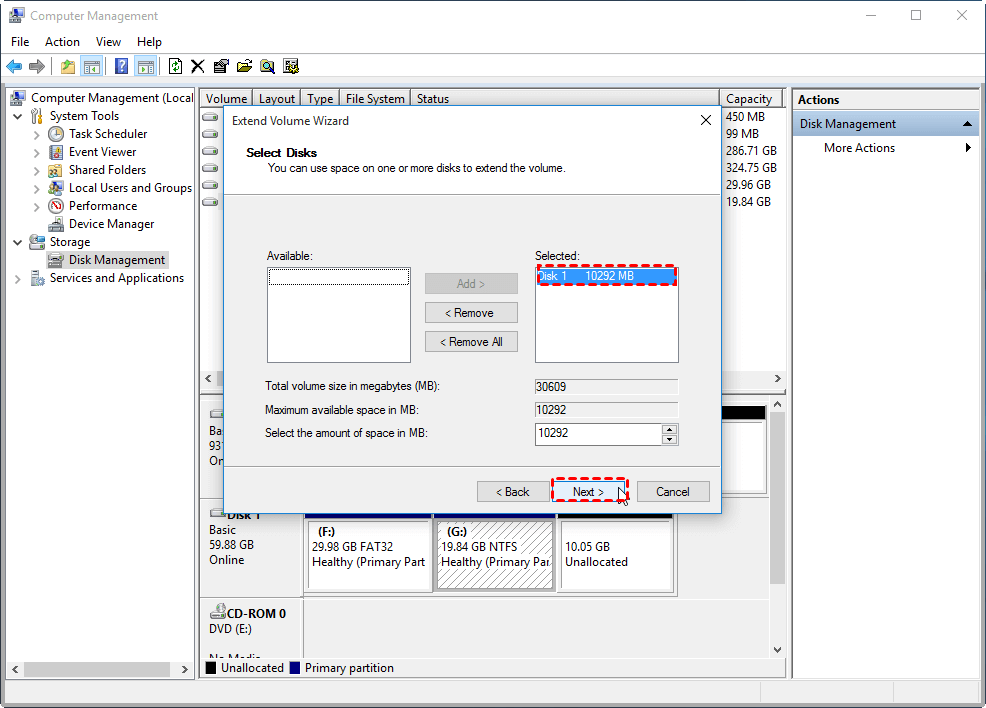
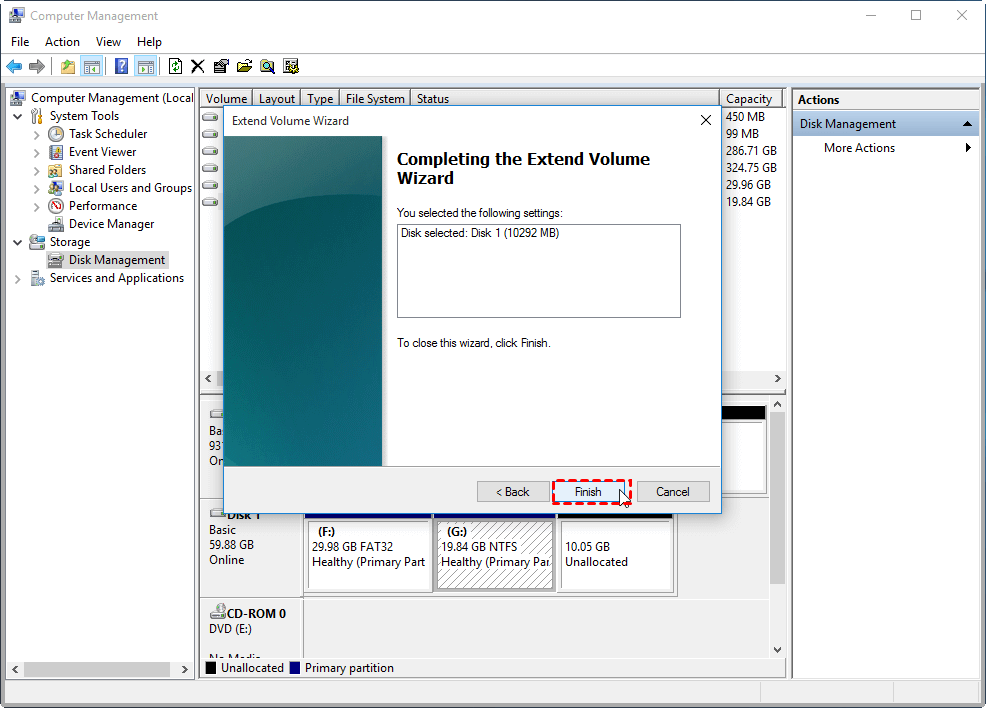
3. Follow the guidelines to accomplish the process.
Limitations:
①The “Extend Volume” option will be clickable only when there is adjacent unallocated space on the right side of the partition you want to extend. Otherwise, the Extend Volume will grey out.
②You can only extend NTFS partition.
▌Method 2. Adjust partition size with free partition manager (Flexibly)
Because of the limitations listed above, Windows Disk Management might be not the best tool to change partition size without losing data. Thus, you can use a free partition manager called AOMEI Partition Assistant Standard. It is a much more powerful tool for Windows 10/8/7/XP/Vista (32 & 64 bit). Compared with Disk Management, AOMEI Partition Assistant has many advantages while adjusting partition size including:
★Support moving partition during resizing partition, so the unallocated space can be generated on either side when shrinking a partition.
★Both NTFS and FAT32 partition are supported to resize (shrink or extend).
★Support partition alignment for SSD drive when necessary, which can help optimize SSD performance to some degree.
★Nonadjacent unallocated space can be easily merged or combined into other partitions in the same disk.
★ Support resizing BitLocker partition in the computer.
Download the freeware, install and launch it on your Windows PC, then you’ll see all connected storage devices with overall partition layout.
Part 1. Shrink partition
1. Right-click the partition needing to be shrunk (here we select D partition)and select “Resize/Move Partition”.

2. In this window, drag slider bar on both sides to shrink it. Or you can move the partition location by dragging it rightward when the mouse becomes a cross crux.

3. In the main interface, click “Apply” and then “Proceed” to execute the pending operation.

Part 2. Extend partition
If there is unallocated space on the same disk no matter it is adjacent or nonadjacent to the partition you want to extend, you can try the “Merge Partitions” function to combine it into the target partition. Next is how to merge unallocated space into partitions.
1. Right-click the partition you want to enlarge (here we select C partition), and click "Advanced" > “Merge Partition”.

2. Here, you can tick an unallocated space to merge to C partition.

3. Click “Apply” to commit the pending operation.

Besides merging unallocated space into one partition on the same disk, it also supports merging two adjacent partitions into one (PS.: System partition cannot be merged into data partition). Additionally, if you upgrade to AOMEI Partition Assistant Professional, you can enjoy the following three functions to adjust partition size more flexibly.
● Allocate free space: this can directly assign free space from one partition to another one within 3 steps.
● Split partition: this function can divide a large partition into two smaller partitions quickly without damaging the data.
● Extend partition wizard: it is able to extend your system boot partition and other partitions without loss of data/formatting partition and restarting computer.
Final words
Although the above two methods can help you change partition size without losing data, you had better back up necessary data first because the data damage can be caused by some uncontrollable factors such as sudden power outage. Besides changing partition size, AOMEI Partition Assistant Standard helps you do many other operations: copy, check and hide partition, convert disk between MBR and GPT without deleting partitions, upgrade small disk to a larger disk, transfer OS to SSD, etc.