How to Copy Recovery Partition to New Hard Drive in Windows 11/10/8/7?
What is recovery partition? How to copy recovery partition to new hard drive when the computer cannot start normally? You will find the answer you want from this article.
By Dervish / Updated on May 12, 2023
What is the recovery partition?
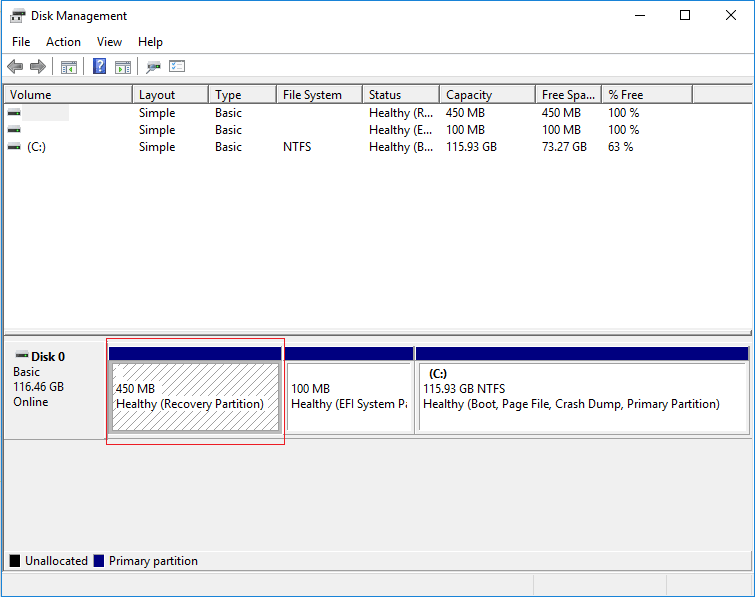
The recovery partition is a partition where the system contains important files that help restore the factory default settings. It is automatically created when you install OS on a computer, like Dell, HP PC. Once the operating system won’t boot up normally one day, you can enter the recovery partition to restore the failed computer to its factory settings.
Why copy recovery partition to new hard drive?
Now more and more people are trying to clone recovery partition to new hard drives. Most of them do it for two reasons below:
● Free up disk space: Recovery partition may take up much space on hard drive, so some people want to clone it to another place like an HDD/SSD/USB flash drive and delete recovery partition from the computer.
● Back up recovery partition files: Sometimes, your computer cannot boot or the operating system probably would go down. To avoid this situation, you can copy the recovery partition to USB for a backup, and clone it back to do the restoration easily.
Now, follow this article, and learn how to copy recovery partition to a new hard drive.
Step-by-Step: How to copy recovery partition to new hard drive?
In order to move Dell recovery partition easily and successfully, here we recommend a recovery partition cloner-AOMEI Partition Assistant Professional. It has lots of advantages to make itself stand out among so many cloning tools.
● Great compatibility: It supports the mainstream Windows OS, including Windows 11, 10, 8, 7, XP. And it can transfer recovery partition to a new hard drive from HP, Acer, Dell, and other brands of computers.
● SSD partition alignment: If your new hard drive is SSD, it can align SSD partition to boost its data write-read speed.
● Clone larger drive to smaller one: It supports cloning large drive to smaller dive as long as the target drive is big enough to hold the used space of recovery partition.
You can download the demo version to try how to copy recovery partition to new SSD for free.
Step 1. Open AOMEI Partition Assistant, and right-click the recovery partition on the main interface, choose “Clone Partition”.

Step 2. Choose a copy method in this window. Here we choose “Clone Partition Quickly”. You can choose “Sector-by-Sector Copy” to copy all sectors of the partition, including encrypted sectors.
Step 3. Now, select an unallocated space as the destination space. If the target hard drive is an SSD, check “Optimize the performance of SSD” and click “Next”.

Step 4. Click “Apply” and “proceed” to start the clone/move process.

After the clone, you just delete the recovery partition and it would become unallocated space, you can move the allocated space to C drive.
Further tip: How to access recovery partition and use it to restore OS?
Here we take accessing Dell recovery partition as an example to demonstrate you how to restore system in Windows 7 and 10 (two most-commonly used Windows OS). If you have cloned recovery partition to USB flash drive or other external hard drives, firstly insert it into your computer.
✍ Warning: Restoring a computer to factory default settings will delete apps or personal data like photos, videos, films. Please backup files beforehand if you don’t want to lose them forever.
● If you are using Windows 7 operating system.
Step 1. Restart your computer, and press "F8" when the Dell logo appears.
Step 2. Now you see the "Advanced Boot Options" window. Use the arrow keys to choose “Repair Your Computer”.

Step 3. Then “System Recovery Options” will be showed on the screen, and click “Next”.
Step 4. Select “Dell Factory Tools” or “Dell Backup and Recovery Manager” and click “Next” to start operation.
● If you are using Windows 10 operating system.
Step 1. Click Win button, and go to “Settings” > “Change PC Setting” > “Update and recovery” > “Recovery”.
Step 2. Click “Get started” on the right side of window. Then your computer will restart and enter the Recovery Options.
Step 3. Then click “Troubleshoot” > “Reset this PC” and you will see two options- “Keep my files” and “Remove everything”. Choose one according to your need to restore your Dell computer.

✍ Note:
-
Keep my files: it removes apps and settings but keeps personal files like photos, videos.
-
Remove everything: it removes all of the personal files, apps, settings.
-
If you want to undo system changes and take system back to certain status that it was, please click “Advance Options” > “System Restore” and choose a time, click “Next”.
When the operation is finished, restart the computer, and your computer will restore to its original condition.
Conclusion
After copying recovery partition to the new hard drive, you can easily restore the Windows operating system when your computer gets errors and fails to boot. Besides, if you delete recovery partition by accident, AOMEI Partition Assistant Professional can help you restore deleted recovery partition within simple steps.
In addition, if your computer is running a Server system, you can use AOMEI Partition Assistant Server Edition to copy recovery partition to new hard drive.