Simple Steps to Delete Dell OEM Partition Safely in Windows 7/8/10/11
Can I delete Dell OEM partition safely? How to delete it? How to restore the Dell OEM partition if I delete it accidentally? We will help you to solve these problems with ease in Windows 7/8/10/11 in this post.
By Lucas / Updated on May 12, 2023
Scenario: How to delete Dell OEM partition?
I have an old Dell hard drive as my external drive. I can delete the other two partitions except for the OEM partition, about 63MB. When I right-click in Disk Management, I only got the help option instead of the delete option, how could I delete the Dell OEM Partition correctly?
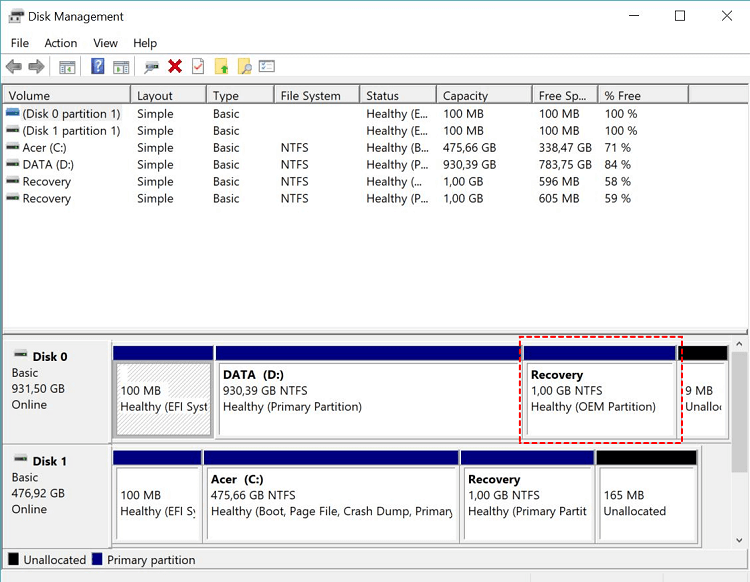
About Dell OEM partition
Generally speaking, a Dell OEM partition is a hidden partition in front of the hard drive and made by computer manufacturers like Dell. It’s created automatically while Windows is installed and used to reset your PC or restore to factory settings when emergency. In addition, Lenovo and HP also have the OEM partition. It can be small around 100M or less or could be larger than 10GB.
Can I Delete Dell OEM Partition Safely?
If you're sure that you won't need to restore your PC to factory settings, or if you have created a recovery drive, you can delete the Dell OEM Partition to free up space to extend the system drive. But, the most important thing you need to know is that if the OEM partition is deleted from your PC, you will be unable to restore to factory settings when emergency.
So, before removing it from your PC, you should clone the partition to another device, such as a USB, just in case an unforeseen mistake occurs. If your PC has a system fault, you can return it to your PC to run the OEM partition.
Then, how to remove Dell OEM partition from hard drive safely while you can’t delete OEM partition for your Dell computer in Disk Management?
Delete Dell OEM partition from disk
In fact, you have two options to solve this problem. Diskpart command and the disk partitioning software.
Way 1. Diskpart delete Dell OEM partition
Diskpart is a hard drive and partition management tool, which allows you to delete OEM Partition easily. Below is the tutorial.
Step 1. Hit the “Windows” + “R” combination key to open the dialog box, type “diskpart” and press enter.
Step 2. Then type the following commands in turn.
• list disk
• select disk n, where n is the volume number of the disk that you want to operate.
• list partition
• select partition m, m is the volume number of the Dell OEM partition you want to delete.
• delete partition override

Then you deleted it with a success.
Delete with AOMEI Partition Assistant Professional
AOMEI Partition Assistant Professional is a powerful disk partitioning software, which allows you to create, delete, format partition, and restore deleted partitions in Windows 7, 8, 10, and 11. Thus, taking advantage of this software to delete Dell OEM partition in Windows is a piece of cake.
Step 1. Install and run AOMEI Partition Assistant Professional, on the main console, right-click the Dell OEM partition and choose “Delete Partition” at the drop-down menu.

Step 2. Select a method to delete the OEM partition. “Delete partition quickly (Recommended)” or “Delete partition and prevent data recovery, it will take more time”. Then hit “OK”.

Step 3. Click “Apply” to confirm this deletion if you have checked.

After a few seconds, you will find the Dell OEM partition has been removed successfully.
Restore if accidentally deleted Dell OEM partition
However, if you want to keep Dell OEM Partition to restore your system to factory settings, and you accidentally deleted Dell OEM partition, what should you do? There is a life-saver solution provided by AOMEI Partition Assistant Professional.
The following text is about how to restore deleted Dell OEM partition in Windows 7, 8, 10.
Step 1. Run the procedure, on the main interface, choose “Partition Recovery” under the Recover tab, and select a disk that you want to recover list in the pop-up window.

Step 2. Choose a search method and hit “Next”.

Step 3. The program will list all the lost partitions, tick the lost partition and click “Proceed”.

After a while, you will see that partition again and restore system to factory settings if needed. Furthermore, if you are not willing to keep all the partitions on the hard drive, you can delete all partitions with AOMEI Partition Assistant Professional. This software also allows you to allocate free space to expend the system drives or other partitions.