[Free] How to Format Portable Hard Drive for Mac and PC?
When you need to use Seagate, WD or other hard drives on both Mac and PC, you can learn how to format portable hard drive for Mac and PC in the following content. Also, which file system is most compatible with Mac and PC will be discussed for your reference. A free disk formatter will be introduced to help.
By Michael / Updated on May 12, 2023
How to format portable hard drive for Mac and PC?
Usually, when we use a new hard drive for the first time, no matter it's portable or non-portable, it can not be directly put into use for it has to be initialized and formatted first, like giving it fresh new birth. Without this step, your computer will have no idea where to write or read. And only after formatted, your computer can work normally.
However, it’s not just a case of formatting if you want to use your hard drive on both Mac and PC when these 2 platforms use different file systems. Windows uses NTFS and FAT32 while Mac uses HFS and they’re incompatible with each other. So, to make a portable hard drive work well on both Mac and PC, we need to find out proper file systems that are compatible with those 2 platforms and format your hard drive into any of these file systems.
Which file system is compatible with Mac and Windows?
To make any portable hard drive such as Seagate, Western Digital, etc to work with both Mac and Windows computer, we need to format it to a proper file system. Then what file system is compatible with those two different platforms? In fact, there're 2 different file systems you can choose from: exFAT and FAT32.
As for exFAT, it supports partition capacity larger than 2TB and a single file over 4GB. However, it suffers from a defect: The file system of exFAT is easier to be corrupted. In this case, it seems you'll need a safer alternative.
As for FAT32, its very good compatibility sets it apart from other counterparts. It's compatible with quite a number of devices such as DVD players, game consoles like PS3. Besides Mac and Windows, it also supports Linux and Android which makes it much more functional. However, it also has significant defects: Single file size is limited to 4GB and partition capacity can not go over 2TB.
So, after realizing both of their distinctions, which one to choose mostly depends on your own needs. If your hard drive is less than 2TB, and you won’t save 4GB+ single file onto it, the FAT32 is a great choice. Instead, go for exFAT.
Freeware to format portable hard drive for Mac and Windows
As far as we're concerned, for portable hard drive format for Mac and PC, the computer provides its own way. However, if you follow those tutorials on the Internet, you may find that if the device is beyond 32GB, the system provides no option for FAT32 for formatting in Windows Disk Management or Windows File Explorer. And in DiskPart, you will receive the error message: The volume size is too big for FAT32 as the screenshot displays below. So, what now?

Luckily, AOMEI Partition Assistant Standard comes to your best favor. The most evident advantage of this software is that it’s able to format devices over 32GB into FAT32 which is a great leap compared with Windows’ inbuilt formatting tool. Within clicks, you can format devices into exFAT, FAT32, NTFS, Ext2, Ext3, and Ext4.
It also offers other features for your disk management such as resize/move partition, merge partitions, and initialize disk, etc. And meanwhile, this software provides safe condition for formatting and the user-friendly and feature-rich interface makes it easier to quickly spot the tool they’re looking for.
Now, free download the most impressive Disk Manager and learn how to format portable hard drive for Mac and Windows
Note: The formatting process will delete all the data on your device. Please make a file backup first.
Step 1: Install and launch Partition Assistant on your computer. Then, connect the portable hard drive to it and wait until it's recognized.
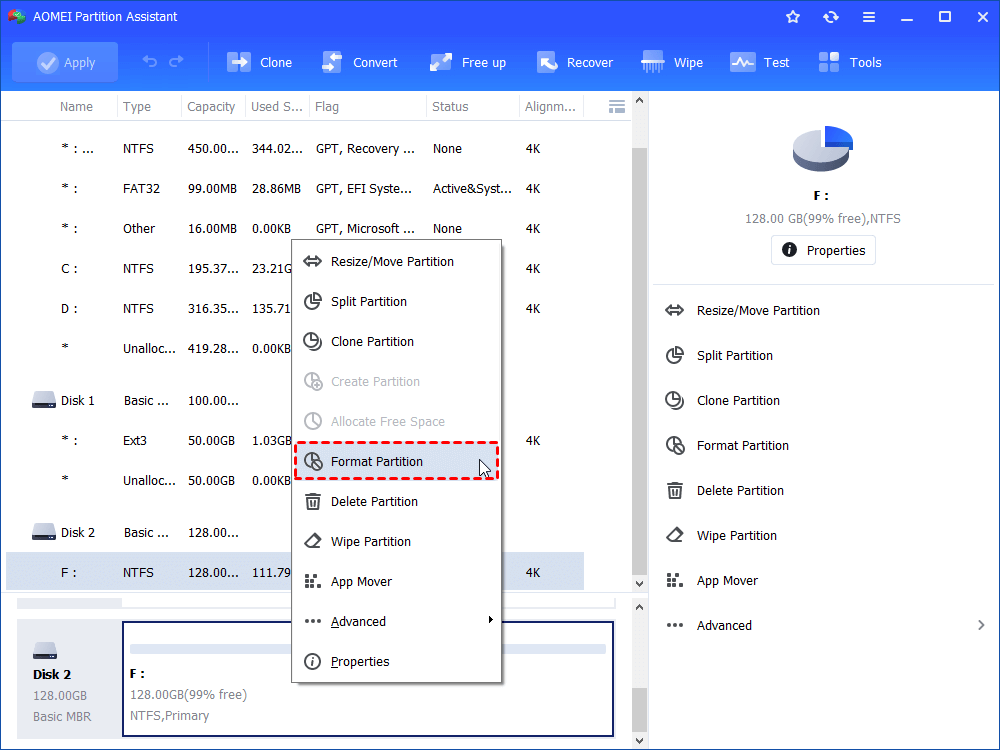
Step 2: Right-click on the icon of your portable hard drive and choose "Format Partition" in the drop-down menu.
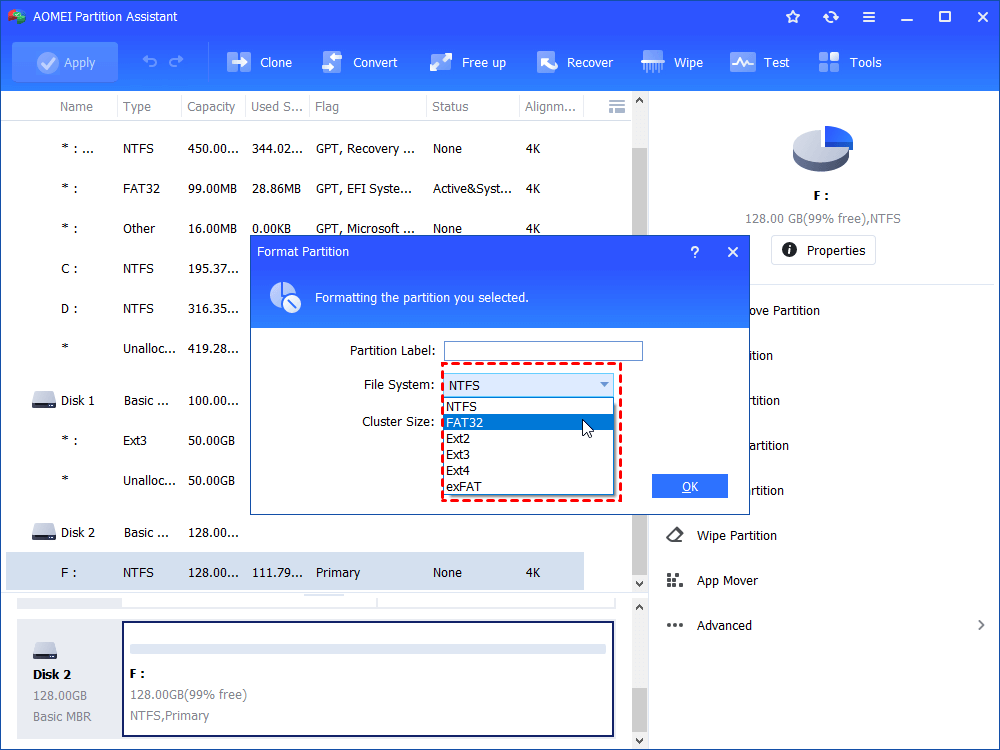
Step 3: Choose your desired file system and preset a partition label if necessary. Here, we take FAT32 for example. Then click on “OK” to proceed.
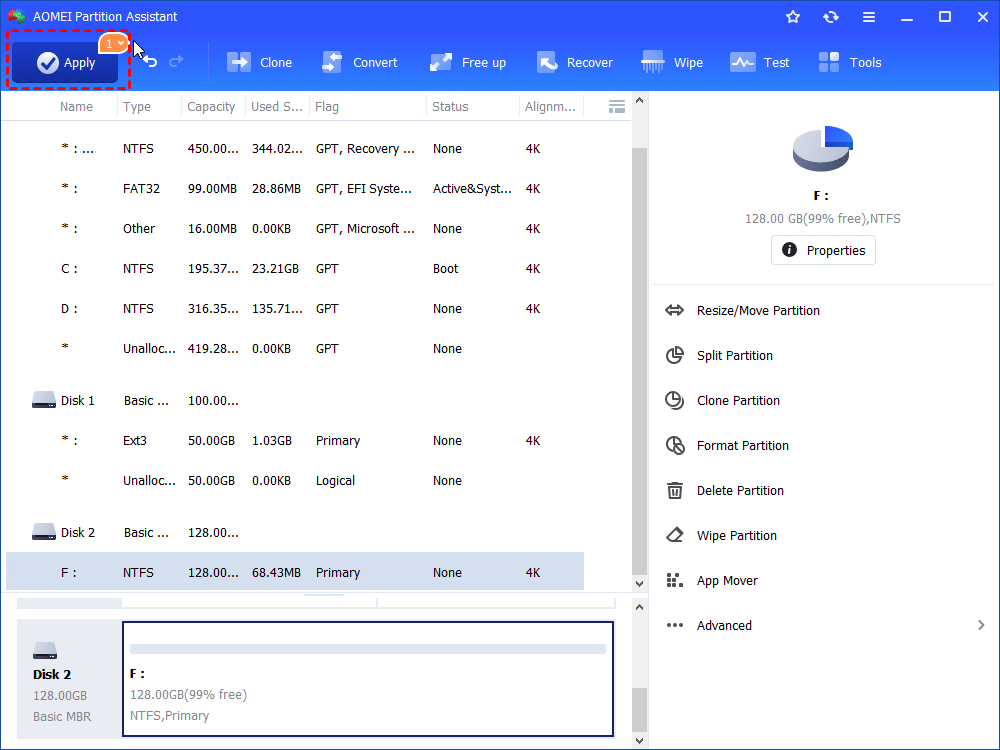
Step 4: Click on “Apply” on the upper left to submit the operation. It won’t be too long before the device gets thoroughly formatted.
Tip: if the data on the portable hard drive is quite important and you don’t want to format it again, you can switch to “NTFS to FAT32 converter” in this software, which can directly convert NTFS to FAT32, or FAT32 to NTFS without reformatting.
Conclusion
What is the best way for portable hard drive format for Mac and Windows? Windows' build-in tool helps accomplish this job easy and quick. However, it has its own limits that the device shouldn't be more than 32GB. As for the alternative - AOMEI Partition Assistant Standard - it allows formatting devices as large as 2TB into FAT32.
For more features like allocating free space from one partition to another, conversion between primary partition and logical drive, and changing serial number, please try the Pro version of AOMEI Partition Assistant.