2 Solutions to “Shrink Volume Access Denied Error”
If you try to shrink volume but meet the “access denied” error message in Windows Disk management, here you can learn the possible casues, effective solutions to the access denied issue and finally shrink a partition successfully.
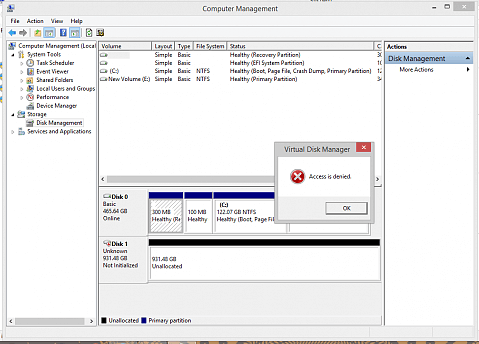
Access Denied error when shrinking a volume
I hope to shrink the D partition and add free space into C drive. It says 100GB available and i tried to shrink it in Disk management, but it gives me an Access Denied error message. Then i launched the cmd.exe as admin and tried to shrink it. Again I received the acess denied error. Why did this “Virtual Disk Manager Access Denied” error happen? How can it be resolved?
Why “Virtual Disk Manager-Access Denied” occurs?
When you wish to shrink a volume with Disk Management in Windows 10, 8, 7, XP, Vista or Windows Server 2008, 2012, 2016, 2019, there are chances that you get the error message saying “Access is Denied”. Usually, the following 2 factors can result in the error:
-
The user account does not have the permission to access this partition;
-
There are unmovable files located on the end of this partition;
2 Solutions to fixing “Windows Access Denied” Issue
If you can’t shrink partition for any above reasons, the following solutions may help you out.
Solution 1. Restore partition permission
1. Log in with administrator account and turn off UAC.
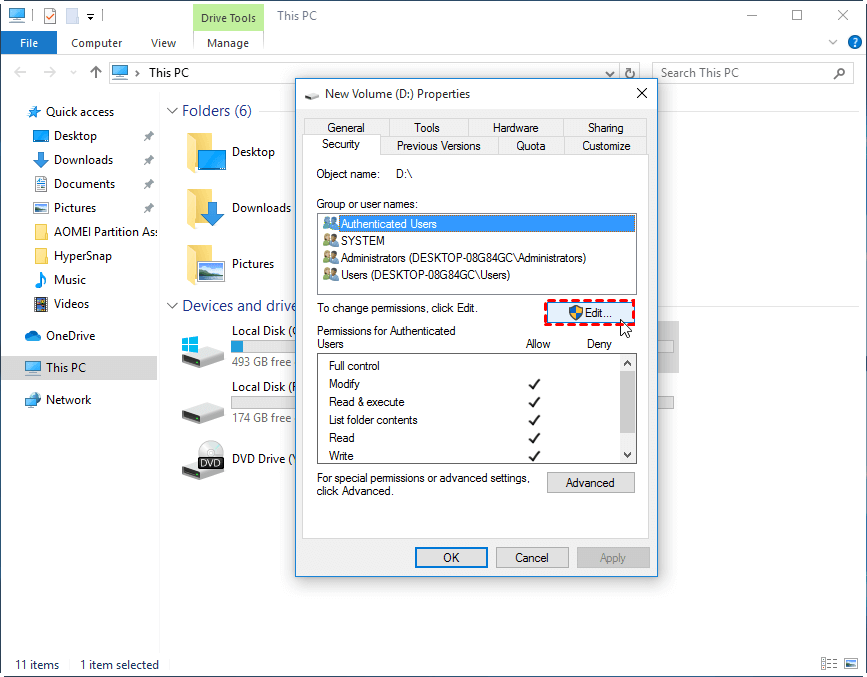
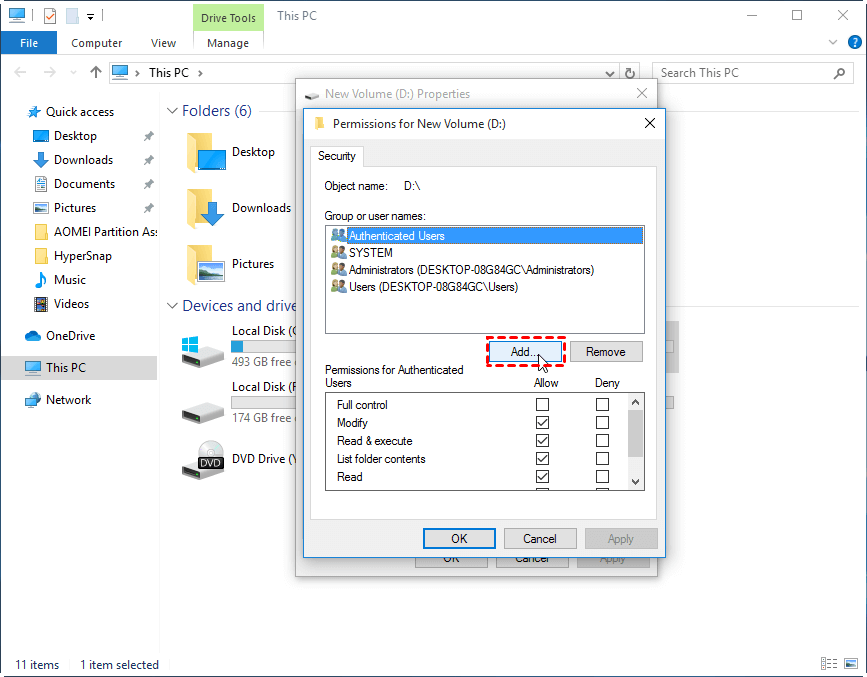
2. Right-click Drive and go "Properties" > "Security" > "Edit" to see if "Administrators" is included in the "Group and user names. If it is not, click the "Add" option to add Administrators group into this name list.
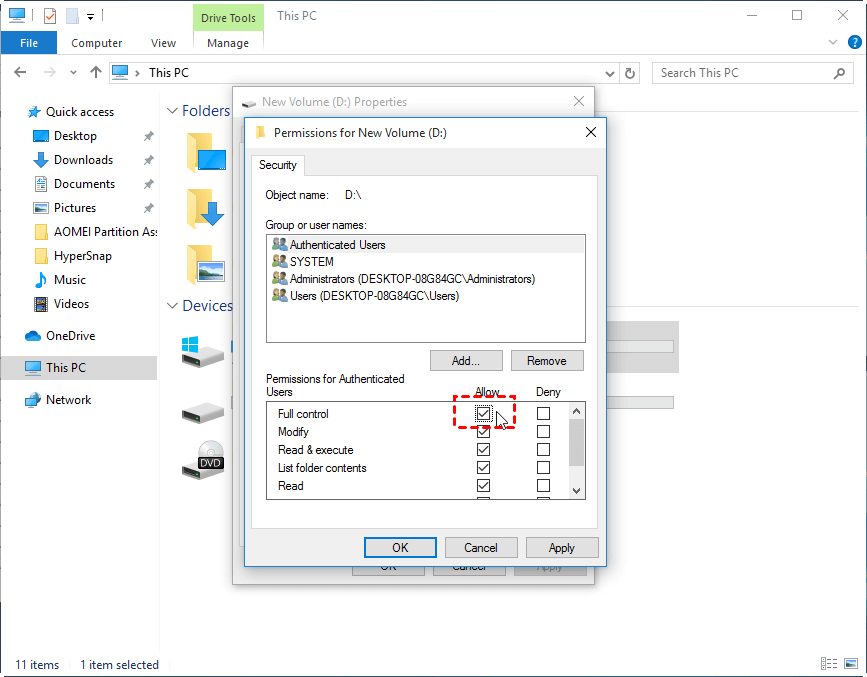
3. Then, in the Permissions for Users box, select the "Allow" check box of "Full control" (this will allow you to have full control to access and modify this partition). After that, click "OK" to apply the changes.
4. Click "OK" to save all the changes and close the Properties dialog.
At last, you can see if the “Access Denied” error disappears when shrinking volume.
Besides, you can also disable hibernation, turn off system protection temporarily, or use “Disk Cleanup “to delete all system files possibly stored on the partition that you want to shrink. Or you can run Defragment. If all thoes quick fixes does not work at all and you still get an error disk logical error access denied, please check out the solution 2.
Solution 2. Shrink volume with a free partition manager
The first solution might be kind of difficult for some users and maybe you still receive the “Access Denied” error during shrinking a partition. Thus, it is advised to use a professional third-party partition manager. The free AOMEI Partition Assistant Standard is worth of your trying.
This freeware makes up the limitations of Windows built-in Disk Management, coming with many great features to help Windows 10, 8, 7, XP. Vista users manage their disk partition more flexibly: resize partition, move partition, clone partition, merge partitions, check partition for bad sectors and so on. To shrink parititon successfully (Including normal partition, system partition, BitLocker partition, etc.), just download the AOMEI Partition Assistant Standad and follow the steps:
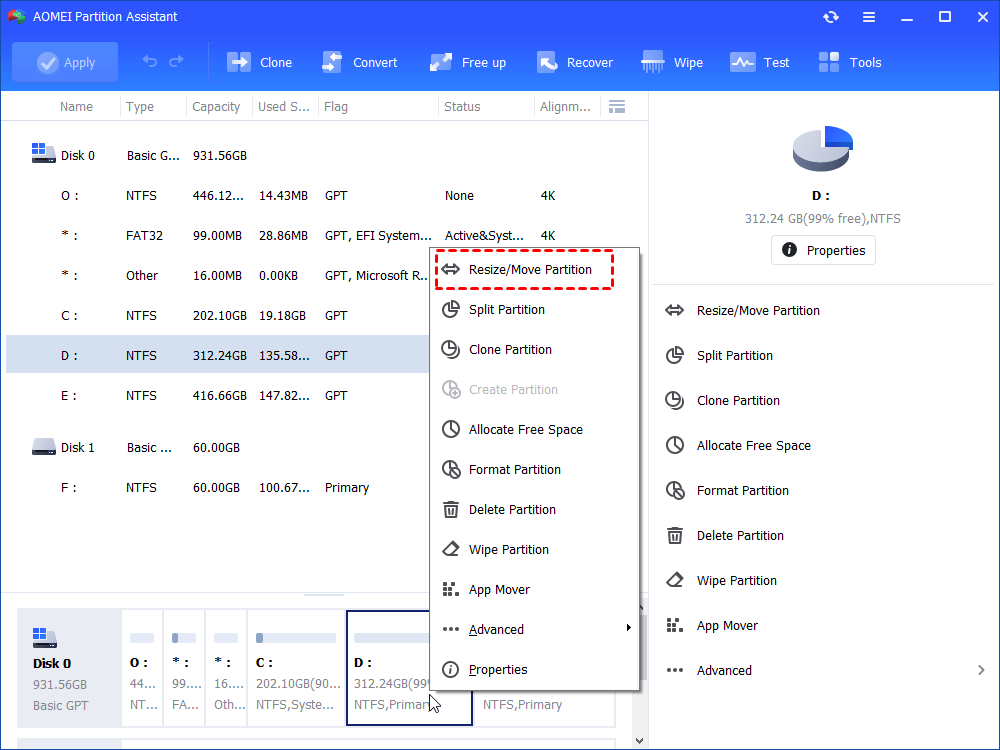
1. Install and launch the freeware. Right-click on the partition you want to shrink and choose "Resize/Move Partition".
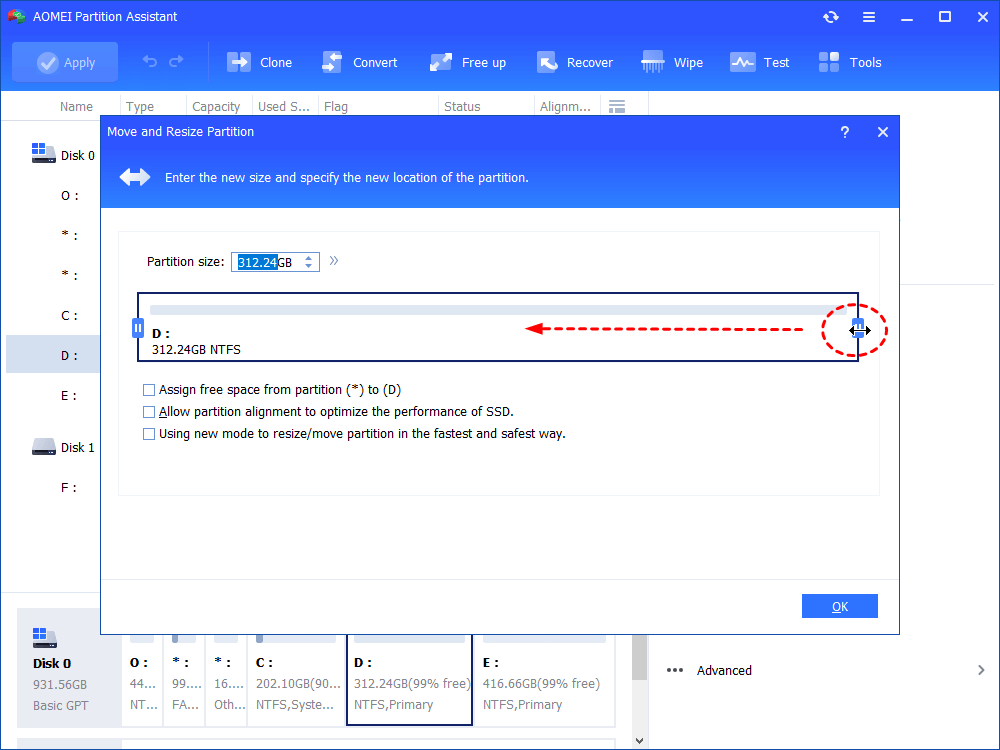
2. In the next screen, you can enter the new size of the partition or drag the slider leftwards to shrink the partition. If you want to specify the new location for the partition (namely move partition), you can drag the partition.
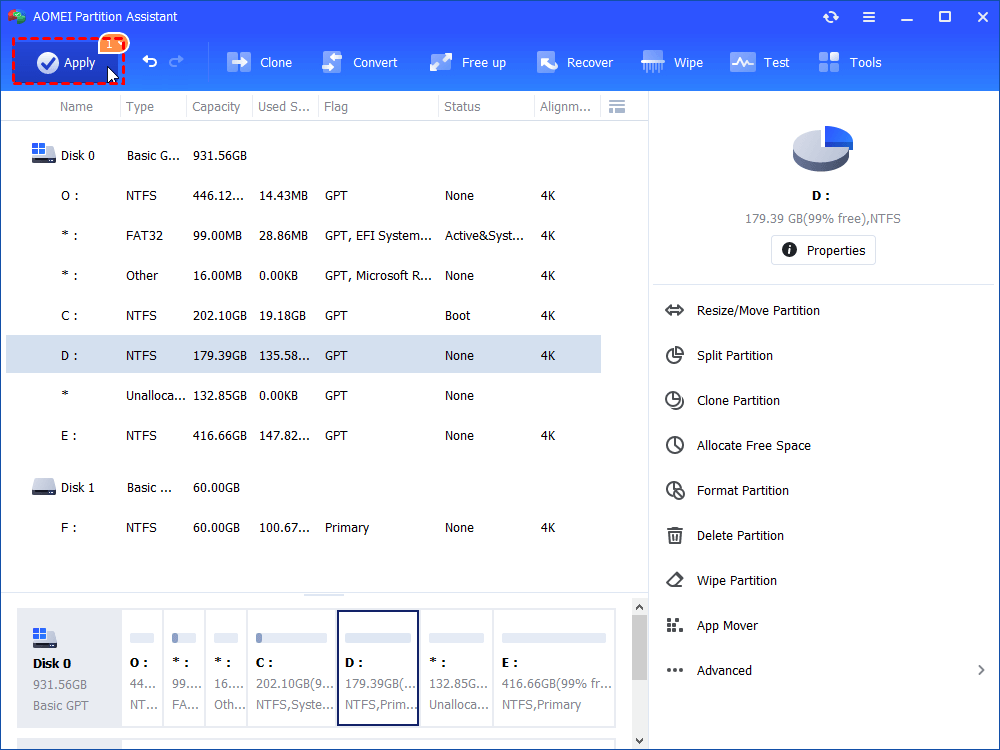
3. At this stage, the program has done nothing to your disk, but allows you to preview the partition layout after the operation. If it is not what you want exactly, you can easily undo the operation and modify it. Till it meets your needs, click “Apply” to put the operation in process.
After shrinking a volume successfully, you will get an unallocated space, with which you can create a new partition or extend another smaller partition via the “Merge Partitions” function of AOMEI Partition Assistant Standard.
Summary
With the AOMEI Partition Assistant Standard, you will never have the shrink volume access denied problem. Besides, this software can also be used to convert MBR and GPT without deleting partitions, transfer OS from one disk to another, clone hard disk, and many more. If you meet the shrink volume access denied issue in Server 2008, 2012, 2016 or 2019, you can use its Server edition.

