Transfer All Data from HDD to SSD on Windows Server 2012 (R2) at Ease
To transfer data from HDD to SSD on Windows Server 2012 (R2), the most effective way should be directly cloning HDD to SSD, which can move everything including OS and programs from HDD to SSD, and make them workable normally.
Need to transfer data from HDD to SSD on Server 2012
“I have an HDD that Windows Server 2012 installed on. Now I would like to upgrade it to SSD so that I can boot up the operating system faster and load games and program quicker. The problem is that I am unwilling to lose any data on HDD. But I don’t know how to transfer all data including operating system from HDD to SSD on Windows Server 2012? Can I just copy every file one by one on HDD and pasted them into SSD?
Can the "copy & paste" help transfer HDD data to SSD on Server?
“Copy” and “Paste” is one of most common way to transfer files from one location to another one. So, many users wonder if it can work when moving everything including some boot files. Unluckily, the copy and paste method only works when you try to move some personal files, like pics, videos, documents, and so on.
If those data you want to transfer from HDD to SSD contains programs or even the OS, the traditional method cannot help at all. What's worse, some system files are inaccessible after pasted into SSD and the system or programs can’t boot properly. So, it is impracticable to transfer data from HDD to SSD on Windows Server 2012 by copying and pasting files.
Best way to move all data from HDD to SSD on Windows Server 2012
Luckily, you can choose to clone HDD to SSD on Windows Server 2012, which can transfer all the content including OS from HDD to SSD and you don’t need to reinstall programs and Windows operating system. To migrate all data from HDD to SSD via cloning disk in Windows Server 2012, you can apply reliable and safe disk cloning software. Here it is highly recommended to try AOMEI Partition Assistant Server.
This server cloning software is specially designed for Windows systems. It is compatible with Windows Server 2022/2019/2016/2012 (R2)/2008 (R2)/2003 and other Windows systems like Windows 11/10/8/7/XP/Vista. Apart from moving data from HDD to SSD, it supports you to migrate data from HDD to HDD, SSD to SSD, and SSD to HDD. Then, let’s have a look at the detailed tutorial on how to move all data from HDD to SSD on Windows Server 2012 via it. You can free download its demo version to have a try at first.
PS.: The SSD has to own enough space to store all the data moved from HDD. Leave 25% or more free space of SSD to gain more stable performance.
Step 1. Connect the SSD to the machine and make sure it can be detected. Then, enter Disk Management to initialize SSD.
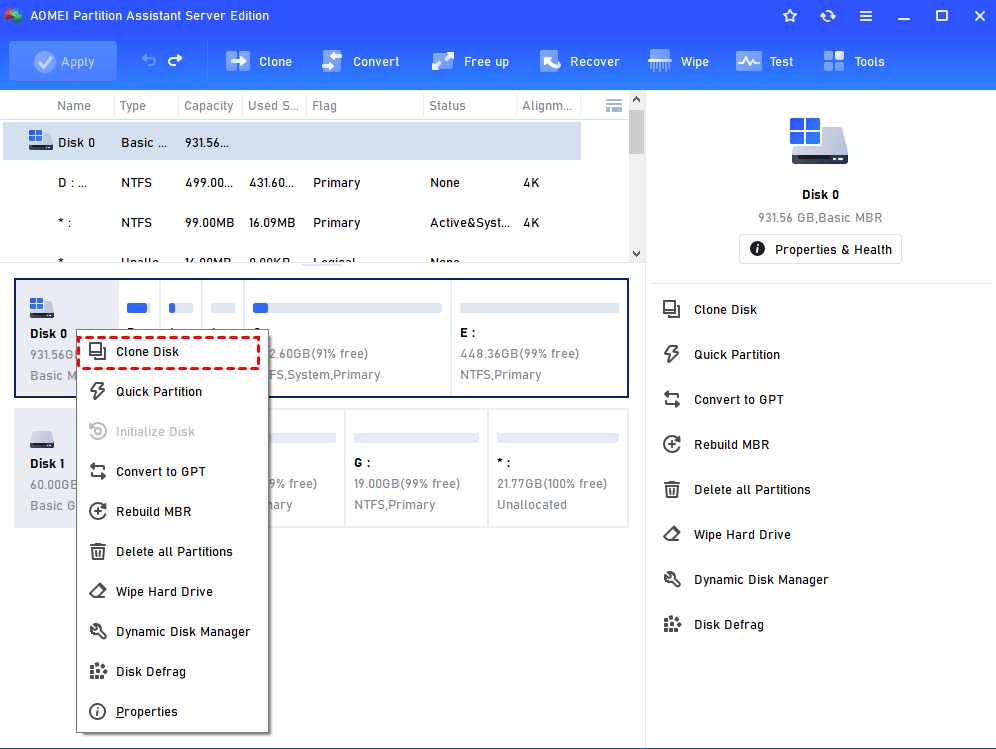
Step 2. To migrate data from HDD to SSD Windows Server 2012, run AOMEI Partition Assistant Server. In the main interface, right-click the source disk and choose “Clone Disk”.
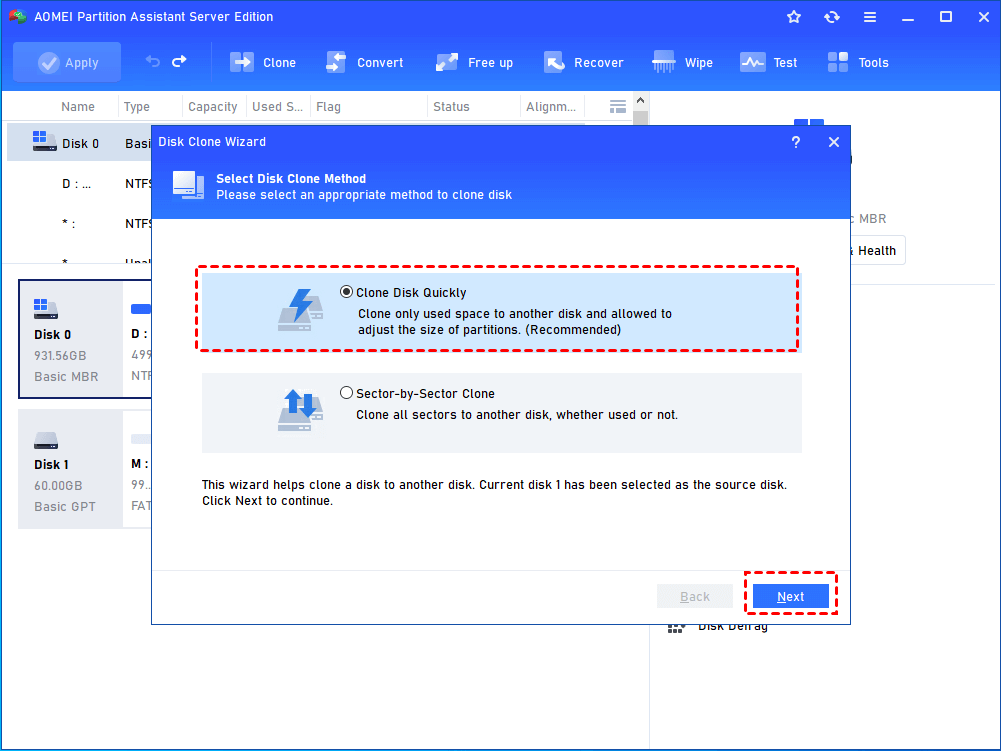
Step 3. In the pop-up window, choose a proper way to clone HDD to SSD in Server 2012 and click “Next”.
- ★Tips:
- "Clone Disk Quickly" just copies the used space of the hard drive to another and "Sector-by-Sector Clone"copies all sectors of the hard drive to another.
- The former takes less time and demands more space than the latter; the former allows you to adjust partition on the destination disk and nor the latter. The deleted or lost files only can be cloned through the latter.
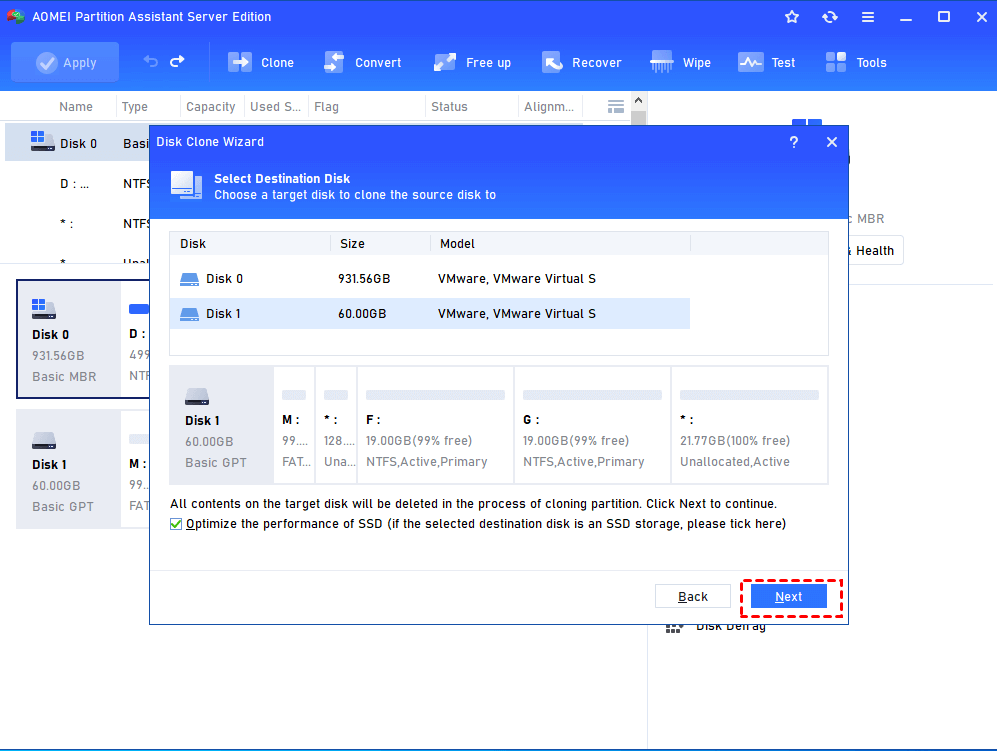
Step 4. Select a target disk to copy the source disk to. As the target disk is SSD, please place a tick in the box before “Optimize the performance of SSD”. Then, click “Next”.
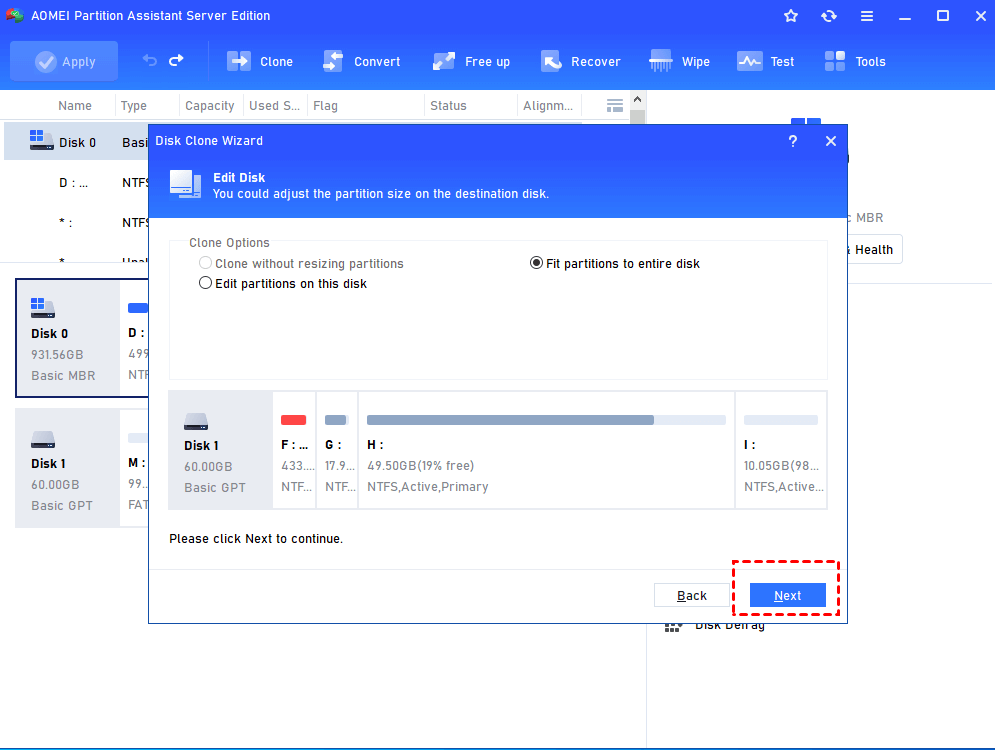
Step 5. It allows you to adjust the partition size on the target disk. Make your choice and click “Next”.
PS: There are three options for you to choose: “Clone without resize partition”, “Fit partitions to entire disk” and “Edit partitions on this disk”.
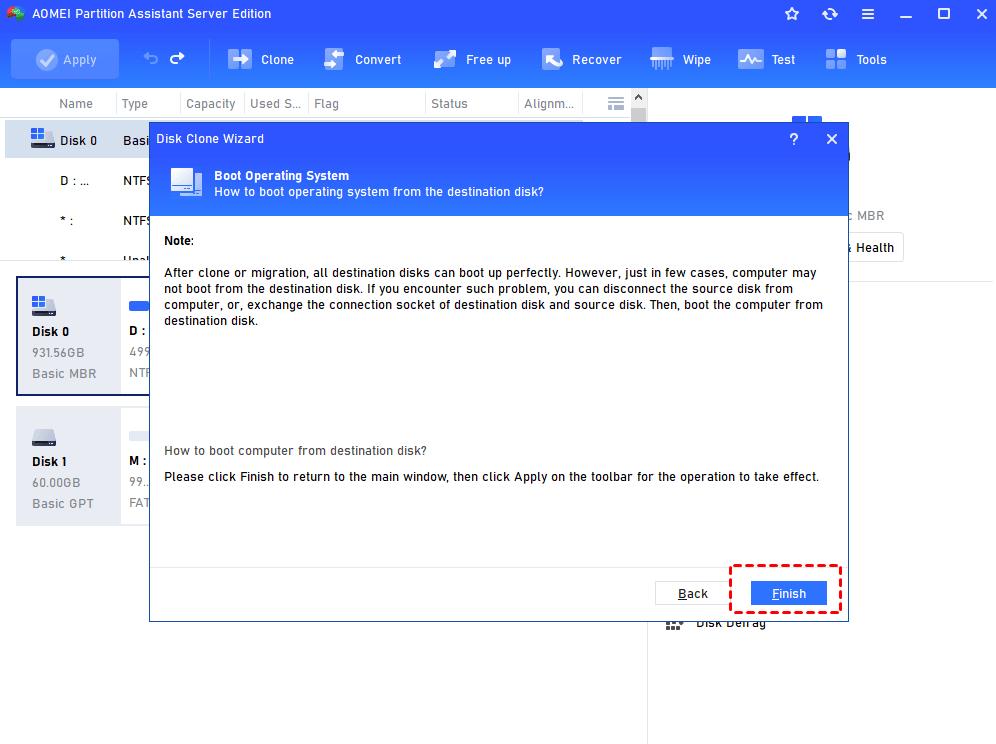
Read the pop-up Note about how to boot after clone or migration seriously and remember it. Then click “Finish”.
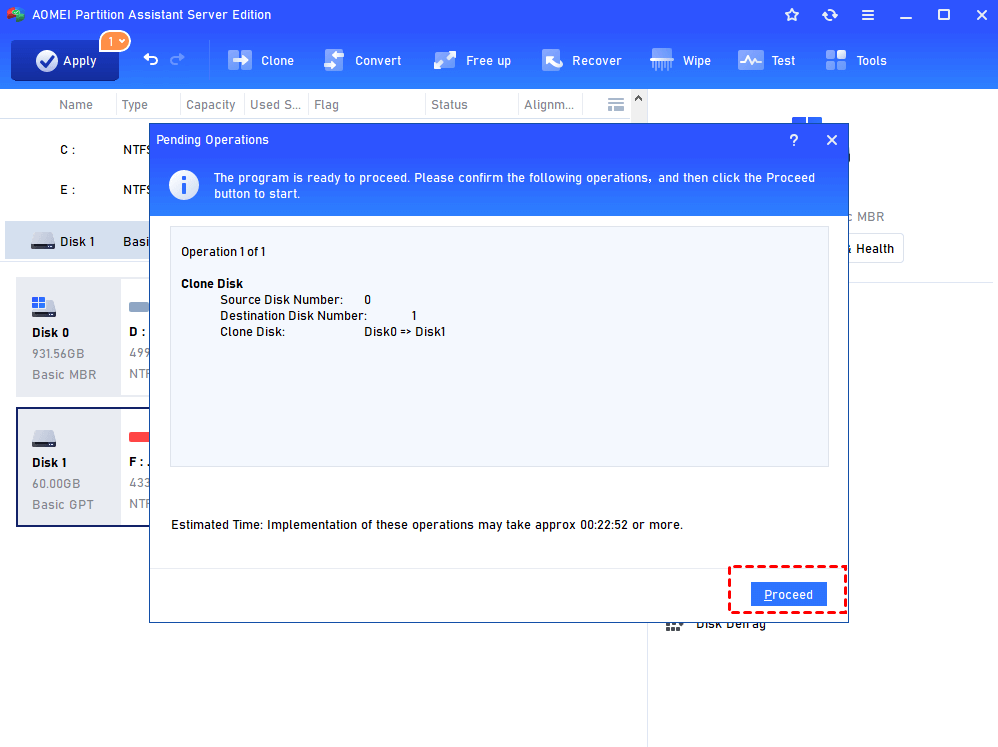
Step 6. You will return to main menu. Please check the pending operation and click “Apply” > “Proceed” to perform this operation.
- Notes:✎...
- Reboot is required as the operation has to be completed under PreOS mode.
- Enter BIOS to set SSD as the first boot option.
- If the destination disk is GPT style and your machine doesn’t support EFI/UEFI boot mode, you’d better convert GPT into MBR before cloning.
- You can resize partition after cloning if you are not satisfied with the partition of SSD.
SSD optimization after data migration [Tips]
All in all, AOMEI Partition Assistant Server can help you to transfer data from HDD to SSD on Windows Server 2012 through disk cloning software within simple few steps. However, after realizing how to transfer data from HDD to SSD on Windows Server 2012, in order to gain better performance of SSD, there is something about SSD optimization that you should have knowledge about.
- Align SSD partition since it is known that SSD adopts the smallest 4k sector in file system to save data. When 4k sector is not aligned, the performance of SSD might be affected.
- Set SATA controller to AHCI (Advanced Host Controller Interface) mode as it supports NCQ (Native Command Queuing) that is rather important for SSD performance.
- As it wastes a great number of times, disable Superfetch by pressing Windows +R, entering "services.msc", finding Superfetch and disabling Superfetch.

