[2024] What to Do When Hard Drive Making Clicking Noise?
If you hear hard drive making clicking noise, you’d better replace a new hard drive or recover lost data as soon as possible. Read patiently to learn more about disk drive making clicking noise.
By Irene / Updated on April 1, 2024
Hard drive making clicking noise: does it normal or abnormal?
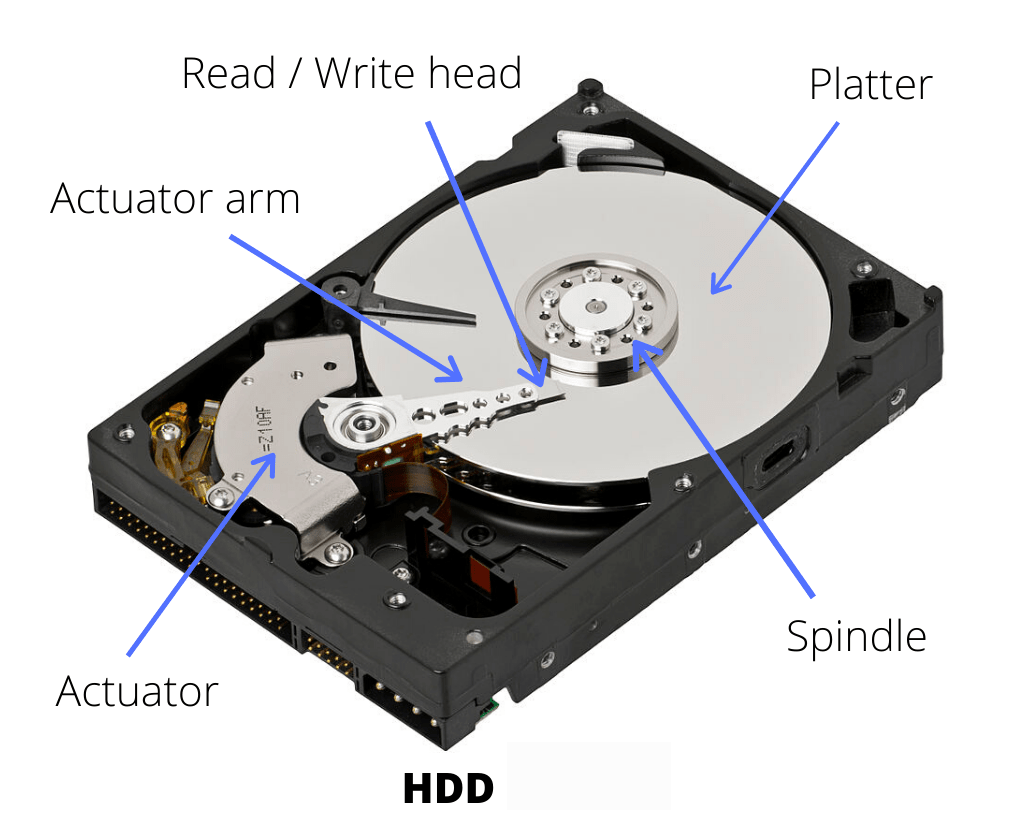
Does a hard drive making a clicking noise indicate it will fail soon? Not necessarily. Hard Disk Drives (HDDs) typically produce sounds because of their spinning parts, and these sounds are generally considered normal while Solid-State Drives (SSDs), lacking moving parts, are typically quieter. Factors that can affect sound perception include as below. If you heard these hard drive clicking sounds, your drive can be in normal status:
● Surface placement: The HDD's location on a resonant surface may amplify its sounds.
● Environmental factors: Nearby objects may cause echoes or affect the perception of HDD sounds.
But if you hear your hard drive making clicking noises, it may indicate that your hard drive is experiencing abnormal conditions. In this situation, it's best to replace the disk or recover lost data as soon as possible.
Abnormal HDD sounds that may indicate issues include:
✍ Grinding or scratching sound: This may indicate physical damage to disk platters, which means your stored data has been lost to some extent.
✍ Persistent hard clicking or repeating clunking: Likely a physical issue with the drive, which may also suggest a quick data recovery.
✍ Exaggerated and irregular vibrations: This sound is compared with healthy drives to establish a baseline.
✍ Pronounced humming or crackles from the power supply: May not be supplying enough power to the drive.
✍ Intermittent beeping: Usually indicates insufficient power. Test with different cables, ports, or computers.
What to do if the hard drive clicking sound is strange?
From the abnormal indications that your hard drive making clicking noise, it is advisable to replace a new hard drive or instantly recover your data. Now, read to learn the suitable situations and which methods you need to choose now.
1. Replace your hard drive
The first situation is that your hard drive is clicking but still works normally. Under this condition, your hard drive may make a clicking noise because of exaggerated and irregular vibrations or other reasons. At this time, replacing the hard drive is the optimal solution to prevent data loss or further system damage, as it may fail at any time.
To easily replace your disk, you can use AOMEI Partition Assistant Professional, a reliable disk manager that can be compatible with Windows 11/10/8/7. It offers you Clone Disk function that allows you to enjoy the following benefits. Before the replacement, you can use the tool to test hard drive health first.
- Easy-to-use software for copying your entire hard drive, including programs, files, and OS
- Clone your just specific partitions if needed
- Supports moving your operating system only to the new hard drive
- Automatically detects and prepares new disks for the cloned disk
- Copies every sector of your disk, even supporting cloning with bad sectors, which will not cause the clone to fail during the process.
- Resize and rearrange partitions during the cloning process
If your disk drive is making clicking noise, it is time to download the powerful software and follow the guidance. Replacing the hard drive that makes a clicking noise for a laptop can be divided into 3 parts. By following the step-by-step guidance, you can easily finish the process.
Part 1. Before cloning
1. First, please remove unnecessary files or programs from your current hard disk. This will help shrink its size to fit the disk.
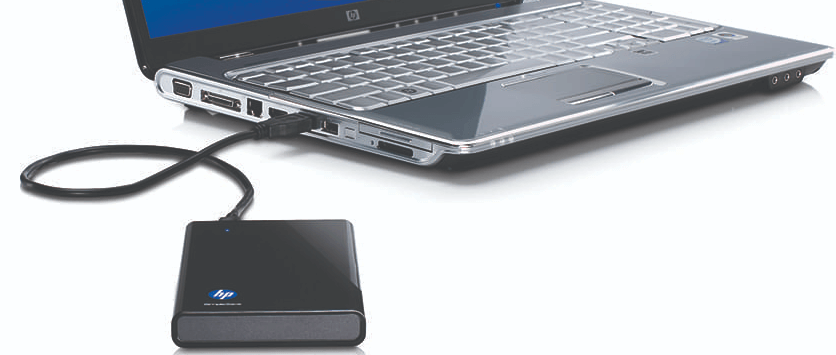
2. Then Connect the hard drive to your laptop and ensure that it gets recognized properly. You might require an external USB to SATA adapter, dock, or enclosure to do this.
3. Remember to back up important files you want to keep on the hard drive. This step is crucial as all data will be wiped during the cloning process.
4. If you're considering cloning an MBR system HDD to a GPT drive, make sure your motherboard supports UEFI boot mode. This is important because you'll need to upgrade the BIOS legacy to UEFI boot mode for successful cloning. Failing to do so might result in being unable to boot from the destination disk.
Part 2. Start cloning
After confirming the above steps are successfully done, let’s start replacing the hard drive making clicking noise with AOMEI Partition Assistant.
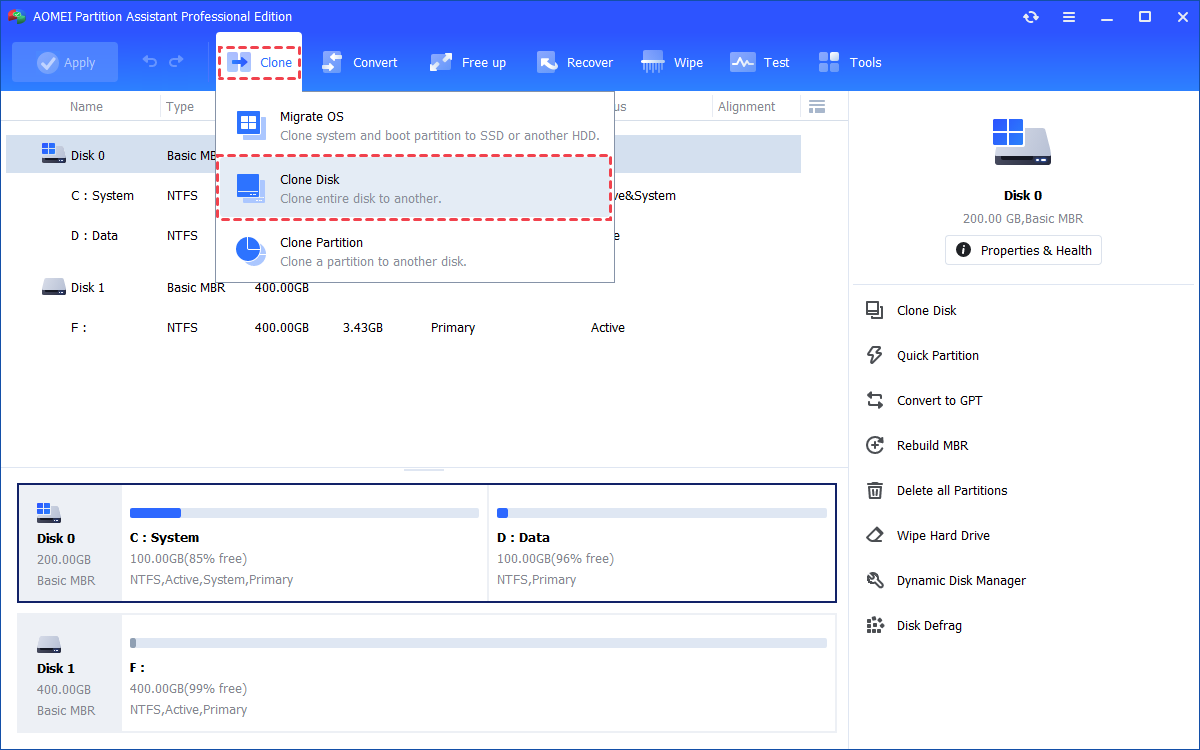
Step 1. Run the installed AOMEI Partition Assistant Professional. Click “Clone” in the top menu, and select "Clone Disk" feature.
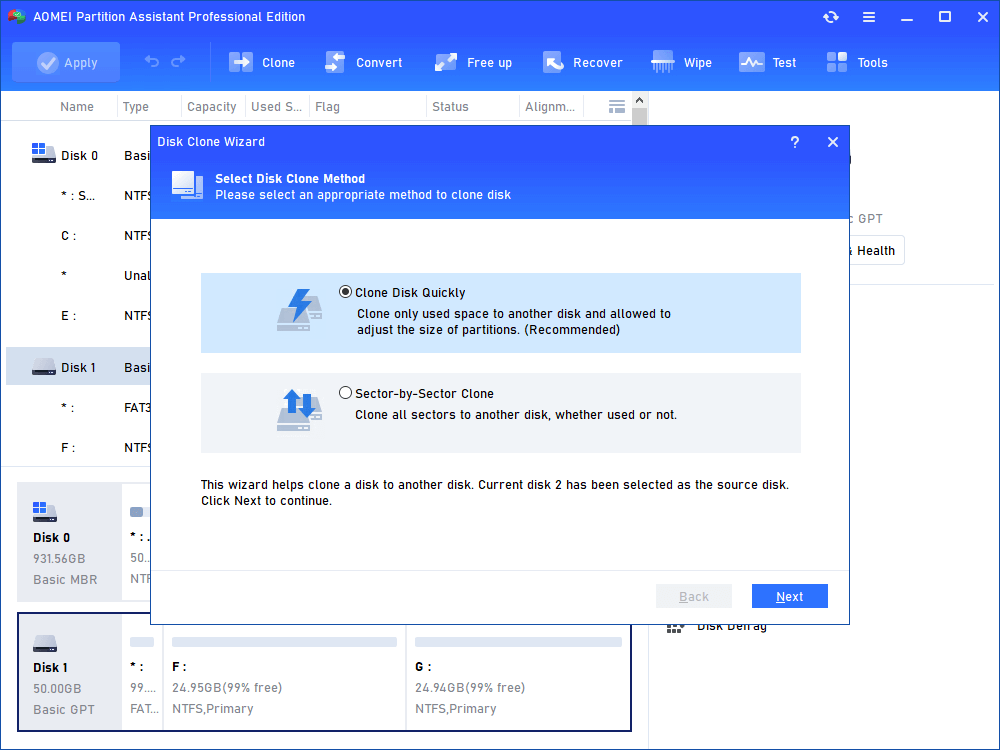
Step 2. Then choose the clone method to copy the selected disk and hit the “Next” button. If you are cloning a large hard disk to a smaller one, choose the first option, please.
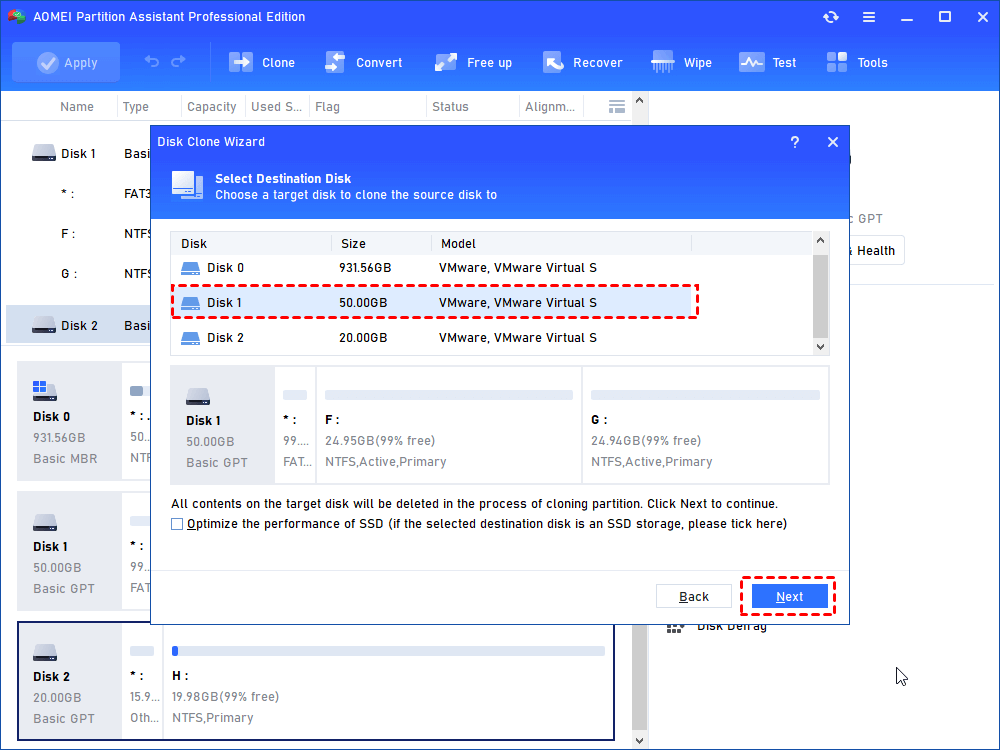
Step 3. Select a destination disk to contain all data from the source disk, and click “Next”.
If the destination disk is an SSD drive, you can click the “Optimize the performance of SSD” option during the process, which can help make 4K alignment on SSD partitions.
Step 4. You can adjust partition size in this window if you choose “Clone Disk Quickly” above. After everything is done, hit on “Next” to continue.
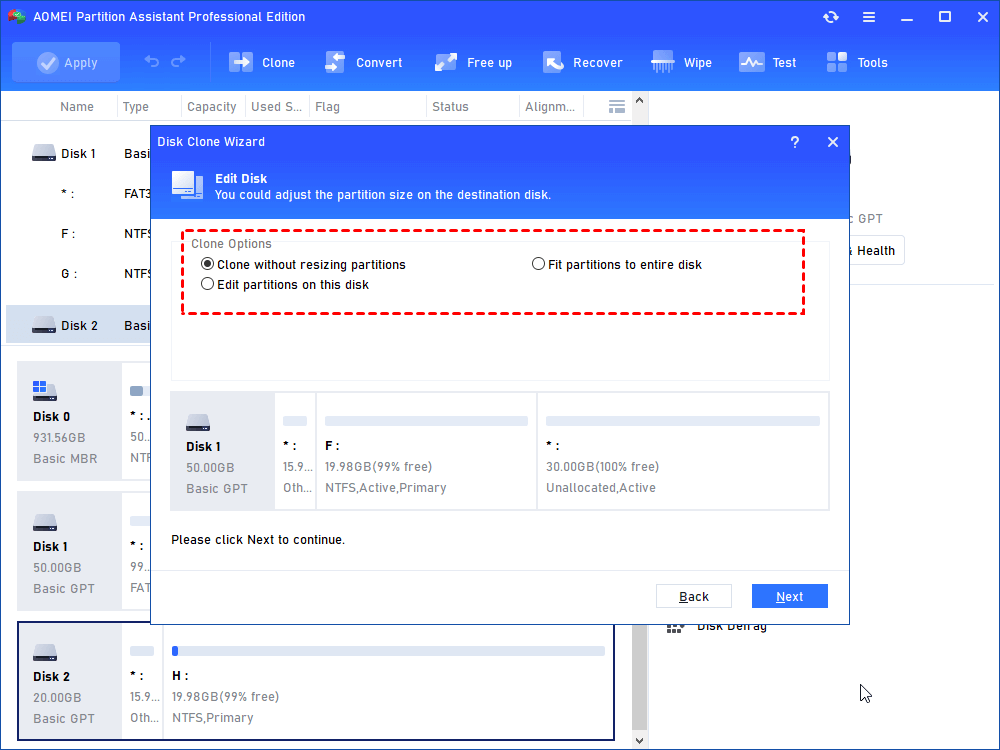
1. Clone without resizing partitions: All partitions will be cloned to the target disk as the original partition size. It is available when the target disk is large enough to hold all partitions on the source disk.
2. Fit partitions to the entire disk: All partitions will be cloned to the target disk and take up its full capacity according to the original partition size proportion.
3. Edit partitions on this disk: You can change every partition size on the target disk as you need.
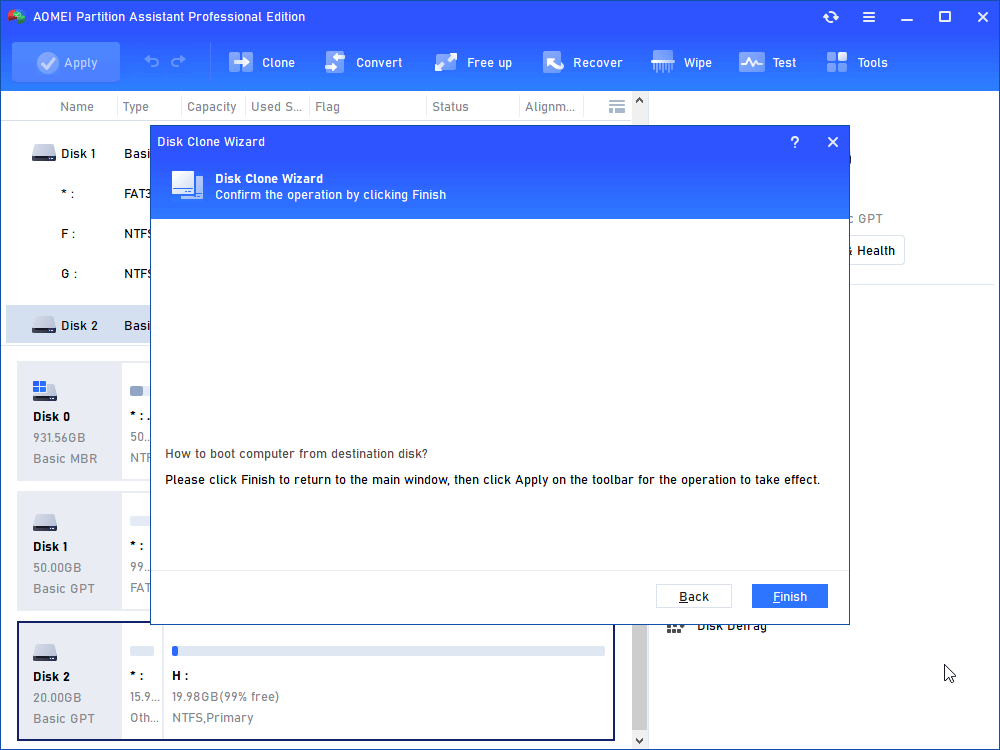
Step 5. A note will appear to tell you how to boot from the cloned disk. You can read it carefully, and then click “Finish”.
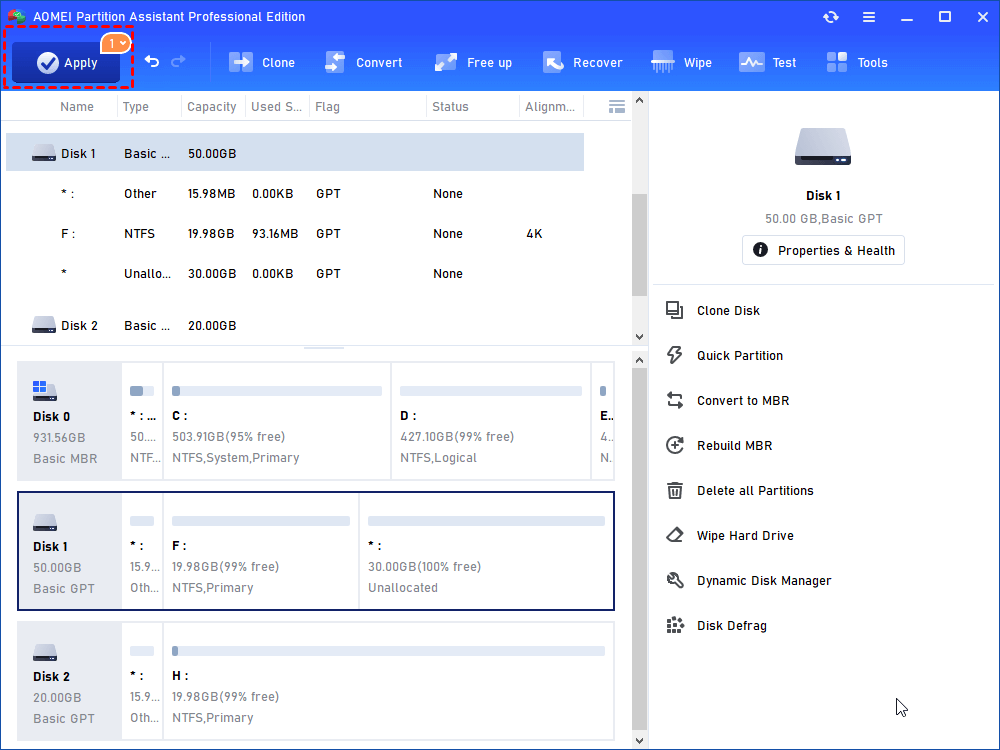
Step 6. Click “Apply” to commit the pending operation.
In case of "cloned hard drive won’t boot", kindly please follow the steps if you are cloning the system hard drive to another.
Step 1. Restart your computer, long press the "F2" key (perhaps other keys like DEL), and access the BIOS environment.
Step 2. Change the boot order and set the cloned hard drive as the first boot drive in BIOS.
Step 3. Press "Enter". Now you should boot the computer from the cloned hard disk successfully.
Note: If you want to clone only the C drive or boot-related partitions to another hard drive, its “Migrate OS to SSD" feature can be helpful. It only transfers the OS partition to another hard drive and allows you to boot from it smoothly.

Part 3. Securely boot from cloned new hard drive
Once the cloning process is complete, it's important to boot up from the newly cloned destination disk.
Step 1. Power down your laptop and disconnect the hard drive, power cable, and any other connected cables.
Step 2. Open the back cover of your laptop. Remove the old hard drive from its slot and install the cloned disk. Secure it in place using a screwdriver.
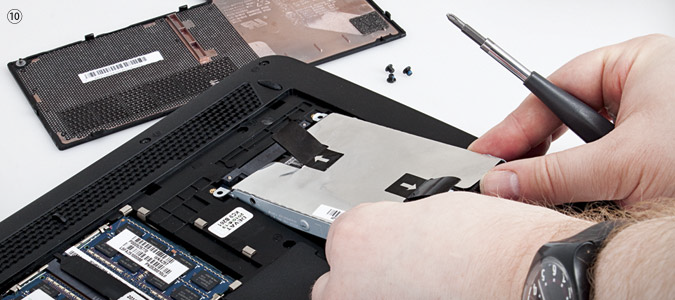
Step 3. Attach the back panel that covers the drive and screw it back on. Then restart your laptop. During the initial startup screen, press and hold specific keys to access the BIOS environment. Or you can directly click “Tools” > “UEFI BIOS Boot Options Manager” to directly access to BIOS.

Step 4. Go to the Boot tab in the BIOS menu. Check the boot list and use the arrow keys to move the cloned SSD to the top of the boot priority list.

2. Recover the lost data
If you hear strange sounds like grinding, scratching, or constant clicking from your hard drive, you should check for data loss right away and start the data recovery process immediately. The longer you wait, the higher the risk of losing more of your data, as the hard drive can become more damaged over time.
Instead of checking one by one, you can use powerful software AOMEI Partition Assistant to quickly scan your drive and see if you've suffered any data loss. This software can then help you recover the lost files quickly, before the hard drive gets worse.
Don't delay if you hear hard drive making clicking noise. Act fast to save your important data before it's too late.
- About AOMEI Partition Assistant data recovery:
- This tool can help you get back files from an emptied Recycle Bin, or that you accidentally deleted, or lost when you formatted a drive and partition. It can also recover data from damaged storage devices and files that were affected by viruses or malware.
- The tool supports recovering all kinds of file types, like emails, videos, photos, and over 200 other formats. It works with common storage devices like hard drives, SSDs, USB drives, and SD cards.
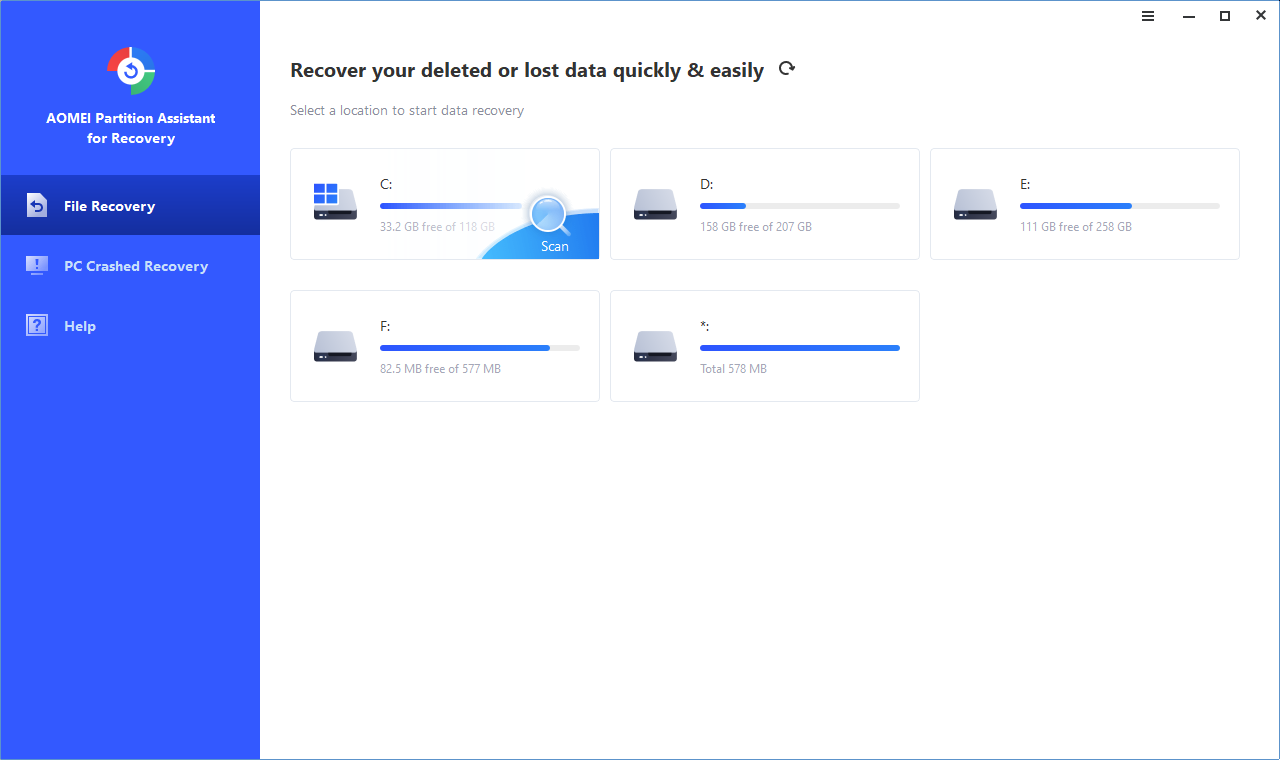
Step 1. Launch AOMEI Partition Assistant Professional. From the top pane, click Recover > Recover Data in turn.

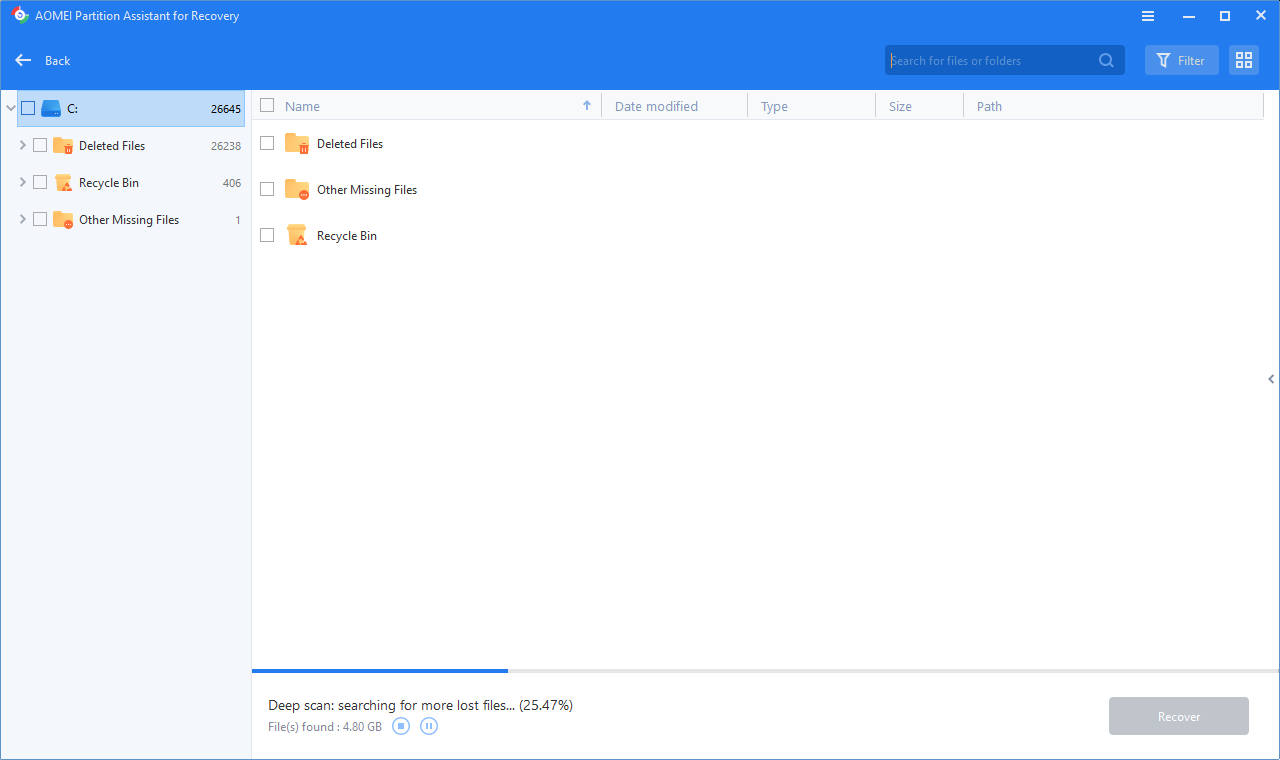
Step 2. Choose the drive where the data you want to recover is saved and click Start Scan.
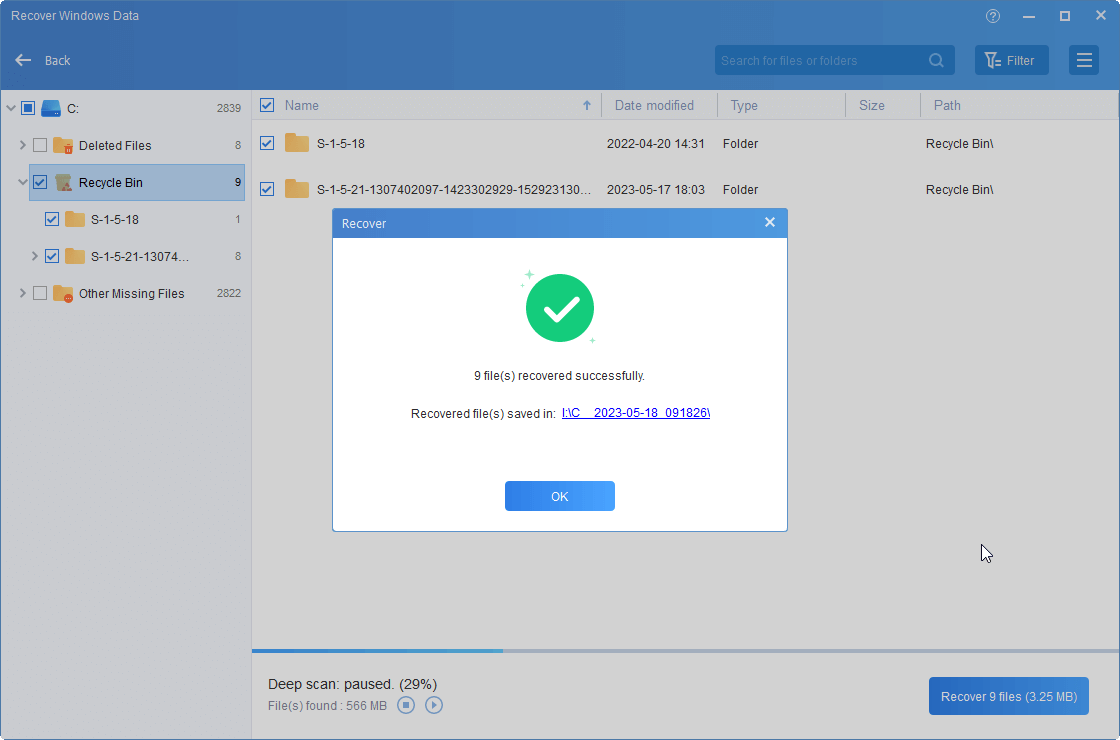
Step 3. After scanning, all lost data on the drive will be listed. Then, tick the target file and click Recover file.
Step 4. Here, choose the path to save the files.
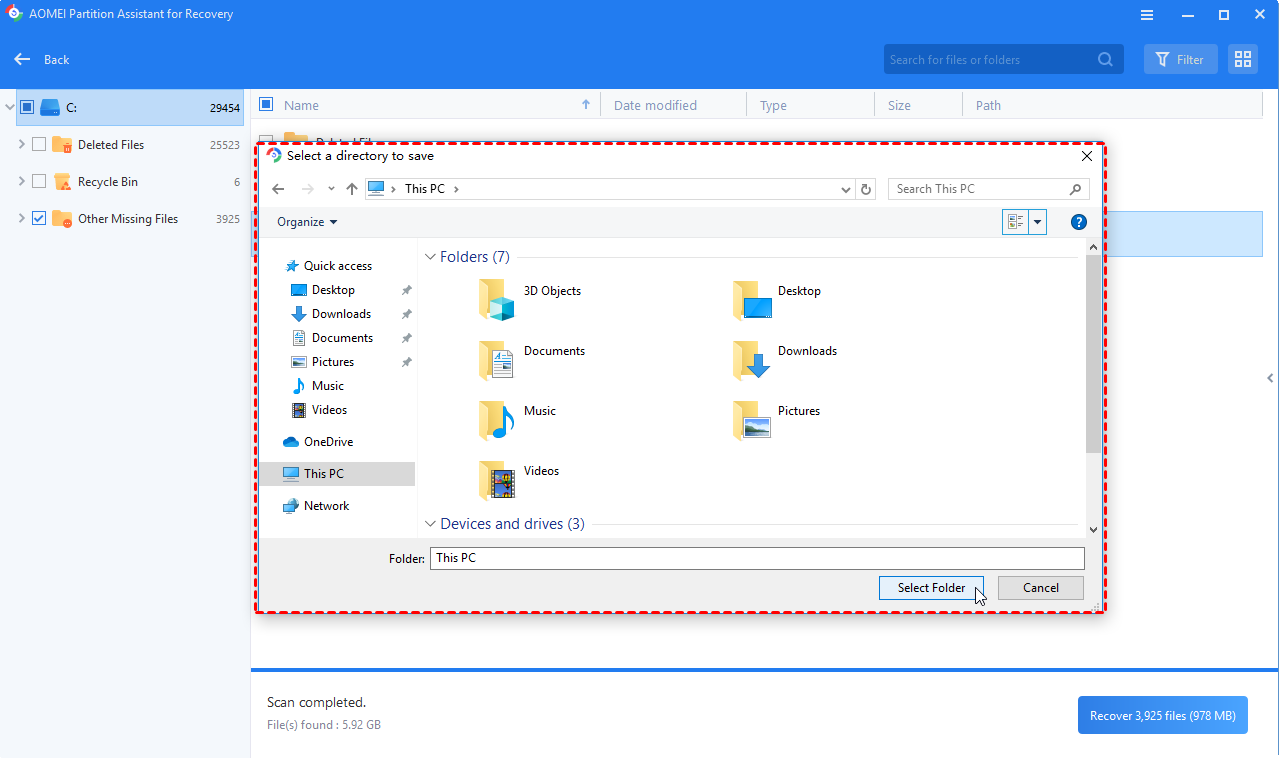
Step 5. When the recovery is finished, close the software and go to the target location to find the files.
Summary
When you hear the hard drive making clicking noise, it is intelligent to take quick measures based on the sound types. With AOMEI Partition Assistant, you can also easily extend drive space, convert disk between MBR/GPT without data loss, format partition, and so on. For Windows Server users, please turn to the Server edition.