Windows Server Manager for Disks & Partitions
Utilizing a Windows Server Manager for disk and partition can assist you in safeguarding your data against inadvertent data loss and managing your hard disk resources. The following is an overview of a specialized Windows Server disk manager.
By Lucas / Updated on April 1, 2024
As we all know, Windows Server Manager is a management console tool used by IT professionals to facilitate the provisioning and administration of local and distant Windows-based servers from their desktop computers. This console eliminates the need for physical server access and the requirement to enable distant Desktop protocol (rdP) connections to each server.
However, to ensure your Windows Server runs smoothly and keeps all tasks performing well, there is another resource you need to pay attention to: your hard disks on Windows Server computer.
So, in this post, we’ll show you how to manage your hard disk and give you some advice on how to use Windows Server disk manager for your machine.
Why do you need a Windows Server manager for disk and partition?
• Data Integrity
First, hard disks store critical data for the server and its users. If a disk fails or becomes corrupted, it can lead to data loss, which can have severe consequences for the organization.
• System Performance
A healthy hard disk is essential for optimal system performance. If a disk develops bad sectors or other issues, it can slow down read and write operations, leading to sluggish performance for applications and services running on the server. So, monitoring the disk's health allows administrators to identify and address performance issues proactively.
• Preventing disk failing
In addition, hard disk failures can result in unexpected downtime, disrupting business operations and causing productivity losses. By monitoring disk health, administrators can anticipate potential failures and take preemptive measures, such as replacing failing disks or migrating data to redundant storage solutions, to minimize downtime and maintain service availability.
Basic Windows Server disk management
In fact, some basic Server disk managements you need can be satisfied by system tool. Windows Disk Management is a built-in utility in Windows Server that allows users to manage storage devices such as hard drives, solid-state drives (SSDs), and external storage devices. It provides several key functionalities:
▶ Partition Management
Disk Management enables users to create, delete, format, and resize partitions on their storage devices. This allows for efficient organization and allocation of disk space.
▶ Disk Initialization
Users can use Disk Management to initialize newly installed disks, preparing them for use with the server. This process involves selecting the disk type (MBR or GPT) and creating a partition table on the disk.
▶ Volume Management
Disk Management facilitates the creation and management of volumes, which are logical storage units within partitions. Users can assign drive letters, mount points, and file systems to volumes, making them accessible to the operating system and applications.
▶ Disk Maintenance
Disk Management provides tools for disk maintenance tasks such as marking partitions as active, changing drive letters, and converting disk types between basic and dynamic.
▶ Disk Properties
Users can view detailed information about their storage devices, including disk capacity, free space, partition layout, and disk status.
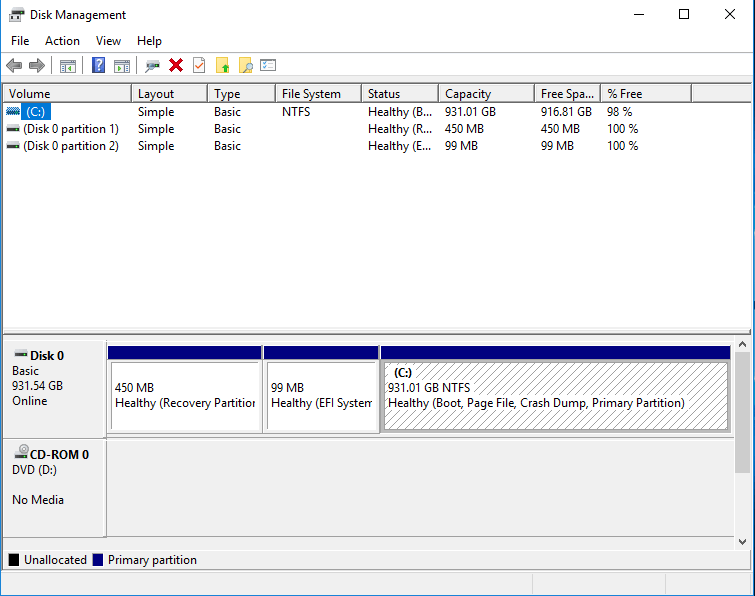
How do I access Disk Management on Windows Server?
1. You can access Disk Management via pressing Windows + R to open Run, type “diskmgmt.msc” in the box and press Enter.
2. Go to ”Control Panel” > ”System and Security” > ”Administrative Tools” > ”Create and format disk partitions”.
3. Right-click the Start menu and select Server Manager. In the Server Manager interface, choose Computer Management under Tools tab.
4. Press the Win + X keys on your keyboard and then tap on the Computer Management shortcut from the given menu to open Computer Management. Click Disk Management under Storage on the left side of the Computer Management window.
Advanced Windows Server manager for disk and partition
Once you've used Windows Disk Management to modify your disks and manage your partitions and drives, you'll see that it has a lot of limits, which are also evident concerns. If you're trying to expand C drive and encounter the "Extend Volume" option being greyed out, it might be because there isn't any free space on the disk. To convert a disk to GPT, you'll have to remove all data and partitions from the target drive. Furthermore, there is no way to clone a drive for a speedy update or to transfer software to free up space without risking data loss.
Therefore, it is thoughtful to choose AOMEI Partition Assistant Server, a superior server disk management application, to circumvent all restrictions of Windows Disk Management. AOMEI Partition Assistant Server is compatible with Server 2022, 2019, 2016, 2012, 2008, and 2003, which simplifies duties and compensates for the shortcomings of the Server snap-in Disk Management utility.
The Best Windows Disk Partition Manager and PC Optimizer
Now, let’s quickly view what you can do with AOMEI Partition Assistant for your Windows Server disk management.
1. Relocate free space
To break “Extend Volume” option grayed out issue, AOMEI Partition Assistant offers 3 ways for you.
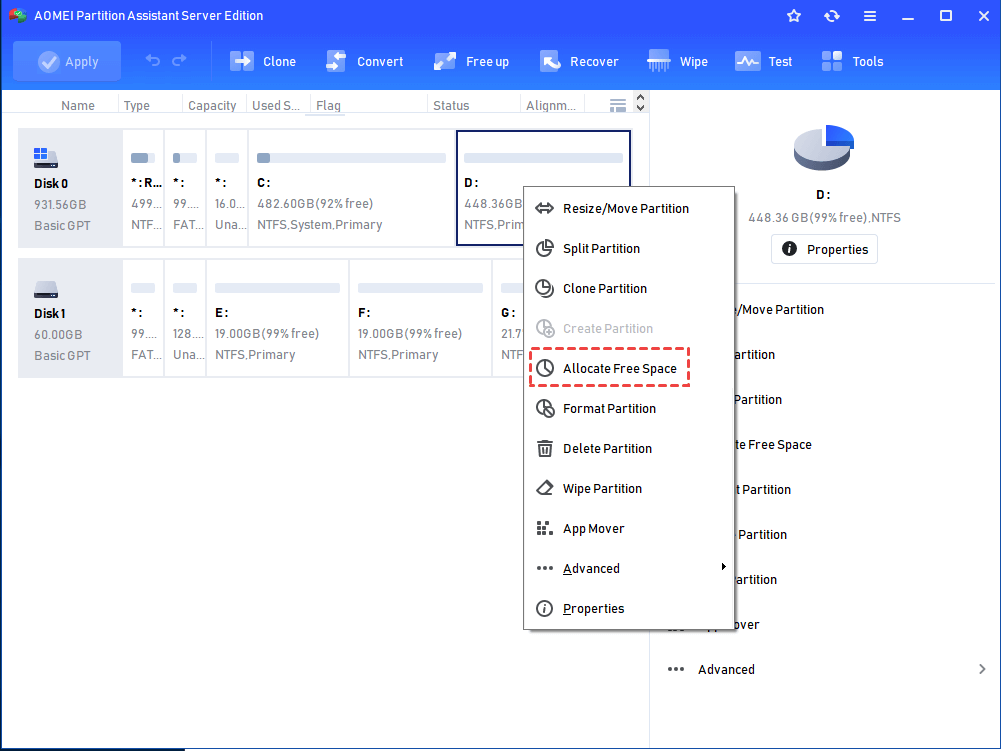
Option 1. Allocate free space
You can directly transfer free space to the Server system partition from another partition that has sufficient storage.
Step 1. Run the AOMEI product, select and right-click on the partition where you want to extract some free space and then, select “Allocate Free Space”.
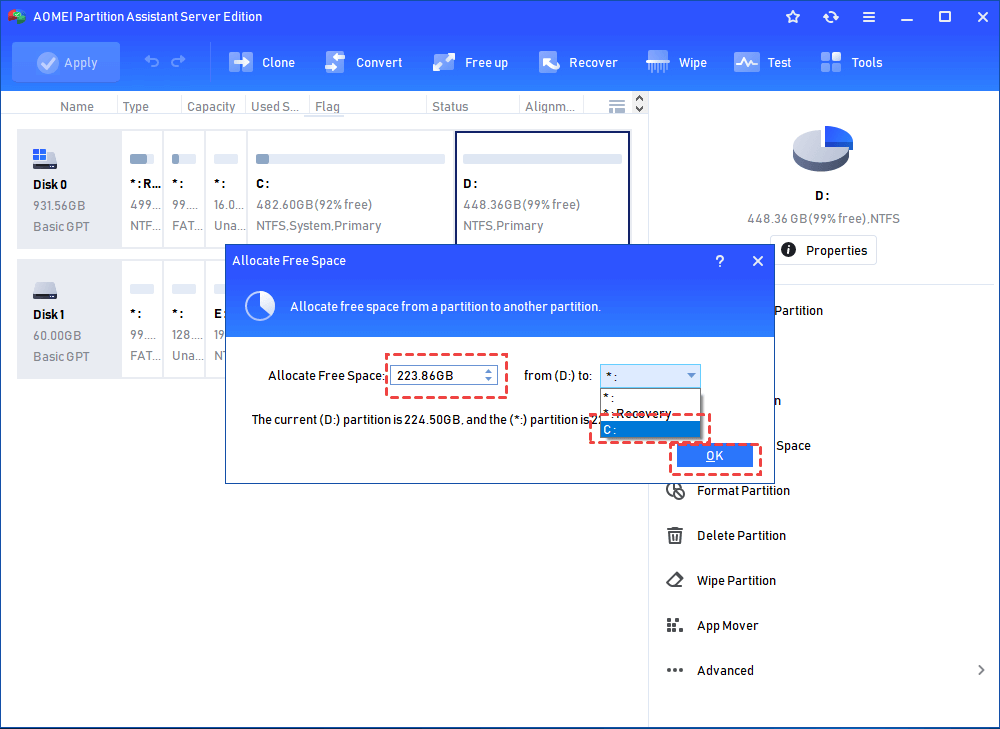
Step 2. In the “Allocate Free Space” window, preset how much storage you want to allocate and choose the destination drive to allocate the storage space to. After that, hit “OK”.
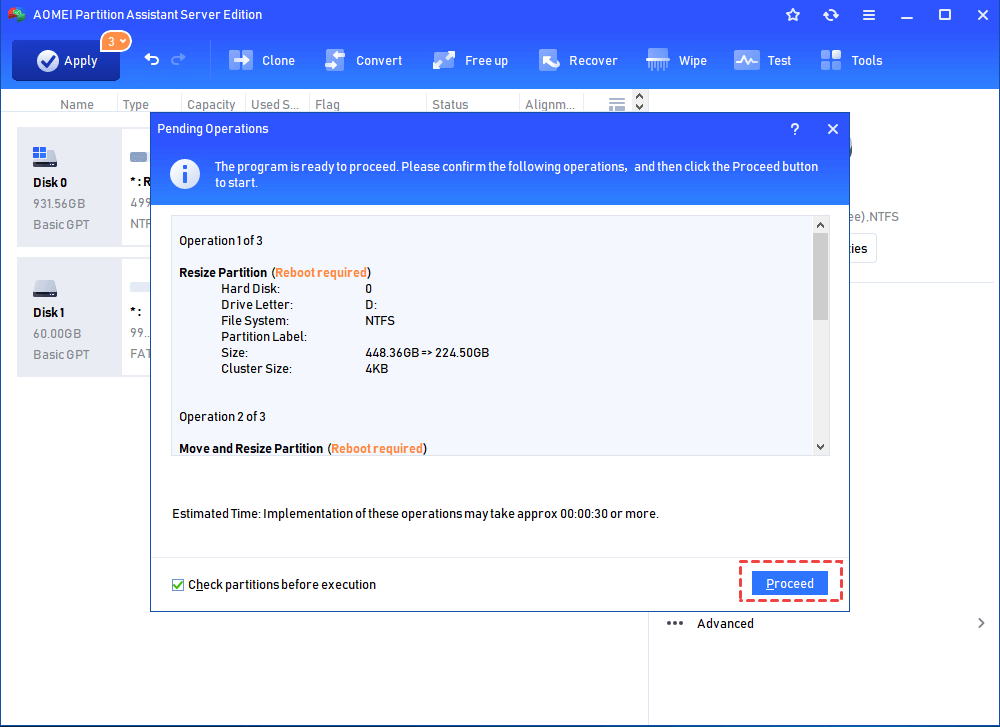
Step 3. Follow “Apply > Proceed” to commit the pending operation.
Option 2. Merge partitions
Users can either combine the Server system partition with unallocated space or with a contiguous data partition.
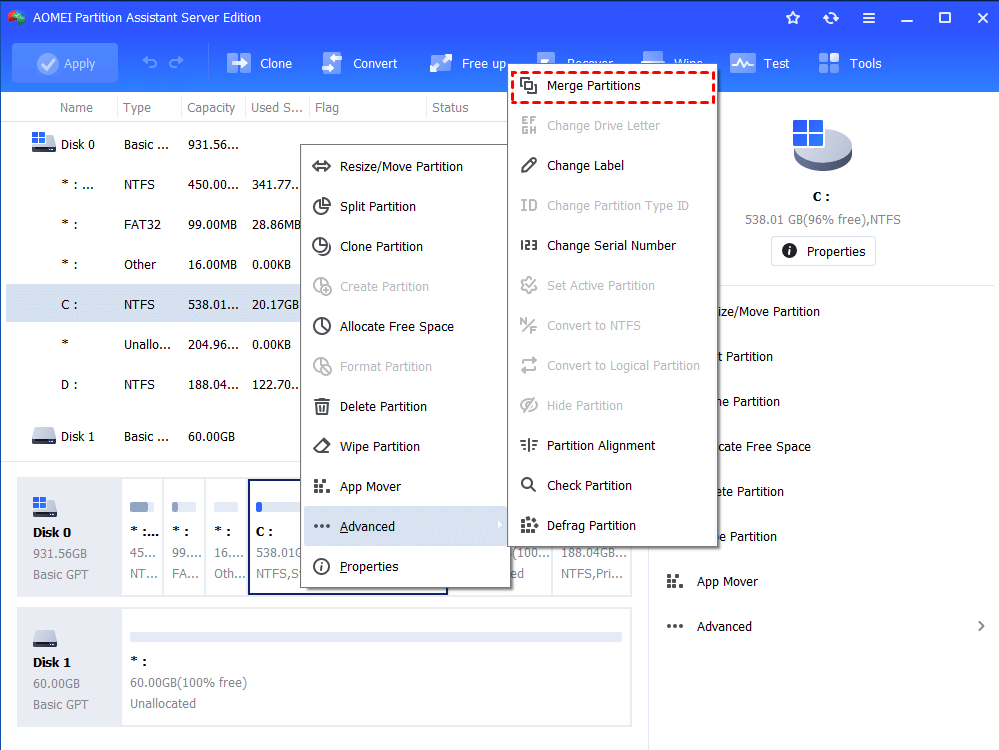
Step 1. Install and launch AOMEI Partition Assistant Server, on the home interface, select and right-click on the Server 2022 system partition and select "Advanced" and choose “Merge Partitions”.
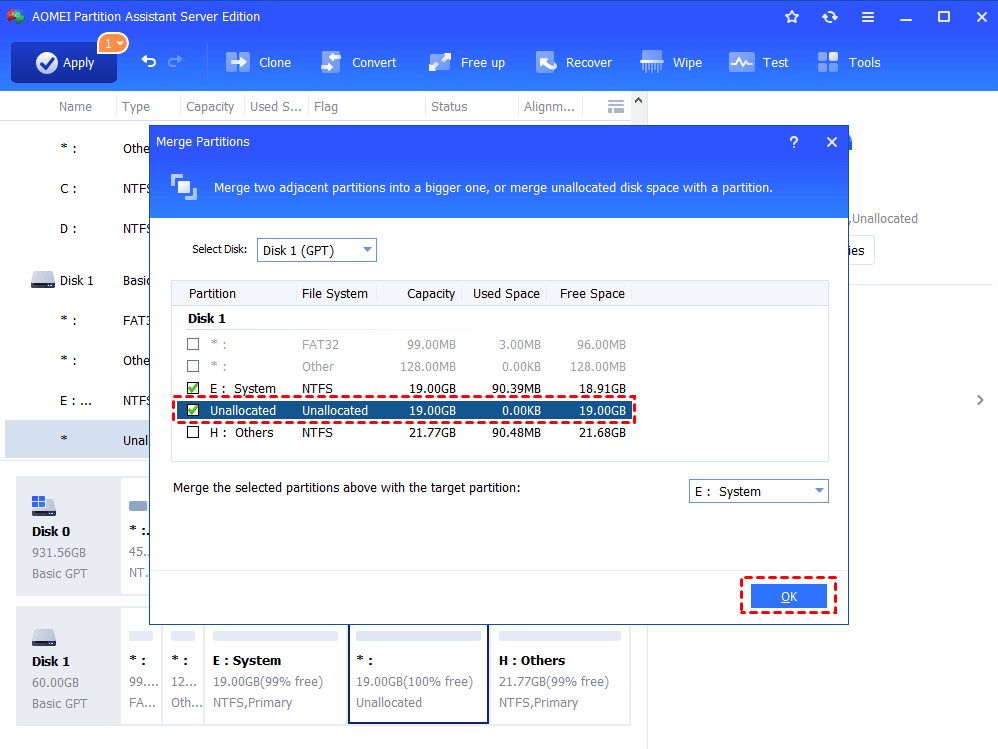
Step 2. Tick unallocated space or the partition you want to combine and then, hit “OK”.
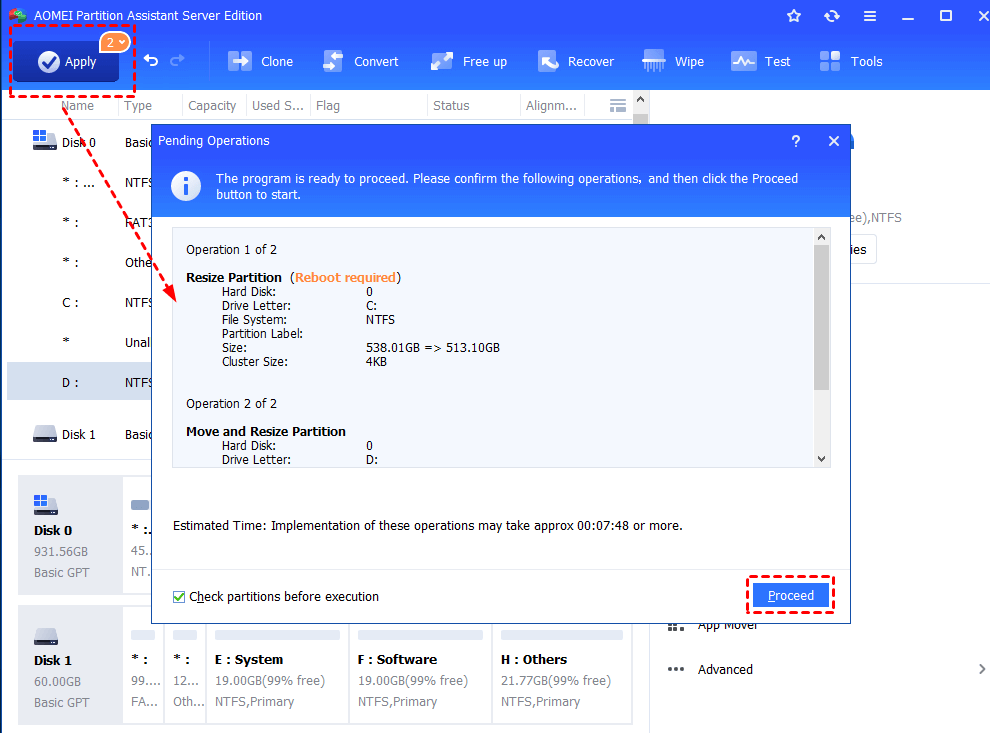
Step 3. In the “Pending Operations” window, you’ll notice that the size of the system partition has been enlarged. To commit the operation, click on “Apply” as the screenshot shows.
Option 3. Split partition
This is the fastest way to create a new partition from another large partition.
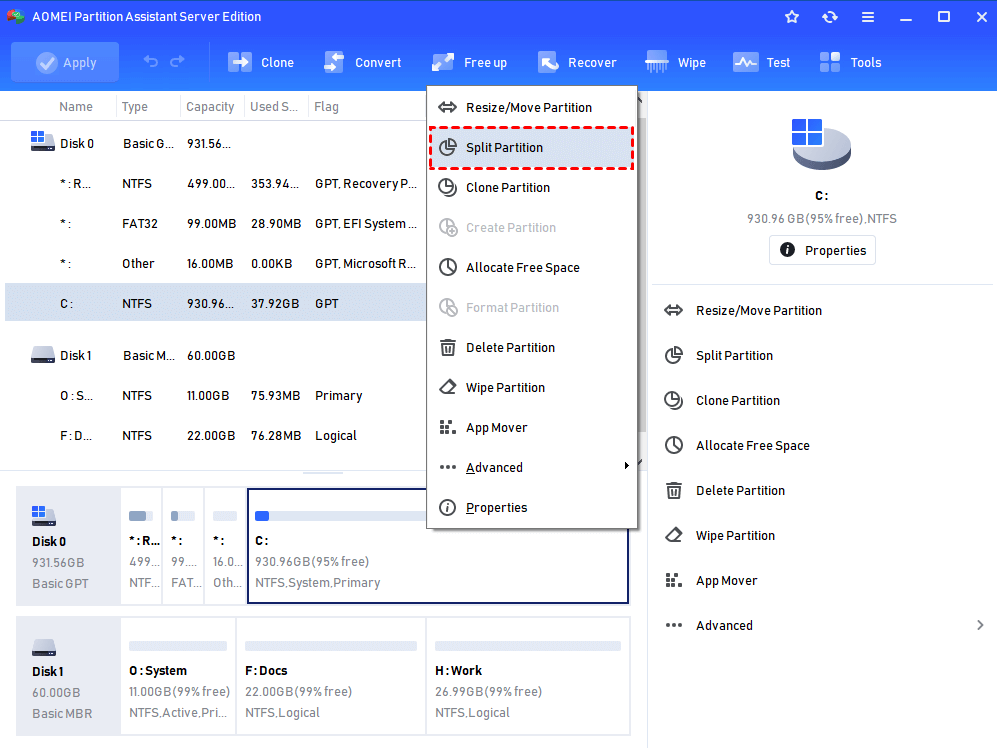
Right-click the C partition and select “Split Partition”. Then, you can specify the size and location of the new partition, and click “OK”.
2. Disk cloning and OS migration
If you want to effortlessly upgrade your Windows Server disks, the best choice is data migration. All operations can be confirmed via some clicks. You just need to connect the target disk to your machine.
Option 1. Disk clone
Users can create a duplicate Server disk via cloning all data and settings on the new disk without reinstalling all and resetting all.
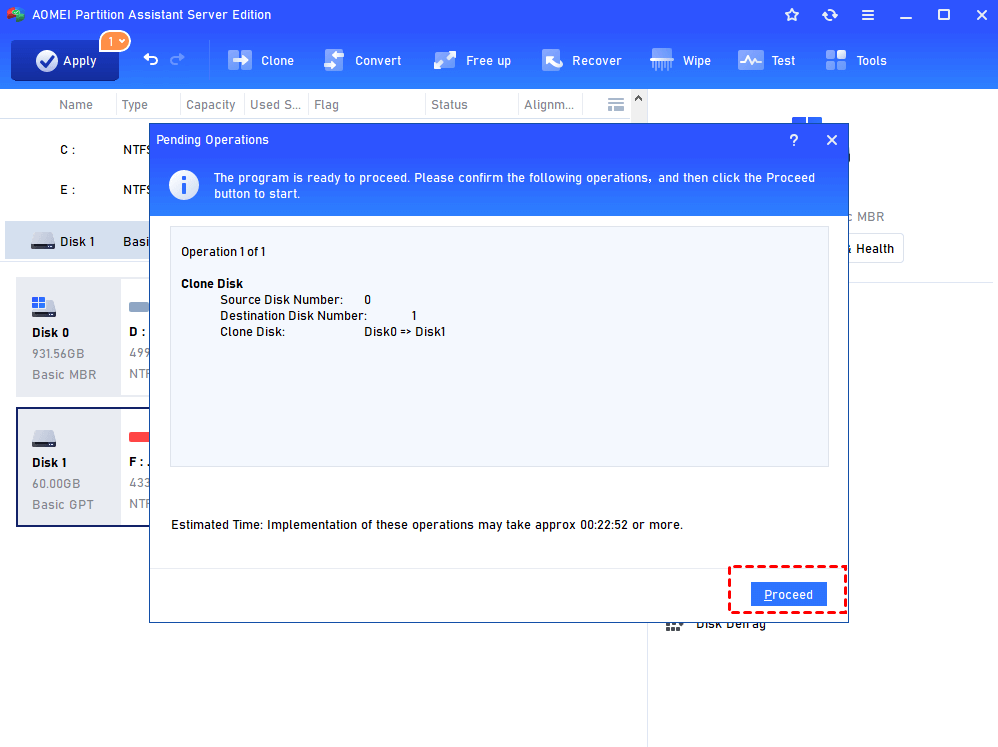
Step 1. Right-click the system disk you are going to clone, and then click "Clone Disk".
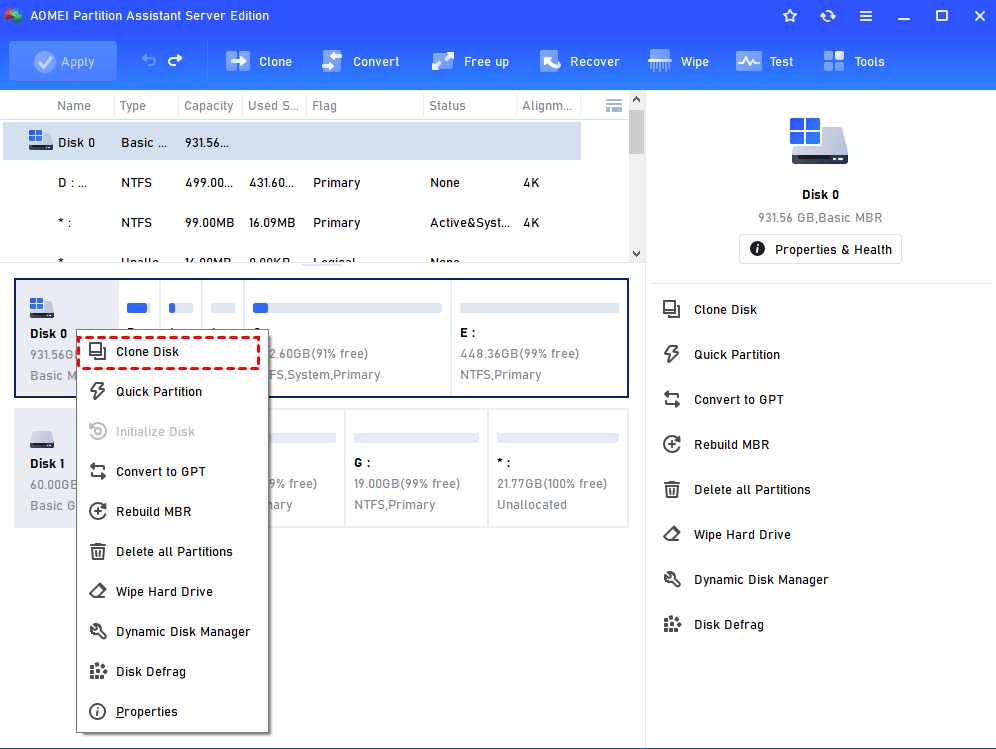
Step 2. In this step you can choose the way to clone Windows Server. “Clone Disk Quickly” is recommended here.
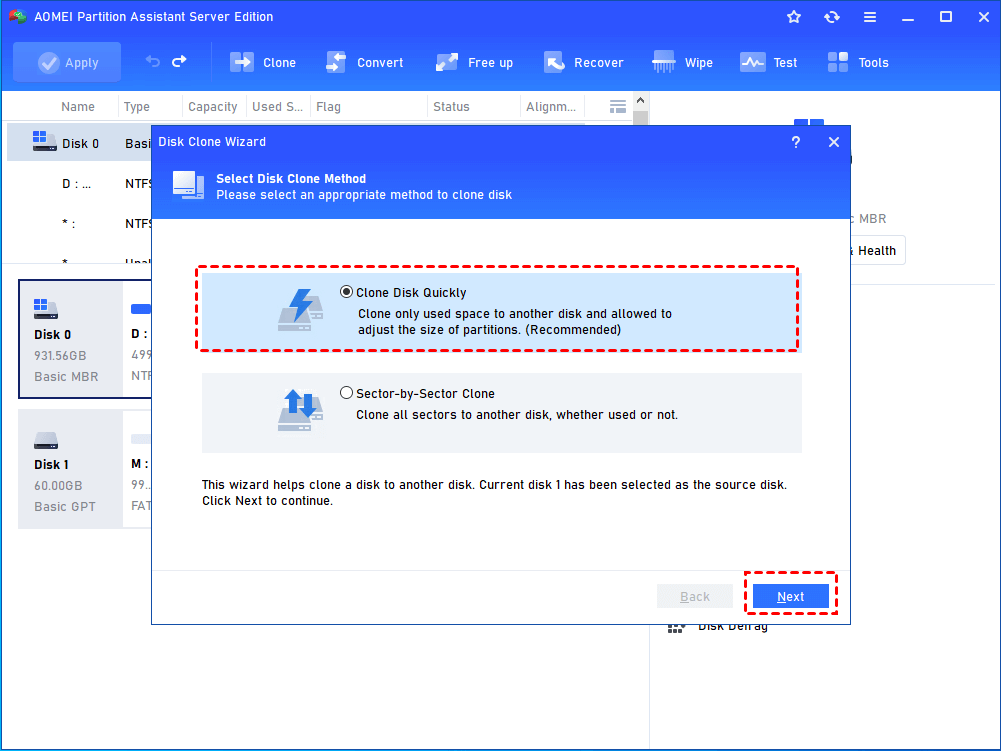
- ★Tips:
- Clone Disk Quickly - Clone only the used space of the hard disk, which consumes less time. The target hard disk can be smaller than the source disk.
- Sector-by-Sector Clone - Clone all sectors to the target disk. The target disk must be greater than or equal to the source disk.
Step 3. Select the new hard drive you have prepared as the target disk. If it is SSD, you can check “Optimize the performance of SSD” and click “Next”.

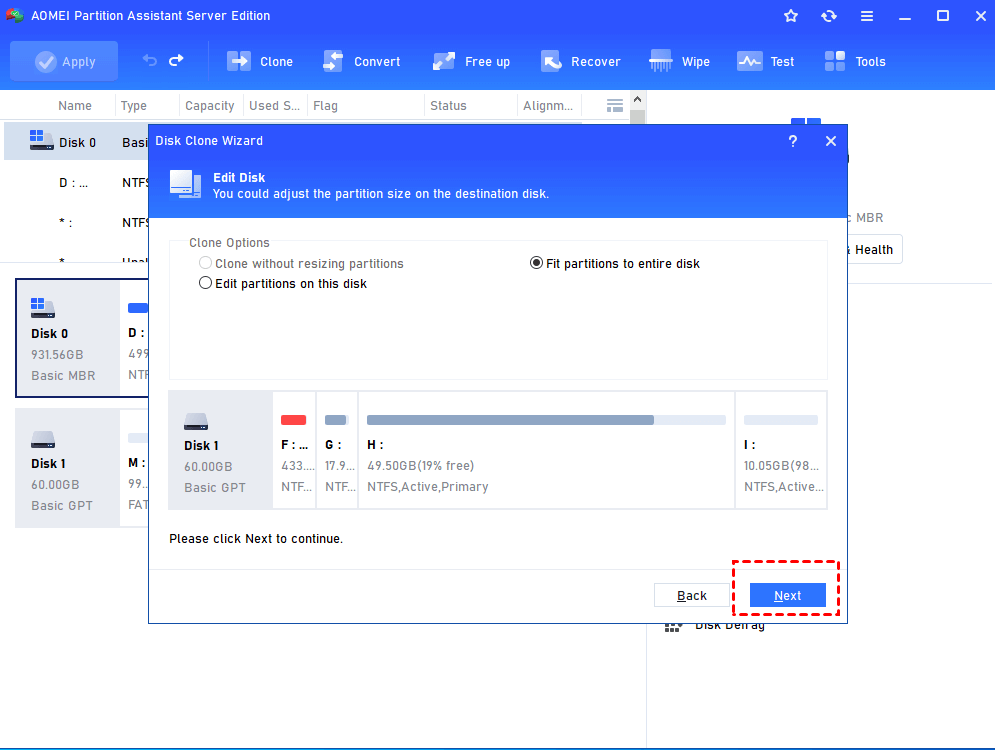
Step 4. You can edit disk size on the destination disk. When you finish, click “Next”.
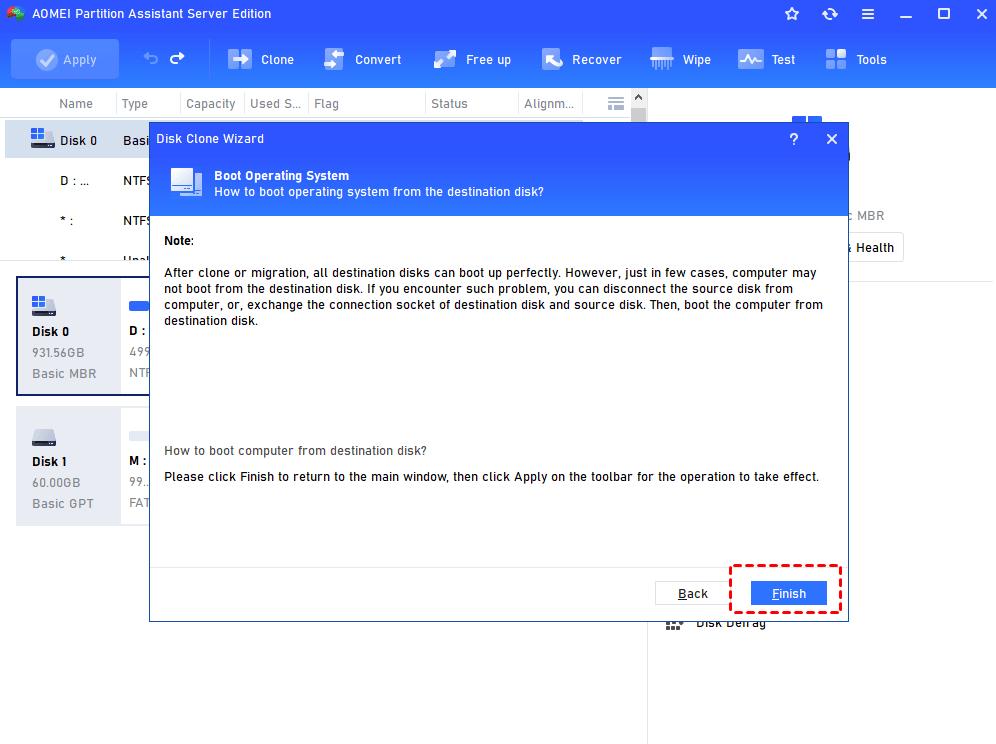
Step 5. It will show you a note about how to boot from the cloned drive after cloning. Read it and remember it. Click “Finish”.
Step 6. You will be back to the main interface, click “Apply” to submit the whole progress.
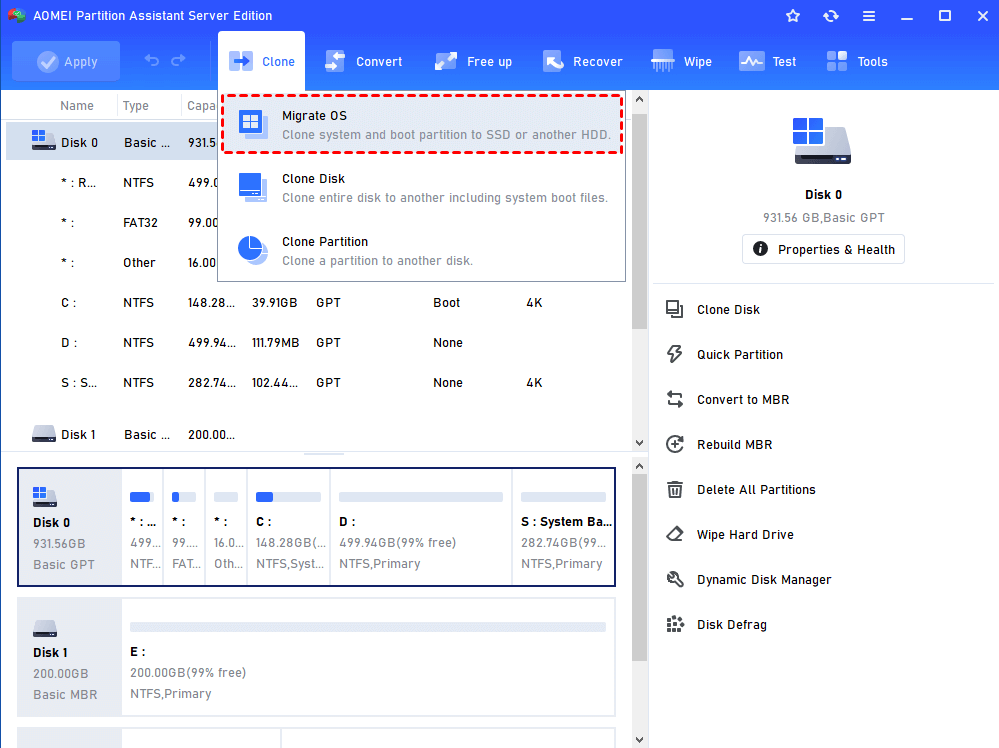
Option 2. Only OS migration
If you wish to only keep the current Windows Server, we also have “Migrate OS” function to perform system-only transferring.
3. Disk conversion
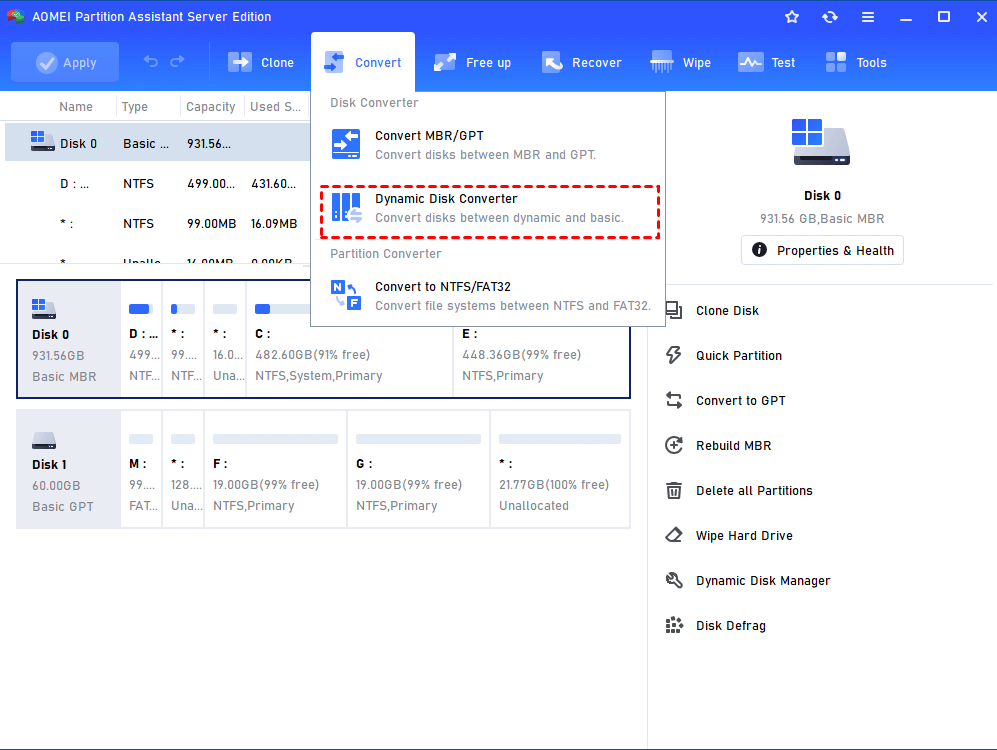
AOMEI Partition Assistant supports Basic/Dynamic disk conversion without data loss, and MBR/GPT data safe conversion. You don’t need to clean your disk at first. What’s more, you can also perform NTFS/FAT32 file system conversion without formatting your drive.
Option 1. Basic/Dynamic conversion
Option 2. MBR/GPT conversion
Right-click the disk you want to convert, and select “Convert to GPT”. (As you can see, there are partitions on the OS disk) Two windows will appear asking you to confirm the conversion. Click “Apply” to execute the pending operation.
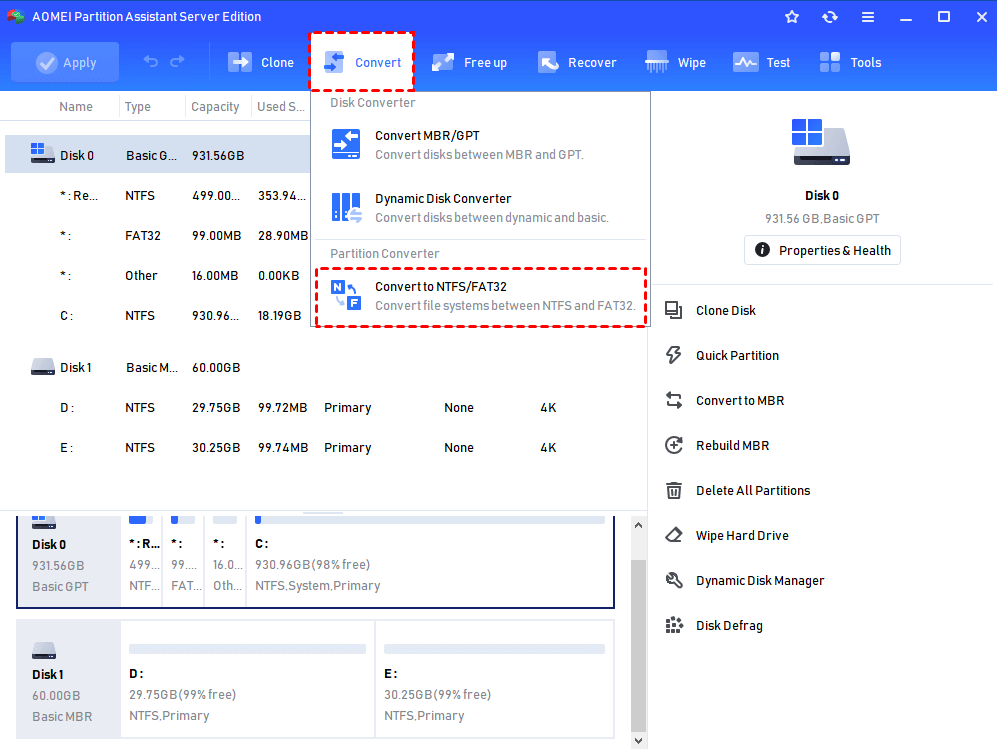
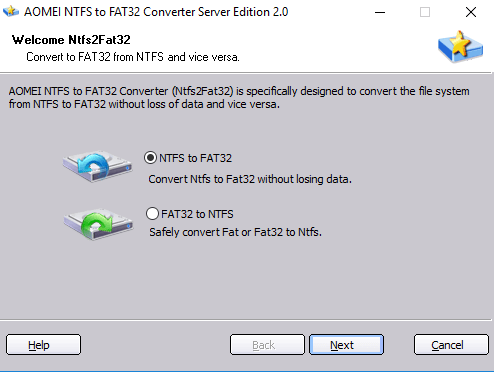
Option 3. NTFS/FAT32 conversion
Clicking “Convert” in the top toolbar, and choose “Convert to NTFS/FAT32”. You will move into the wizard to convert NTFS/FAT32 while keeping the old data on the drive. Choose your option and click "Next" button, you can perform conversion.
Besides all mentioned selections, there are:
App mover: Move installed programs to another location without reinstalling.
Clean junk files: You can easily scan and filter all junk files, large files, and duplicate files to remove.
Disk data wipe: Permanently clean all data for your SSD and HDD.
Recover data: Recover deleted/formatted/accidentally lost files from all common drives.
Disk test: You can run health check, surface test, and check partition to monitor your hard disks and drives.
…
To sum up
If you need a Windows Server Manager for disks and partitions and even more advanced disk and partition management features, now you have a better option: AOMEI Partition Assistant Server. If you need to install this software on multiple PCs and Servers, you can consider the AOMEI Partition Assistant Technician or Unlimited edition based on your needs. The Technician and Unlimited edition have a helpful function, Create Portable Version, enabling you to create AOMEI Partition Assistant to a removable device.