How to Overwrite A Hard Drive in Windows 11, 10, 8, 7
Here tells how to overwrite hard drive in Windows 11/10/8/7 via professional disk wiping software.
By Cherry / Updated on October 18, 2023
Hard drive overwrite
In general, hard drive overwrite is to record or copy new data over existing data, as in when a file or directory is updated, and data that is overwritten cannot be retrieved.
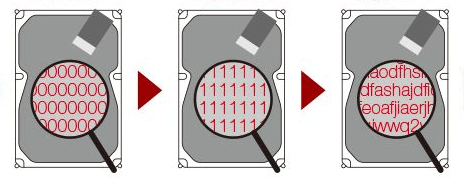
Some users delete old files or format partitions to get more black space to store new data because they think the new data will overwrite hard drive, and the old data cannot be retrieved. However, the data only is DELETED on the hard drive, not ERASED from the hard drive. This means if someone takes some actions, like making use of some data recovery tool, the deleted files or data will be tracked back.
Therefore, we suggest users overwrite the disk not just delete all data before they sell or borrow your disk to someone else. That would be safer for your privacy.
How to overwrite a hard drive securely
However, hard drive overwrites may decrease its performance. Because no matter HDD (hard disk drive) or SSD (solid-state drive), the lifespan has a limit. Thus, only if your hard drive performance is not well, or you want to sell the disk, you can erase data from the hard drive to restore it to factory settings and get its good performance back. Here, we'll show you 2 ways to clean data on the disk.
Way 1. Wipe the hard drive clean with Windows Diskpart.exe
Windows Diskpart.exe can help you clean the hard drive with the command line. If you are familiar with the Diskpart command, you can make use of it to clean the hard drive.
Step 1. Click Start, and type cmd in the search box. Right-click the program and select Run as Administrator. (press Win + R and type cmd in the box to open the command prompt if you are using Windows 10).
Step 2. In the command prompt, type the following commands and press "Enter" after each.
diskpart
list disk
select disk n (n refers to the disk number)
clean or clean all

Way 2. Erase hard drive securely with AOMEI Partition Assistant
Using Windows Diskpart to wipe the hard drive is a nice way. But it is more suitable for those people who know computers a lot. If you do not know much about the command line, you may meet damage because the operations on Diskpart are irrevocable. If you need a more secure way to wipe a hard drive, you can find third-party software to do it.
AOMEI Partition Assistant Professional is such a great hard drive eraser that provides you with different wiping ways for HDD and SSD. The Wipe Hard Drive is designed for erasing data from HDD, while the Secure Erase SSD is designed for erasing SSD securely. You know that the SSD is different from HDD, if you use the way wiping hard drive to wipe SSD, the SSD would be hurt. Thus, the AOMEI Partition Assistant should be the best software for cleaning your disk.
▶ If you are using HDD
If you are planning to wipe HDD, you should use the "Wipe Hard Drive" utility of AOMEI Partition Assistant.
Step 1. Install and run AOMEI Partition Assistant on your computer. it will show you all disk(s) on your computer in the main interface. Click the hard drive you need to wipe, and select Wipe Hard Drive on the right pane.

Step 2. In the following window, choose a way to wipe your hard drive clean and click OK.

Step 3. Finally, you will back to the main interface. Don’t forget to click Apply on the toolbar. Confirm the information in Pending Operations, click Proceed to execute the operation.

Those are the steps that AOMEI Partition Assistant overwrites the hard drive. Then, you can read about what should you do if you are using an SSD.
▶ If you are using SSD
The Secure Erase SSD utility helps you reset your SSD to the factory settings and restore it to its peak performance. In this way, you will not erase all data on the solid-state drive without hurting its lifespan.
Step 1. Connect your SSD to a Windows 7 computer via SATA port (since SSD Secure Erase is only workable in Windows at present). Install and run AOMEI Partition Assistant Professional. Click the SSD that needs to be erased. Click "Wipe" in the top toolbar and choose "SSD Secure Erase".

Step 2. Then, AOMEI Partition Assistant will give you a secure erase notice, read it first. And then, click Next.

Step 3. Here you need to choose the SSD you want to securely erase in the Disk list, here is Samsung SSD. Click Next.

Step 4. You may meet the problem that the SSD is in a frozen state. Follow the link “here” in the following screenshot to perform a hot swap so that you can relieve the frozen state of the SSD.

Step 5. After relieving the frozen state, click Next to continue. Wait till the progress is finished.
To sum up
Hard drive overwriting isn’t a difficult thing. The difficulty is how to erase the hard drive without hurting it. Fortunately, the AOMEI Partition Assistant can achieve that. Apart from securely erasing hard drives, this versatile tool supports more operations for how to manage the hard drive well. For example, it allows you to initialize disk, format partition, repartition hard drive or recover lost data, etc. And if you need, you can choose the Server Edition to manage your Server machine.

