[100% Safe Way] How to Clone OS to NVMe SSD
Some users want to clone OS to NVMe SSD to improve PC performance. But during this process, any mistakes may cause data loss or OS crash. In this post, you’ll learn how to use a professional NVMe cloning software to safely clone OS.
By Lucas / Updated on April 7, 2024
Overview of NVMe and M.2
NVMe stands for Non-Volatile Memory Express. It is a PCIe interface protocol designed specifically for accessing storage media, such as SSDs, over a PCI Express (PCIe) bus. NVMe was developed to leverage the low-latency and high-speed capabilities of PCIe, providing significantly faster data transfer speeds compared to traditional storage interfaces like SATA.
M.2 refers to a form factor for solid-state drives and other expansion cards. It's a small, rectangular-shaped card that connects directly to the motherboard. M.2 can support various interfaces, including SATA and PCIe.
🌟 The key difference between M.2 and NVMe lies in their functions:
1. M.2 is a physical form factor, determining the size and shape of the drive or expansion card.
2. NVMe is a protocol optimized for high-speed data transfer, specifically designed to take full advantage of the PCIe interface, offering faster performance compared to traditional storage protocols like SATA.
Since data can be connected directly to the CPU via the bus, memory is not required to make a call to the hard disk; consequently, the entire operation runs more smoothly and quickly.
So, if you plan to clone OS to NVMe SSD for performance improvement, setting M.2 NVMe SSD as a boot drive is your best choice.
What you need to know before cloning OS to NVMe disk
No matter you want to clone HDD to NVMe M.2 SSD or just want to clone old NVMe to a new one, you need to know some requirements before cloning.
The majority of devices have had an NVMe driver integrated since Windows 8.1, including Windows 11 and Windows Server 2016. NVMe is, so to speak, the new industry standard for desktop and laptop computers, servers, and even next-generation gaming consoles.
Therefore, to enhance the performance of Windows 8, 8.1, Windows Server 2008 (R2), 2012 (R2), and 2016, one may utilize the clone OS to NVMe M.2 feature, which is compatible with all supported systems. To utilize an NVME drive with Windows 7 or older systems, downloading an NVMe driver from the SSD manufacturer's website is a prerequisite.
Here are what you may need:
1. Modernized computer hardware
NVMe may be compatible with older computers; however, it operates more efficiently with Skylake and subsequent chipsets.
2. A slot for M.2 PCI-E x4
If your motherboard was introduced for an extended time and fails to satisfy the requirements, a PCIe x4 adaptor might be necessary.
3. UEFI firmware
Booting from an NVMe SSD is exclusively feasible on UEFI-enabled systems.
4. UEFI starting procedure
Change the BIOS boot mode from Legacy to UEFI if your computer boots in Legacy mode; this should be done after transferring Windows 10/11 to the NVMe drive.
Choose a reliable NVMe cloner to clone OS to NVMe SSD
Selecting the right drive cloning software is crucial for a seamless and efficient transition. We strongly recommend using AOMEI Partition Assistant Professional, which is equipped with a comprehensive set of features designed to ensure a smooth drive cloning process while also optimizing the performance of your SSD. By utilizing this software, you can significantly reduce the time and effort required, making the entire experience more convenient and efficient.
1. The software provides a "Disk Clone" feature that allows you to easily transfer data from a larger disk to a smaller SSD, as long as the SSD has enough storage capacity.
2. The software includes a handy feature called "Migrate OS" that specifically enables you to transfer just the operating system to an NVMe SSD.
3. To enable your NVMe SSD to boot your computer, it is necessary to initialize it in the GPT partition style, as NVMe drives are only compatible with UEFI boot mode. AOMEI Partition Assistant can clone from one type of disk to another, ensuring that the destination disk is bootable. This means you can clone from a GPT disk to another GPT disk, or from an MBR disk to a GPT disk.
Step-by-step guide to clone OS to NVMe SSD
Before you clone OS to NVMe SSD, please keep in mind that all of the data on the target NVMe SSD will be overwritten. If you haven’t wiped your NVMe SSD, you can use “SSD Secure Erase” to clean it. The new NVMe SSD needs to be initialized, so you can also initialize it before cloning.
Note: If you're looking to clone NVMe to NVMe SSD but your computer only has one slot, there are a couple of options available. You can utilize an M.2 to PCIe adapter to connect the second drive, or clone Windows to an external hard drive, swap out the old NVMe SSD with the new one, and then clone the system to the new NVMe SSD using a bootable USB.
Now, let’s see how to clone OS to NVMe SSD.
Option 1. Clone only OS to NVMe SSD
Step 1. Connect your NVMe SSD to the M.2 PCI-E x4 slot and boot your computer.
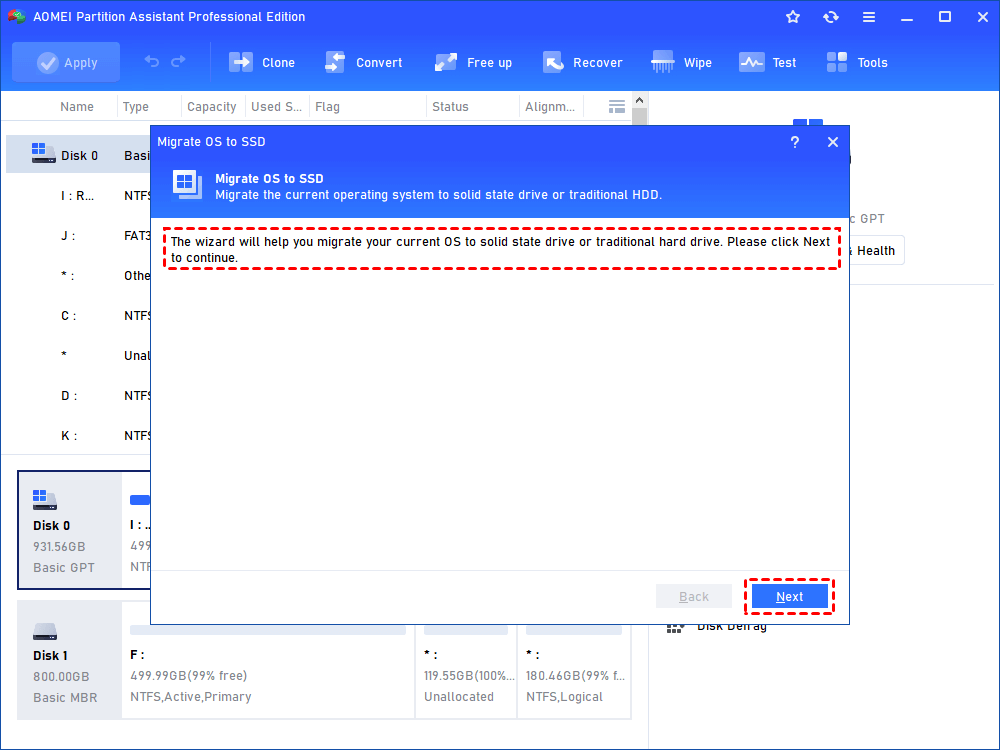
Step 2. Install and launch NVMe cloning software. Click on “Migrate OS” under "Clone" menu. You’ll see an introduction about this wizard, read it and click “Next”.

Step 2. Select the unallocated space on SSD as the destination location and then click “Next”.

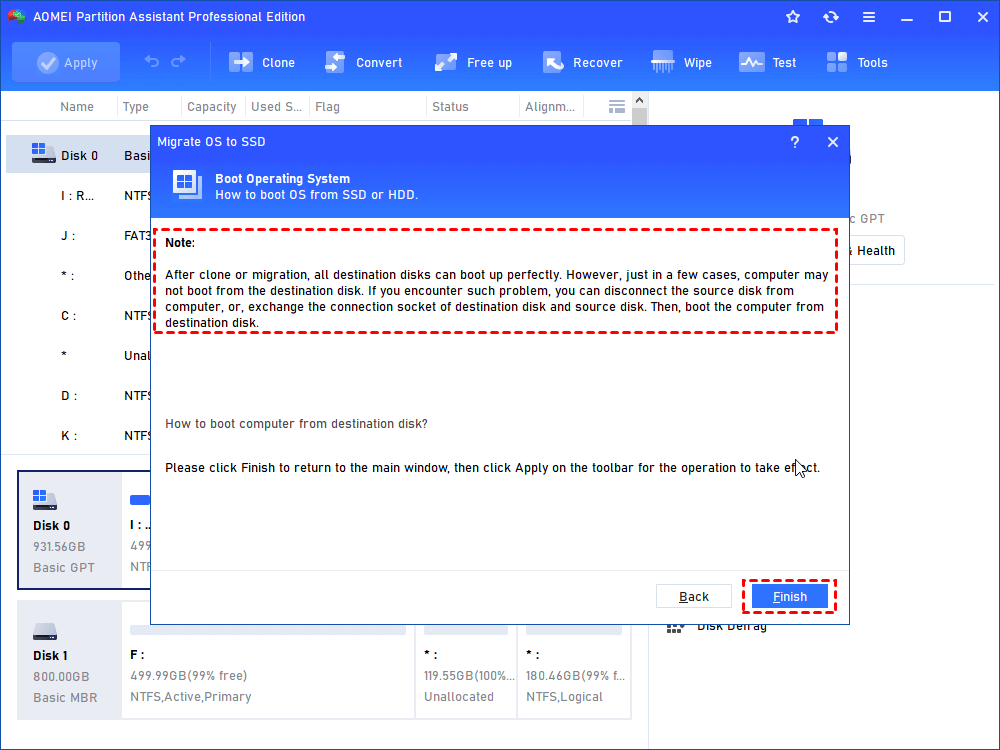
Step 3. Resize the system partition and change the drive on this page. Then a note on how to boot Windows 10 on SSD will pop up. Keep it in mind and click “Finish”.

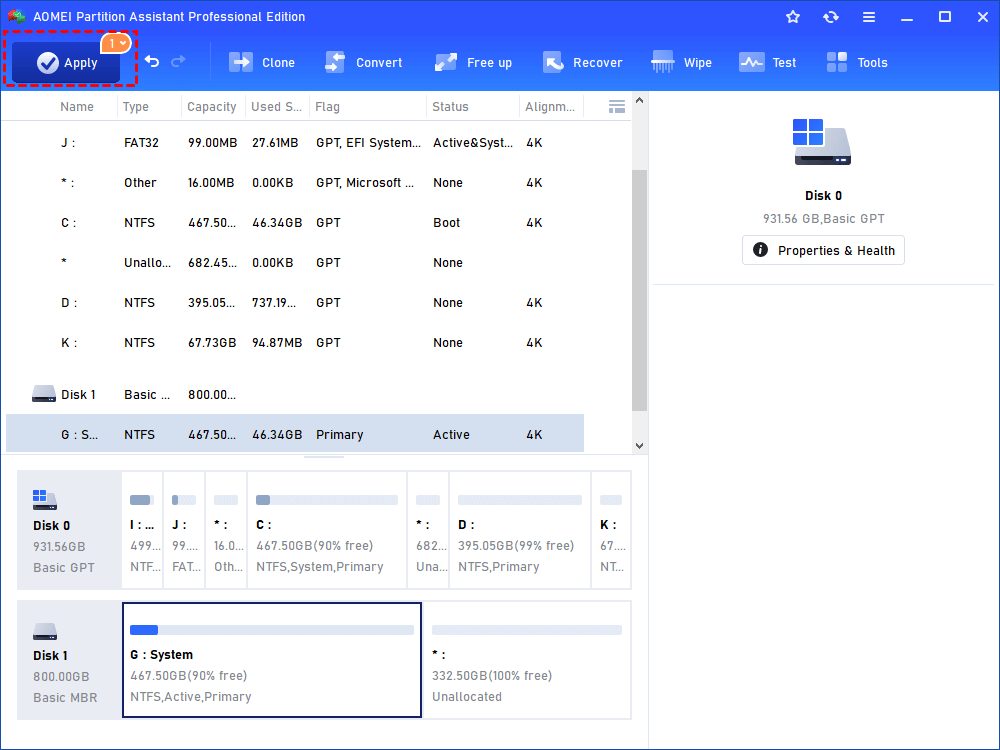
Step 5. Click ‘’Apply“to execute all operations.
Then, turn off your computer, unplug the original hard drive with the system, leave the NVMe SSD in your computer, enter BIOS to change boot settings, and boot the computer from this SSD.
Option 2. Clone the whole HDD/SSD/old NVMe disk to new NVMe SSD
If necessary, you have the option to clone the entire disk to your NVMe disk. AOMEI Partition Assistant Professional offers a convenient "Clone Disk" feature that allows you to replicate a disk exactly like the source disk, ensuring that all programs and the operating system can boot successfully without the need for reinstallation.
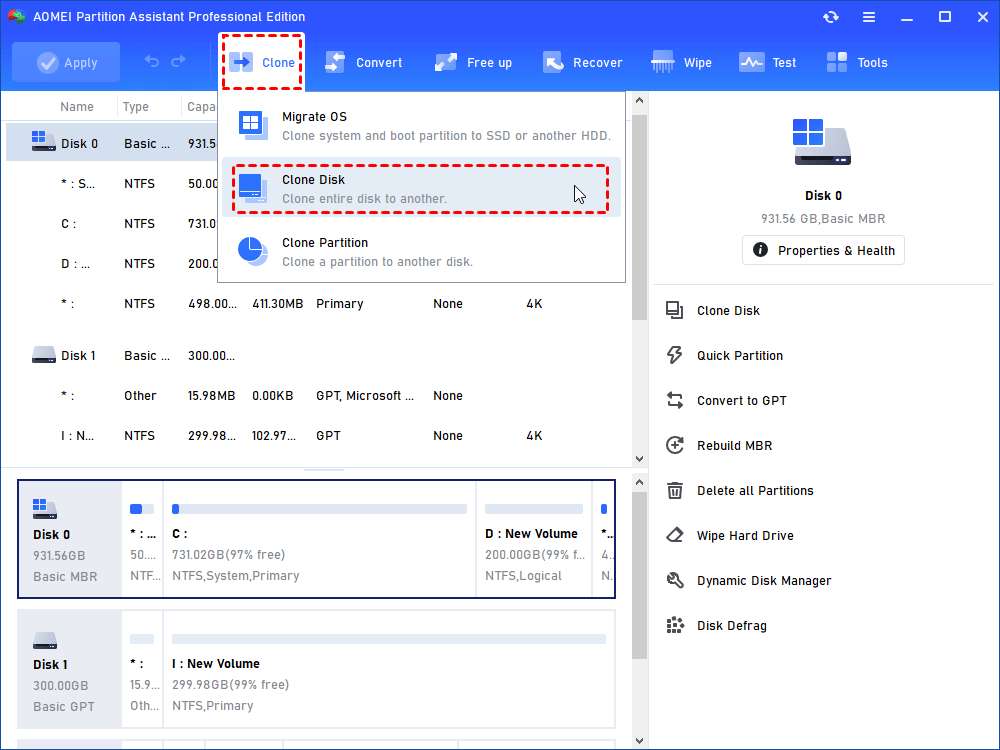
Step 1. Launch AOMEI Partition Assistant, and then click "Clone" and "Clone Disk".
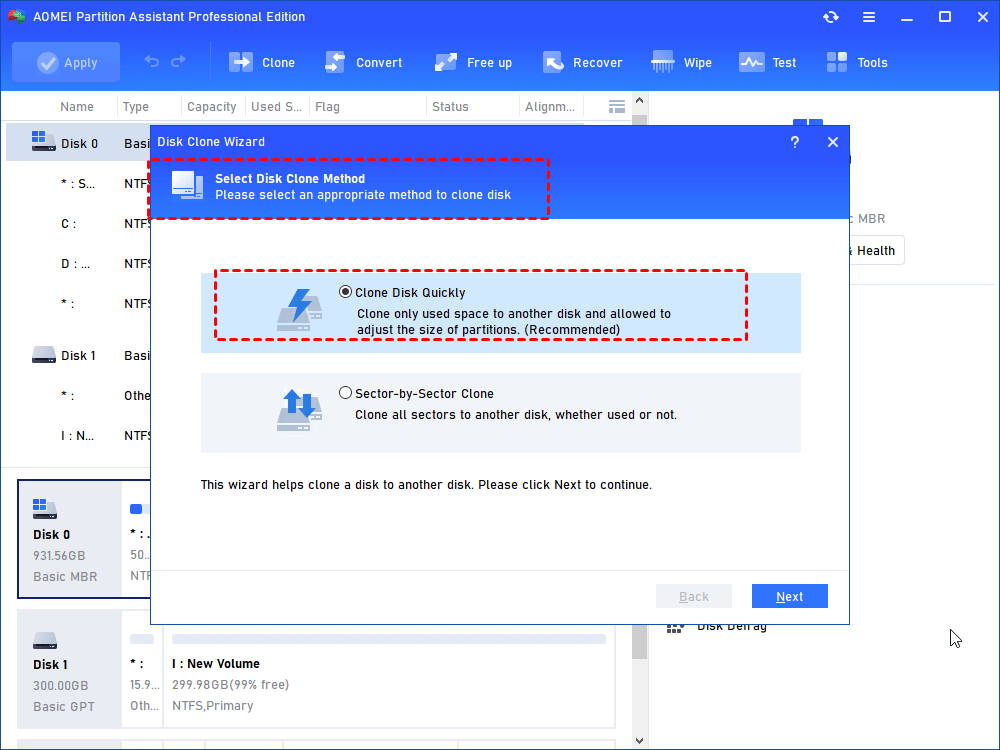
Step 2. In the pop-up window, choose “Clone Disk Quickly”. If you need to clone a hard drive with bad sectors and the capacity of the target SSD is not smaller than the source disk, please choose “Sector-by-Sector Clone”.
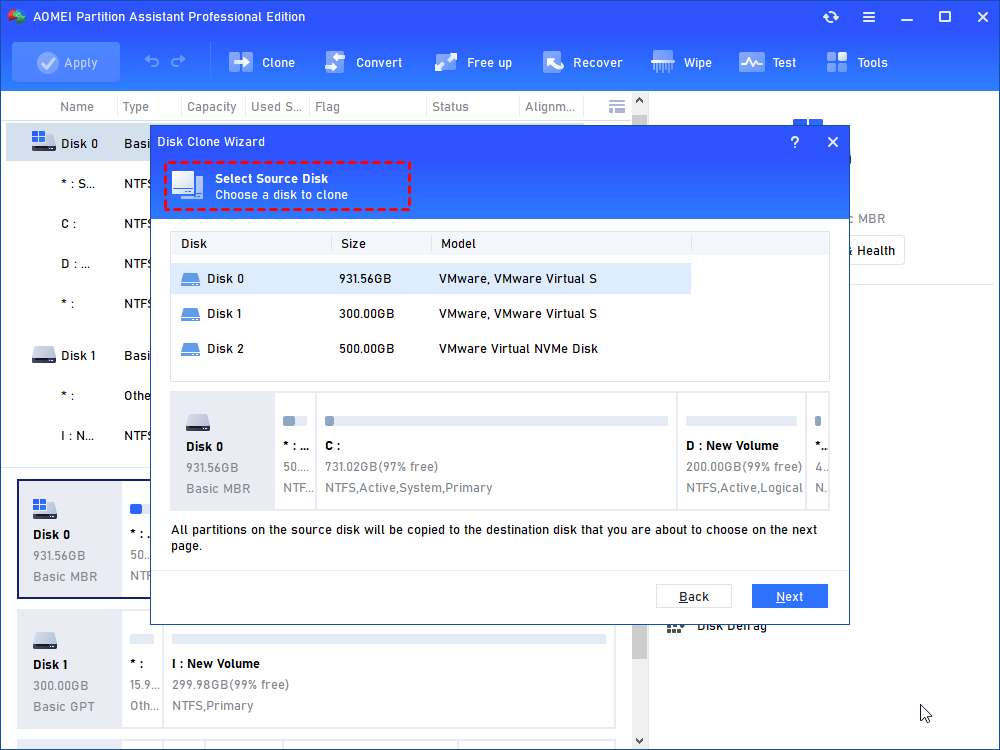
Step 3. Locate the system disk and choose it as the source disk.
Step 4. Choose the SSD as the destination disk, and tick the box before “Optimize the performance of SSD…” to make SSD partition alignment.
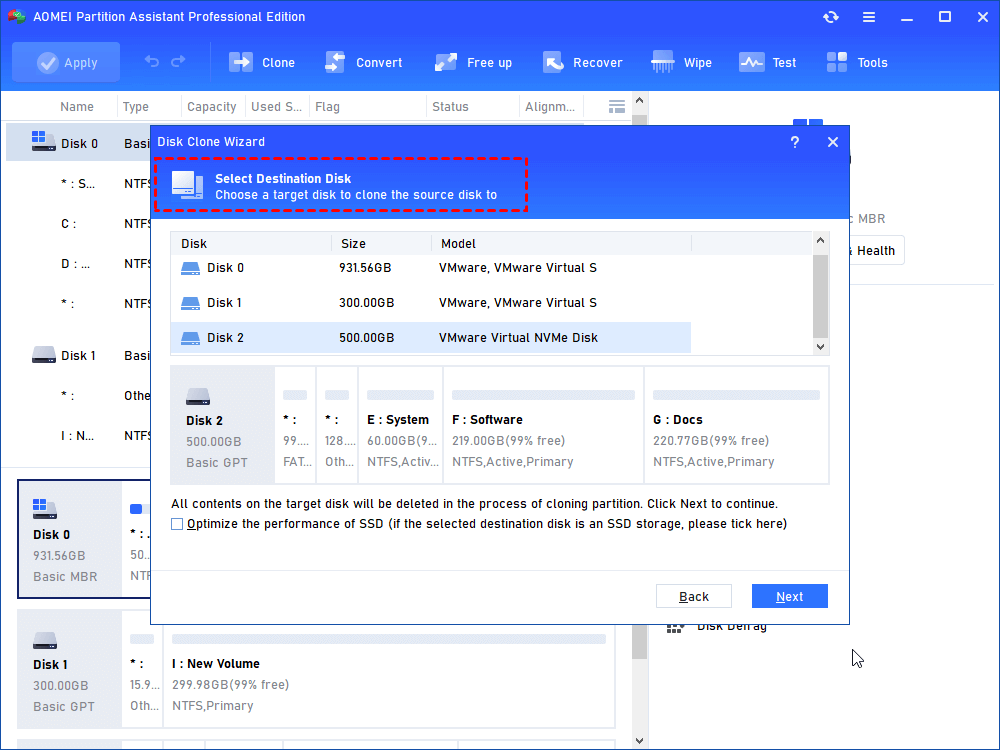
▶ Note: If there are data saved on SSD, you'll be prompted to delete all partitions and wipe all data on SSD.
Step 5. In this window, adjust the partition size on the destination SSD.

▶ Note: If you clone HDD to a smaller SSD, the option of “Clone without resizing partitions” will be greyed out.
A note will appear in the pop window, read and keep it in mind.
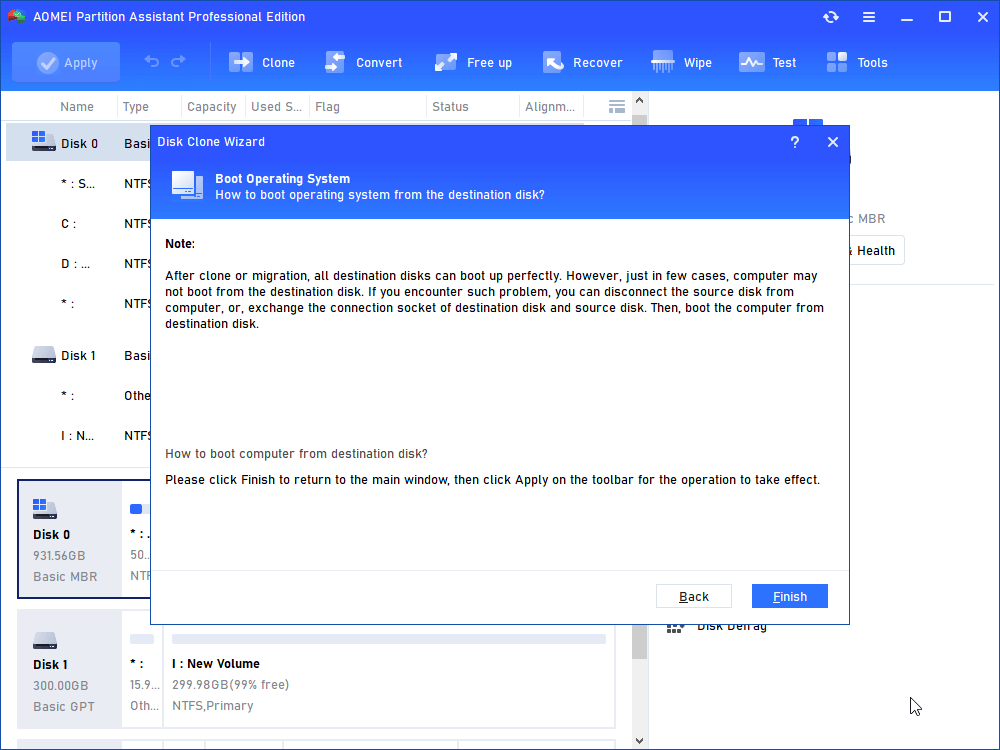
Step 6. In the main interface, to perform the cloning operation, click “Proceed” and “Apply”.

How to boot from NVMe SSD
Step 1. Power on the device and tap the [Delete] key to enter the BIOS settings menu:
[SETTINGS] → [Boot] → Set boot priority for your device.
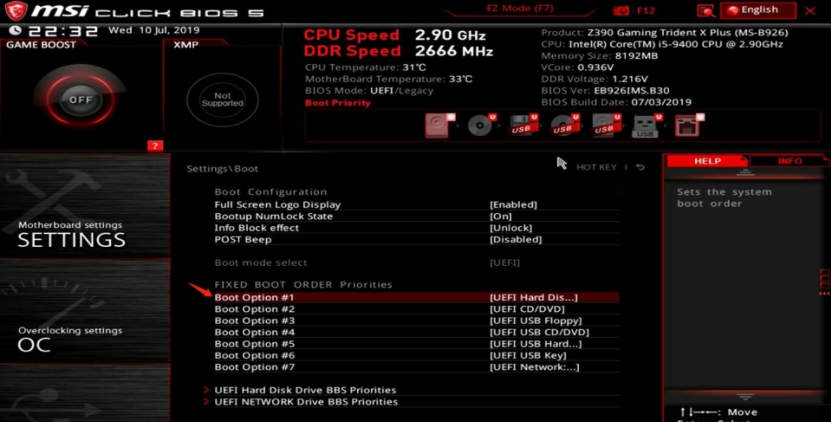
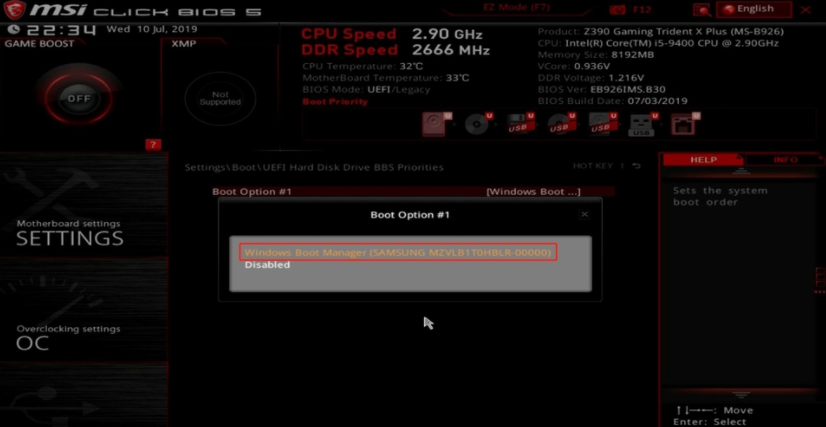
Step 3. Set [Boot Option #1] as the system disk.
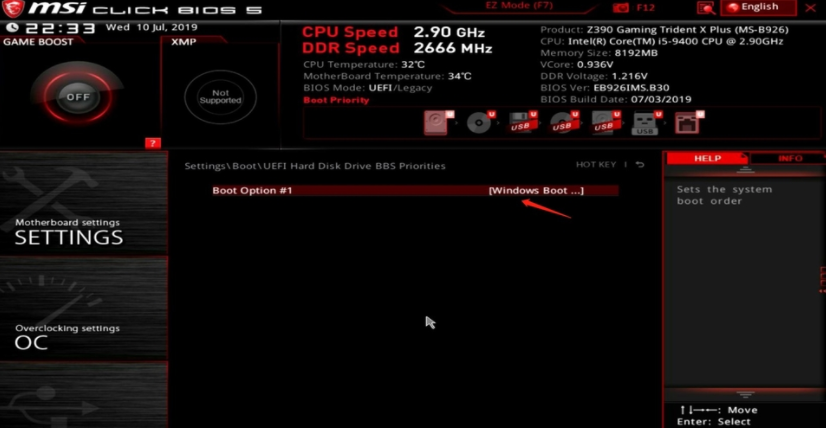
As the example in the following picture: Acer SSD is the system disk. please choose [Windows Boot Manager (P0:Acer GT500M 256G)].
Conclusion
NVMe SSDs are attracting a lot of attention due to their lightning-fast speeds and low latency. For those wanting to clone OS to NVMe disk, specialist disk cloning software like AOMEI Partition Assistant offers a streamlined process with just a few clicks. With this software, users can easily clone their entire HDD or SSD to an NVMe SSD or even selectively transfer just their operating system. This simple solution is a great way to quickly upgrade to faster storage.
Moreover, this exceptional disk management software offers a wide range of features. It allows you to effortlessly move installed applications, expand the storage space of your C drive, convert between MBR and GPT partition schemes without any risk of data loss, eliminate unnecessary files, and recover lost data, among other capabilities. The Server edition is compatible with Windows Server 2022/2019/2016/2012. Using AOMEI Partition Assistant, managing your disks becomes a breeze, resulting in a smoother user experience.
FAQs about cloning OS to NVMe SSD
1. Why should I consider cloning my OS to an NVMe drive?
NVMe SSDs offer unparalleled speed and performance with minimal latency, providing a significant upgrade over traditional HDDs or SSDs. By cloning your OS to an NVMe drive, you can take advantage of faster boot times, quicker application launches, and an overall snappier system response.
2. How do I choose the right NVMe drive for OS cloning?
When choosing an NVMe SSD for OS cloning, consider factors such as capacity, speed, and reliability. Ensure the drive has sufficient storage to accommodate your OS and all essential data. Look for drives with higher read/write speeds to enhance performance. Additionally, opt for well-known brands that offer durable and reliable SSDs to ensure the longevity of your investment.
3. Can I clone my OS to an NVMe drive with a smaller capacity?
Yes, it is possible to clone your OS to an NVMe drive with a smaller capacity, but it requires careful planning and execution. Ensure that the new drive has sufficient space for your OS and essential data. You may need to delete unnecessary files, uninstall unused applications, and perform disk cleanup to optimize space usage before the cloning process.
4. What to do before installing NVMe SSD for cloning OS to NVMe?
Before starting the process, ensure you have the following prepared:
- Check compatibility: Verify if your motherboard supports NVMe SSDs and if it has the necessary M.2 or PCIe slots.
- Choose the right NVMe drive: Select an NVMe SSD with adequate storage capacity, considering your current system requirements and future needs.
- Back up data: It's crucial to back up your important files and data, as cloning wipes the target drive clean.
- Partition the NVMe: Ensure the NVMe SSD is partitioned appropriately (if necessary) for the OS and data.
- Check for system updates: Update your operating system and drivers to the latest version for optimal performance.
- Configure your BIOS/UEFI: Before installing the NVMe SSD, access your BIOS/UEFI settings and ensure that the NVMe device is detected.
- Secure an appropriate installation environment: Turn off your device and unplug the power source. If you're installing the NVMe SSD in a laptop, ensure you have a suitable workspace and tools, as accessing the M.2 slot may require dismantling the laptop. For desktops, ensure you are grounded to prevent static electricity discharge, which could damage components.