How to Clone SATA to NVMe in Windows 11/10/8/7 [Full Guide]
Are you looking for how to clone SATA to NVMe? Read this article, you will know more about SATA and NVMe and learn how to clone SATA SSD to NVMe M.2 in Windows 11/10/8/7 without boot issues. Here is a detailed tutorial.
By Hedy / Updated on May 12, 2023
SATA vs. NVMe: What's the difference?
Why do so many users want to clone SATA to NVMe? In order to erase the confusion, let's start with some basic concepts of SATA and NVMe.
SATA(Serial Advanced Technology Attachment), also called Serial ATA, is an interface used to connect optical drives, SSDs and HDDs. Its version has evolved from the early SATA 1.0 to the current SATA 3.0. With the development of technology, SATA is very mature and has good compatibility. The read speed of SATA has upgraded to 600 MB/S.
NVMe(Non-Volatile Memory Express) is a new generation of bus interface that uses the PCI Express (PCIe) bus to connect SSDs. It allows the SSD to be directly connected to the CPU through the PCI-E channel, which can reduce data latency. With low latency, the read speed of NVMe can reach 3500MB/S, which is about 6 times faster than SATA.
Why clone SATA to NVMe?
As you can see, SATA is different from NVMe. Although NVMe costs more than SATA, many people still want to clone SATA SSD to NVMe M.2 mainly because of the faster read & write speed and lower latency. There are also other advantages that attract them to run on an NVMe, for example:
◈ Significant latency reduction. Thanks to the NVMe protocol, there is no need to read registers when executing a command. This will effectively reduce the delay of the controller and software interface parts.
◈ Performance advancement. Since the speed of NVME can be up to nearly 4GB/S, you can transfer data on it faster and get better computer performance.
◈ Lower power consumption. Automatic power state switching and dynamic energy management function greatly reduce power consumption.
◈ Extensive drive applicability. The driver applicability problem between different PCIe SSDs has been well solved by the emergence of the NVMe standard.
Things to do before you clone SATA to NVMe
It's not difficult to learn how to clone SATA SSD to M.2 NVMe. But there are some premises you need to figure out and make sure they are all done:
◉ Back up important data on the NVMe drive.
If there are files on the destination NVMe SSD, you’d better make a backup. On the one hand, all the data inside will be erased completely during the cloning process; on the other hand, this step can keep your data always safe in case any problems occur. You can use a professional backup tool like AOMEI Backupper.
◉ Make sure your computer has an M.2 slot.
This is because NVMe only can be installed on an M.2 slot. If there are M.2 slots on your PC, you can directly install the target NVMe drive into your device; if not, you can use an NVMe to USB adapter to connect the NVMe drive to your PC.
◉ Check your motherboard supports UEFI boot mode.
Another prerequisite for the success of the SATA to NVMe clone is using UEFI boot mode. You can't boot from NVMe in Legacy mode, so please check whether your target NVMe SSD is partitioned as GPT. If your NVMe is new, you can initialize the disk to GPT first; if the NVMe is an MBR partition scheme, you can convert MBR to GPT before or after the clone.
◉ Download disk cloning software.
Cloning hard drives via Command Prompt is available but time-consuming and complicated. Using a reliable and professional disk clone utility can save you a lot of time and efficiency. We recommend AOMEI Partition Assistant Professional because of the versatility it possesses.
It's designed for almost all editions of Windows 11/10/8/7 and works for all brands and forms of hard drives and SSDs. So it will help you clone SATA to NVMe without losing any data and more importantly, the clone result guarantees a bootable Windows operating system so you don't need to worry about the cloned SSD won't boot issue.
♦ Other promising features of AOMEI software:
◇ It allows you to clone only used sectors, which means you can not only clone smaller disks to larger disks but also clone larger hard drive to smaller drive.
◇ It can clone both the data drive and system drive from MBR to MBR/GPT or GPT to MBR/GPT, so you can complete the clone without conversion.
If you want to clone SATA to NVMe in Windows Server 2019/2016/2012/2008/2003, AOMEI Partition Assistant Server can help.
How to clone SATA to NVMe in Windows 11/10/8/7?
With all the preparations done, you can follow the tutorial to have a free trial.
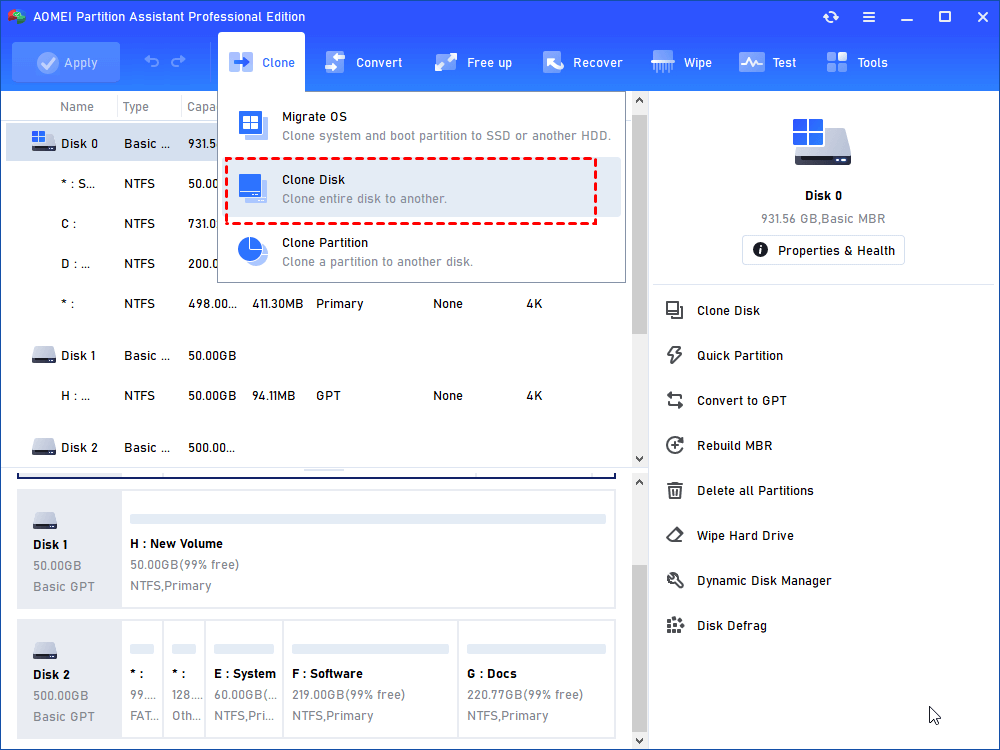
Step 1. Connect NVMe SSD with your computer, and install and open AOMEI Partition Assistant Professional. Click “Clone Disk” in the right menu.
Step 2. Select a disk clone method as you like, Here we take "Clone Disk Quickly" as an example.
Note: "Sector-by-Sector Clone" will clone all the sectors on the source disk to the new one which requires the destination disk to have larger space than the original disk.

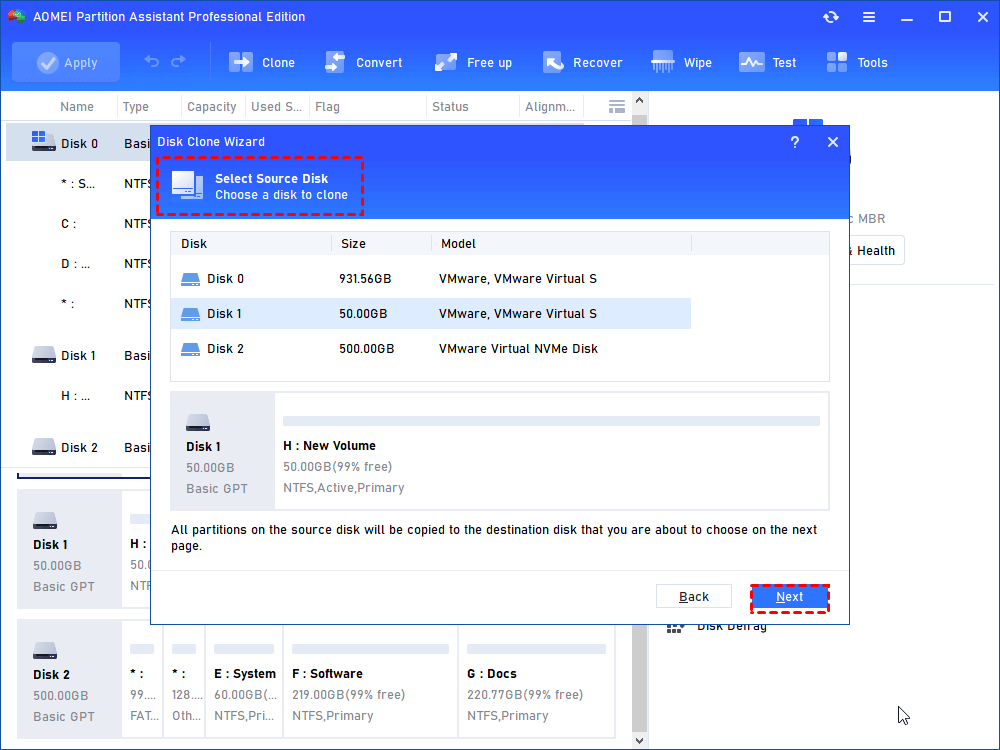
Step 3. Select the SATA drive as the source disk and click "Next".
Step 4. Then select NVMe drive as the destination disk and click "Next". Tick "Optimize the performance of SSD" to make SSD 4K alignment, which can accelerate its reading and writing speed.

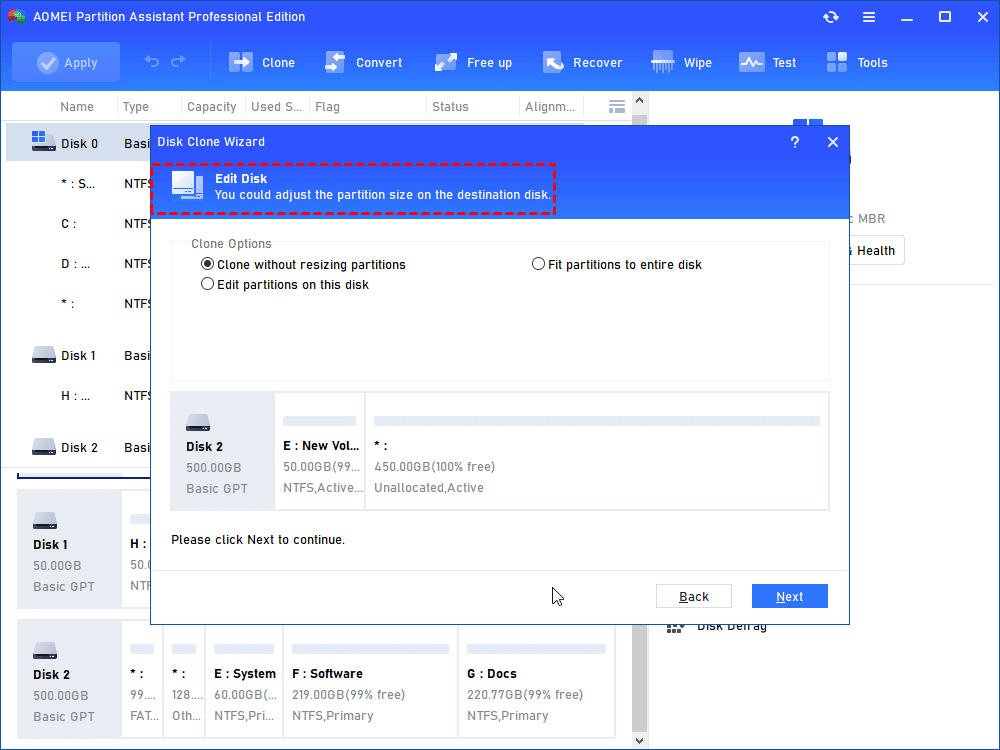
Step 5. In the new windows, you can resize the partitions on the target drive. Select the one you like and click "Next".
● Clone partitions without resizing partitions: all the partitions cloned into the new NVMe SSD will not be changed in both size and location.
● Fit partitions to entire disk: the cloned partitions will be adjusted automatically to fill the entire space of the new NVMe SSD.
● Edit partitions on this disk: you can change the partition size as you like. If you don’t know how to do it, just keep the default setting.
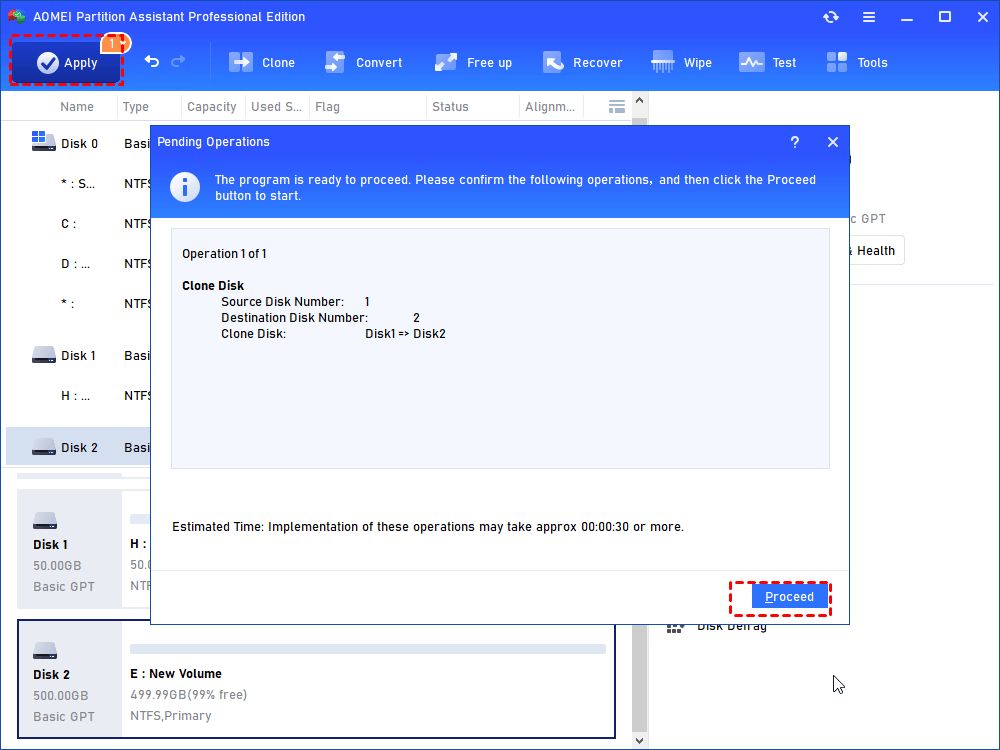
Step 6. After reading a note about how to boot from the cloned disk, click "Finish" and then click "Apply" to clone SATA SSD to NVMe M.2.
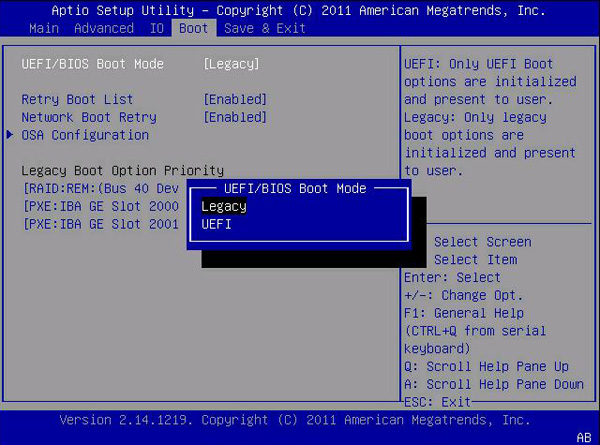
If you want to boot your computer from the NVMe SSD, you need to restart your computer to change the boot order and then change Legacy to UEFI boot mode. Just press the functional key (usually F1, F2, Delete, Esc )to enter the boot interface to change it.
Conclusion
This passage gives you a full guide on how to clone SATA to NVMe. AOMEI Partition Assistant Professional provides you with an easy and effective method to transfer data and operating system between disks with different sizes and partition styles. It is a powerful cloning tool you can’t miss.
Moreover, this software offers a range of other features that manage your disks better such as recovering lost partitions, migrating only OS to SSD, adding space to C drive, moving folders to a different drive, and more.