[Stepwise] Clonezilla Clone Larger Disk to Smaller Disk
Sometimes, you may want to clone larger hard drive to smaller one for some reasons. Here, we’ll show you how to use Clonezilla clone larger disk to smaller disk, and more importantly, bring you an easier alternative - disk cloning software AOMEI Partition Assistant.
By Hedy / Updated on May 12, 2023
Why use Clonezilla clone larger disk to smaller disk?
When it comes to disk clone, your first thought might be cloning a hard drive to a larger disk. But you can also choose to clone a larger drive to a smaller drive or SSD for slow performance issues, space limitations, and disk optimization.
And many users consider using Clonezilla clone larger disk to smaller disk. Clonezilla is a free and open-source disk imaging and cloning program. It supports system backups, disk cloning, system development, and more. Besides, it's compatible with multiple devices, like Linux, macOS, Chrome OS, and Windows. That's why so many people love to use Clonezilla clone to smaller disk.

◙ Can Clonezilla clone to a smaller drive?
However, Clonezilla clone larger disk to smaller disk only possible when the source hard drive fit the destination drive because Clonezilla only clones the used space to a second hard drive. For example, if you want to clone a disk that is consuming 100 GB of storage, the target disk must have at least 100 GB available space for a successful clone.
Tip: Due to the excellent performance and increasingly affordable price of SSD, we recommend you clone HDD to SSD using Clonezilla(whether larger to smaller or smaller to larger).
Step-by-step tutorial: Clonezilla clone larger disk to smaller disk
It's admitted that using Clonezilla clone from larger to smaller disk is extremely complicated, please read carefully what you will read. To make the process clearer, we divide it into three parts. Let's start.
Part 1. Shrink volume
As we described above, Clonezilla requires the destination partition to be equal to or larger than the source one. If your source disk has not run out, you can first shrink partitions in Disk Management to meet the recipient disk.
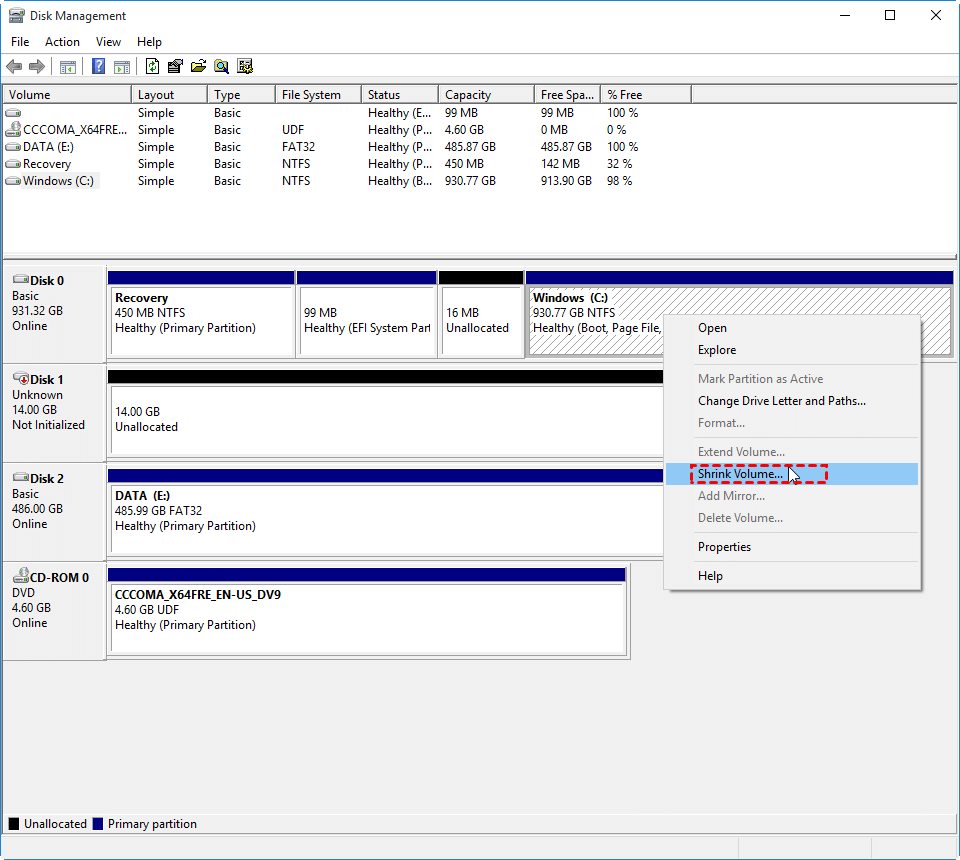
Step 1. Press "Windows+R", enter "diskmgmt.msc" and click "OK" to open Disk Management.
Step 2. On the main page of Disk Management, right-click the volume you want to shrink, and then select "Shrink Volume". Follow the prompts to finish the remaining operations.
Tip: Disk Management can only shrink the NTFS partition. If your partition file system is FAT32, you need to convert FAT32 to NTFS before shrinking.
Part 2. Create a Clonezilla Bootable USB
Then you need to download the Clonezilla ISO file and use a USB flash drive or CD/DVD to make Clonezilla bootable. Here, we take making a bootable USB drive as an example.
Step 1. Go to the Clonezilla download page. Set the parameters as the below picture shows and click the Download button on your PC.

Step 2. Prepare a 1GB USB flash drive (or larger) and find a bootable USB creator like AOMEI Partition Assistant to create a Clonezilla bootable USB.
Part 3. Clonezilla clone to smaller disk
After creating the Clonezilla bootable USB drive, follow these instructions to start Clonezilla larger disk to smaller disk cloning.
Warning: Make sure you have installed the second hard drive on your computer or connect it to your PC with a USB cable.
Step 1. Restart your computer, press a function key to enter the BIOS menu, and change the boot order to the USB drive.
Step 2. In the boot menu, choose "Other modes of Clonezilla live". In the next interface, you can choose "To RAM" to release the boot partition.
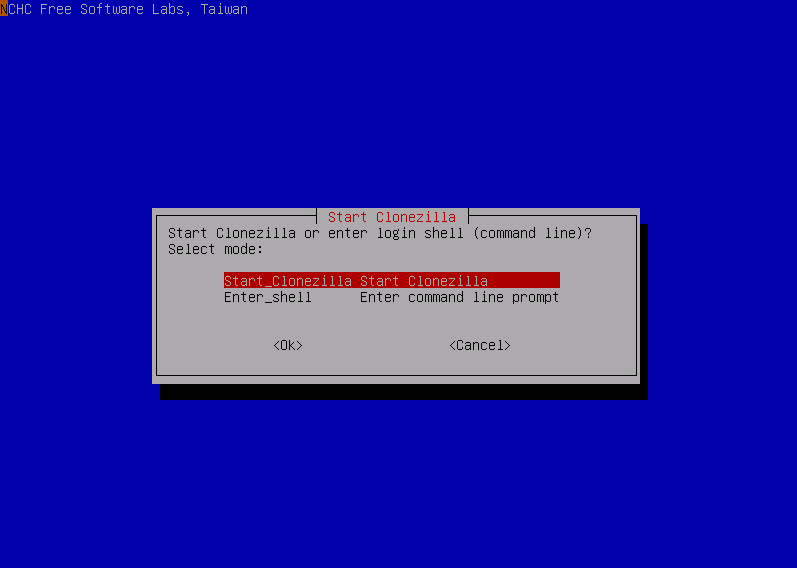
Step 2. Choose the language, and keyboard layout, and then "Start Clonezilla".
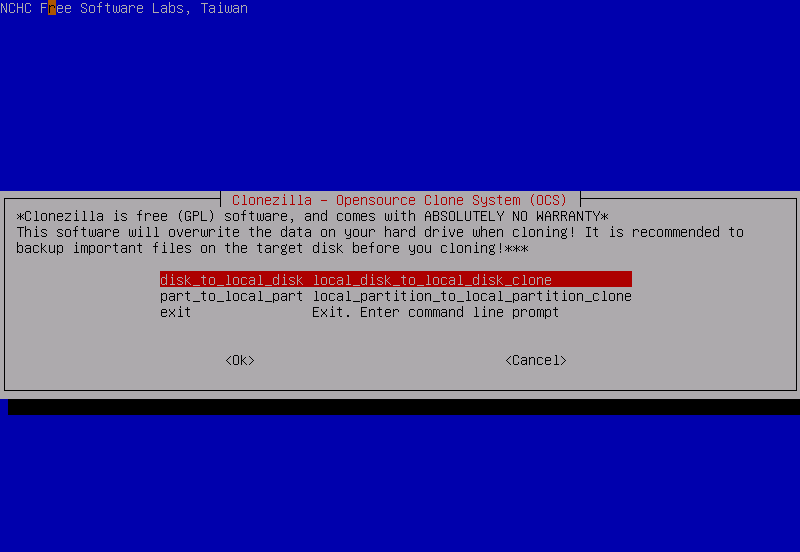
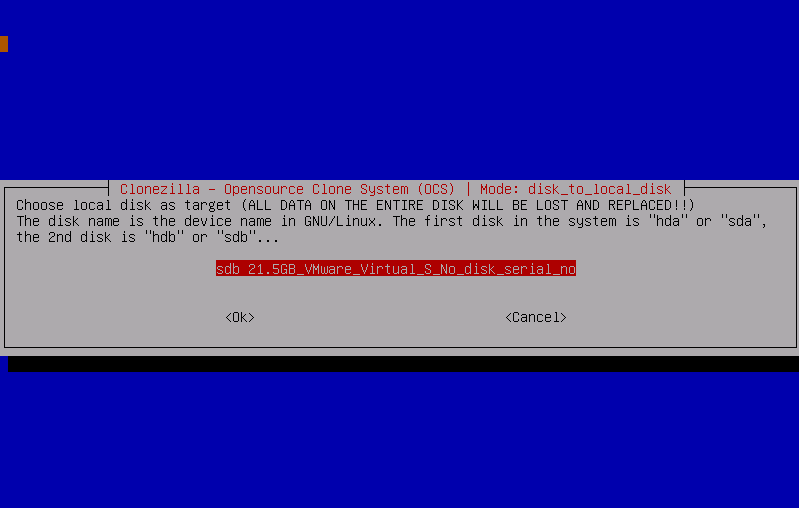
Step 3. Choose "device-device work directly from a disk or partition to a disk or partition". Then select "beginner mode: Accept the default options" > "disk_to_local_disk local_disk_to_local_disk_clone".
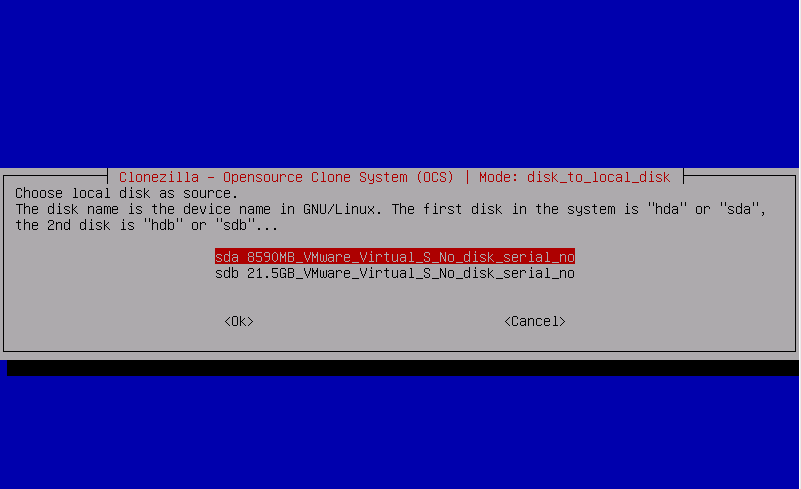
Step 4. Select the source disk and the target disk in turn now. You may be asked to check the source file system here. Just skip or check based on your needs.
Step 5. Choose EXPERT mode and enable the "-icds" option. You need to also choose the option"Resize partitional table proportionally" in one of the following menus.
Step 6. Then type in "y" to confirm and start the clone. Wait for the cloning process to be completed.
Error: Clonezilla won't clone to a smaller disk
However, a number of users complained that they didn't succeed in using Clonezilla clone larger disk to smaller disk. Here is a user case from a forum:
"I have a larger disk Disk A and a smaller disk Disk B. Disk A contains a few partitions but the total size of all the partitions is smaller than the capacity of Disk B.
I tried using Clonezilla in expert mode and selected the icds option but on starting the cloning process, the cloning stops with an error:
Target partition size(163830 MB) is smaller than source(209716 MB). Use option -C to disable size checking(Dangerous). Failed to clone /dev/sda1 to /dev/sdb1
Is there any way to make this work?"
The cloning failed issue when using Clonezilla clone to smaller disk may be caused by many factors. For instance, if the sum of the partition sizes on original disk is larger than the destination drive, Clonezilla will fail or if you miss any step, Clonezilla won’t succeed.
If you have run into the same issue or think it's quite cumbersome to use Clonezilla clone from larger to smaller disk, you can try an easier workaround. Go ahead.
An easier alternative way to clone larger hard drive to smaller drive
A powerful and practical disk migration tool named AOMEI Partition Assistant Professional should be the best alternative to Clonezilla in Windows 11/10/8/7/XP and Vista, which is widely used to clone disks between larger and smaller or between HDD and SSD.
It helps you transfer the current installation of Windows, your apps, settings, files, and more to a new drive without reinstalling or restarting the operating system. Besides, the interface of AOMEI software is easy to use, and you can follow simple steps to complete the cloning process.
And you can choose to clone the entire hard drive or clone only OS from a larger hard drive to a small drive. Here is a demo version, download it and have a try.
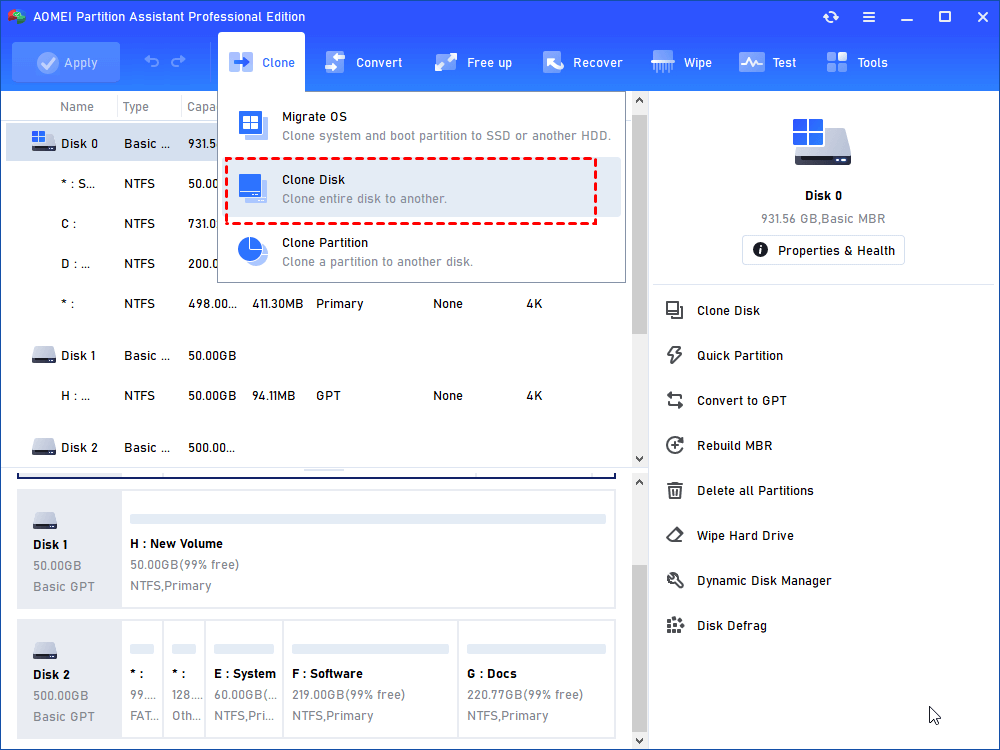
Step 1. Connect the second hard drive to your computer. Install and open AOMEI Partition Assistant Professional. Click “Clone Disk” in the right menu.
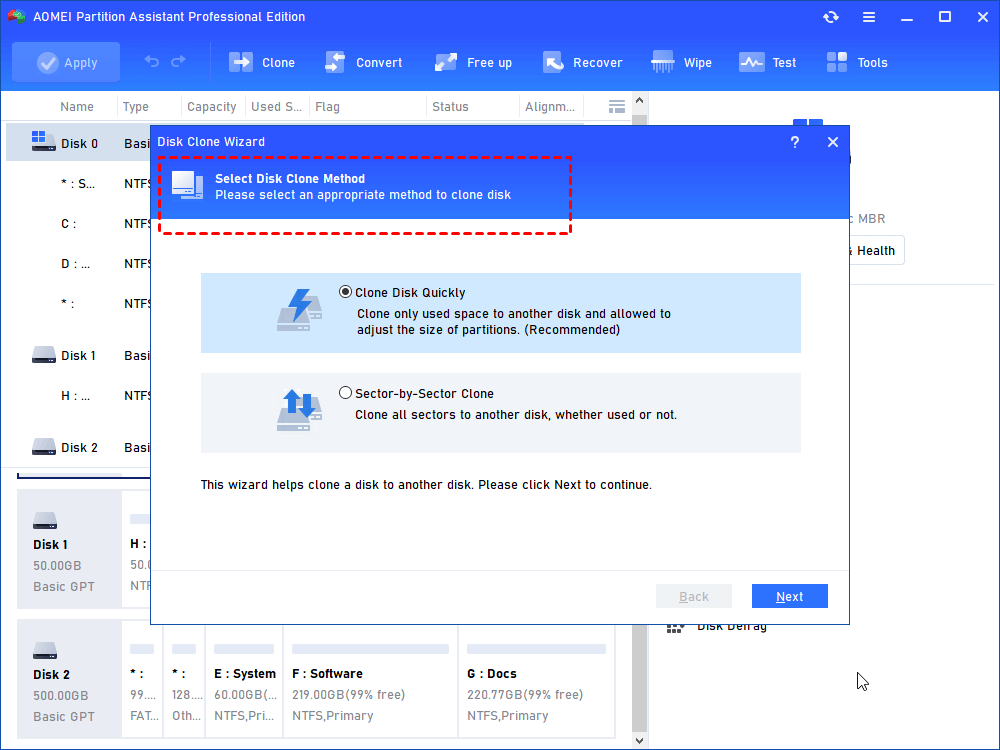
Step 2. Select a disk clone method as you like. In today's case, we choose "Clone Disk Quickly" which clone only used space to another disk.
- Notes:✎...
- Clone Partition Quickly: only copies all existing files from the source partition to the destination disk.
- Sector-by-Sector Clone: copies both existing files and lost/deleted files to the destination disk.
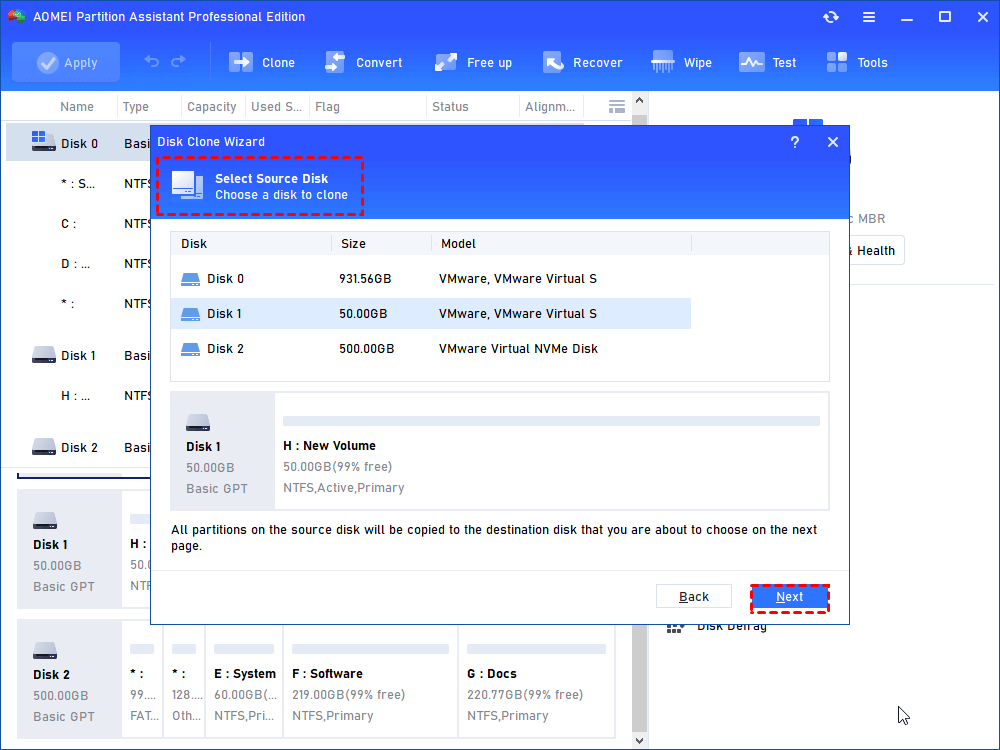
Step 3. Select the source disk and click "Next".
Step 4. Then select another drive as the destination disk and click "Next". Tick "Optimize the performance of SSD" to make SSD 4K alignment if your destination disk is SSD.

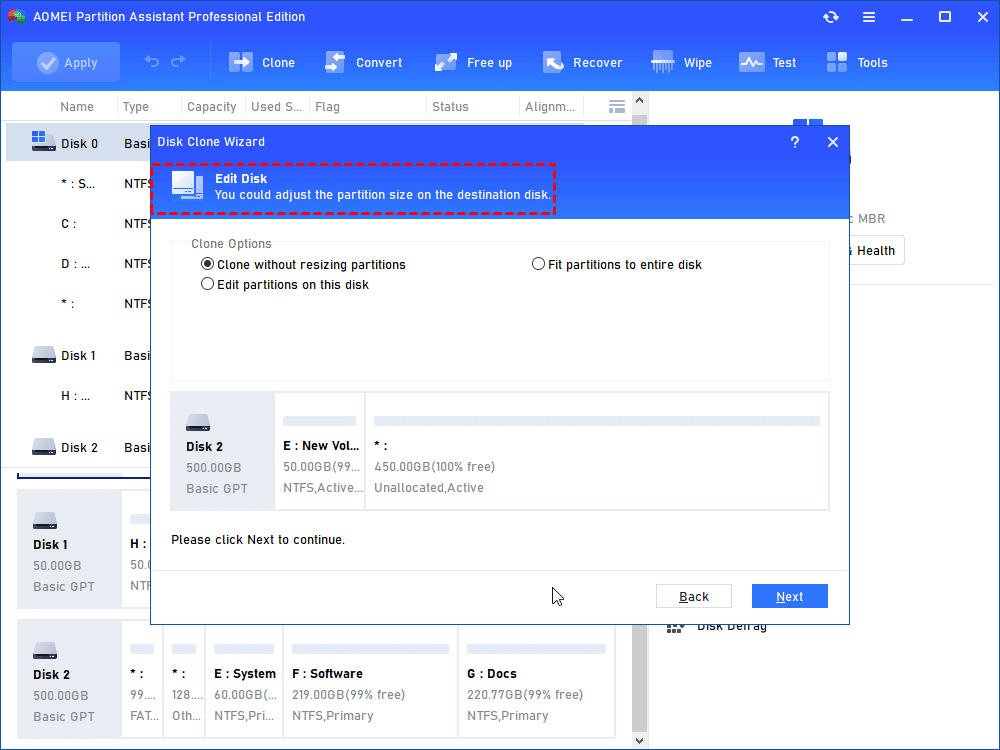
Step 5. In the new windows, you can resize the partitions on the new drive. Select the one you like and click "Next".
△ Copy without resizing partitions: The source disk configuration will be copied on the new disk with same partition size.
△ Fit partitions to the entire disk: The partitions on the source disk will occupy the entire destination disk.
△ Edit partitions on this disk: It allows you to adjust the size of partitions manually, and set the size as you like.
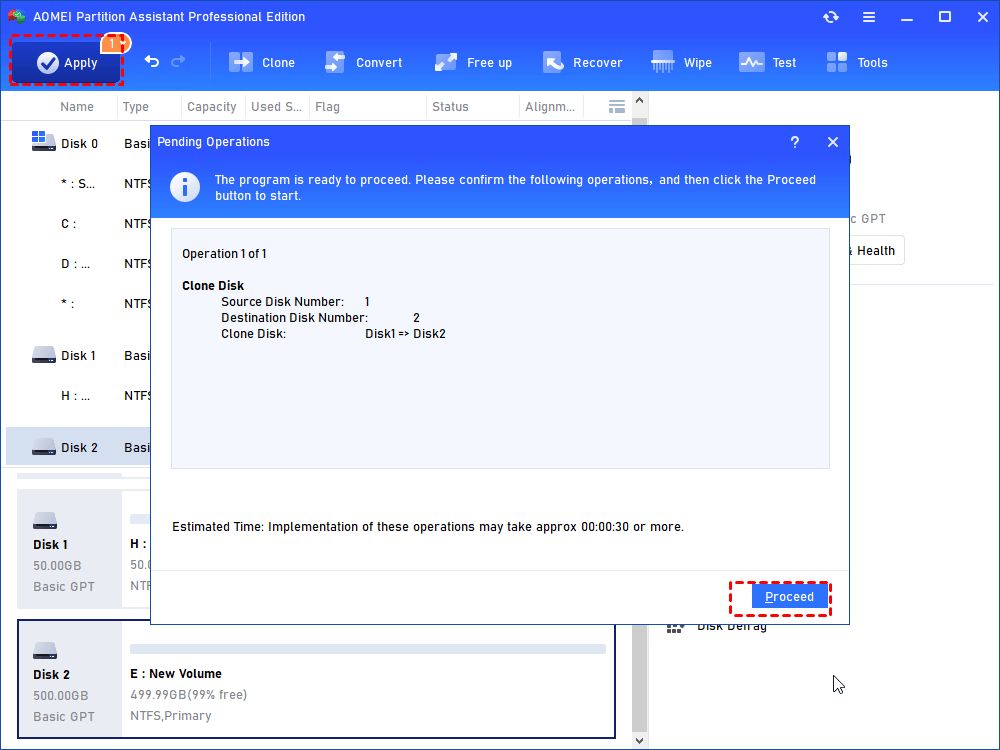
Step 6. After reading a note about how to boot from the cloned disk, click "Finish" and then click "Apply" to commit the operation.
Conclusion
In this passage, you have known how to use Clonezilla clone larger disk to smaller disk and get a Clonezilla alternative - AOMEI Partition Assistant Professional.
If you are an advanced user, you can download Clonezilla, make a bootable Clonezilla USB, and then begin to clone to a smaller disk using Clonezilla. But if you are a green hand or meet Clonezilla stops cloning issue, you can try AOMEI software to complete the clone.
In addition, AOMEI Partition Assistant has ample features you may be interested in: deleting big files to free up space, moving apps/folders from one drive to another, extending C drive for better performance, and more.