[Full Guide] How to Run Clonezilla Hard Drive Cloning
This post will show you the way of Clonezilla hard drive cloning step by step. In addition, another tool to replace Clonezilla hard drive cloning will also be mentioned.
By Dervish / Updated on May 12, 2023
About Clonezilla hard drive cloning
As we all know, Clonezilla is a free and open source disk and partition imaging/cloning program. It provides three types of Clonezilla live, Clonezilla lite server and Clonezilla SE to meet your different needs. Clonezilla live supports stand-alone backup and recovery, while both Clonezilla lite server and Clonezilla SE are used for mass deployment.
In addition, it also supports different operating systems such as Windows, Chrome OS, Linux, macOS, NetBSD, etc., which is why it is so popular among users.
Clonezilla may help you a lot when you decide to replace a small HDD with a larger one or replace HDD with SSD to upgrade your hard drive because it is capable of cloning the old drive into the new one. However, it's not always perfect, you may face some issues when cloning hard drive with Clonezilla.
● Due to the lack of a GUI, it is not suitable for all levels of users.
● The destination disk must be larger than or equal to the source disk. Otherwise, you will get a Clonezilla destination disk is too small warning.
● If there are bad sectors on the source disk, then Clonezilla may fail to clone, because bad sectors cannot be used to read or write data.
Please scroll down to learn more about Clonezilla hard drive cloning.
Cloning a hard drive using Clonezilla step by step
In this paragraph, you will learn about hard drive cloning with Clonezilla.
▶ Part 1. Create Clonezilla bootable USB
Step 1. Open the Clonezilla download page and select Download ISO file.

Step 2. Prepare an empty USB for creating a bootable Clonezilla USB.
▶ Part 2. Run bootable Clonezilla USB
Step 1. After successfully creating a bootable USB. Restart the computer and enter the BIOS settings to change boot drive.
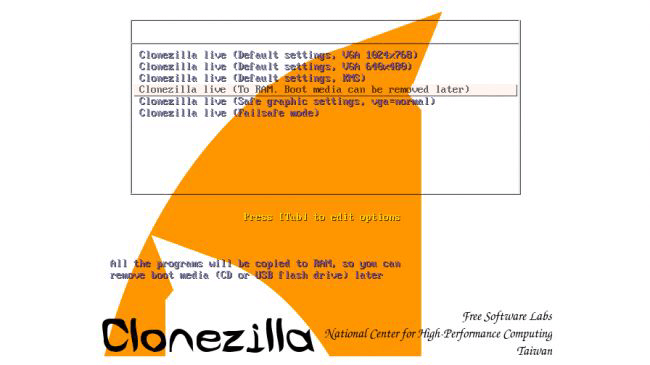
Step 2. In the boot menu, choose "Other modes of Clonezilla live". Then, you can choose "To RAM" option.
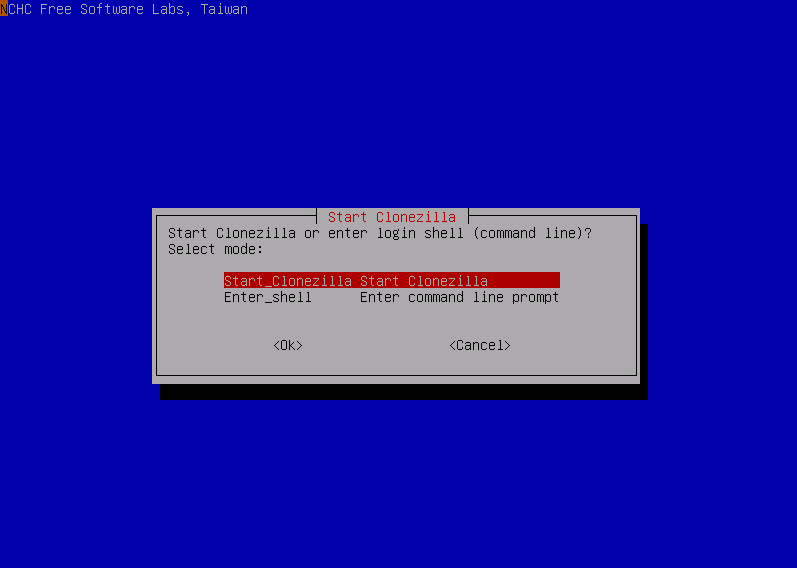
Step 3. Here, select “Language” and “keyboard layout”. Next, select“Start Clonezilla”.
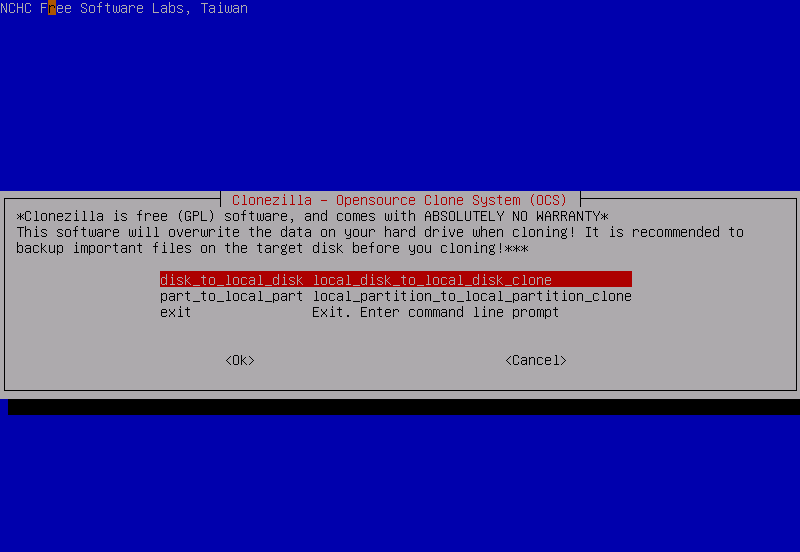
Step 4. Select "device-device work directly from a disk or partition to a disk or partition". Then select "beginner mode: Accept the default options" > "disk_to_local_disk local_disk_to_local_disk_clone".
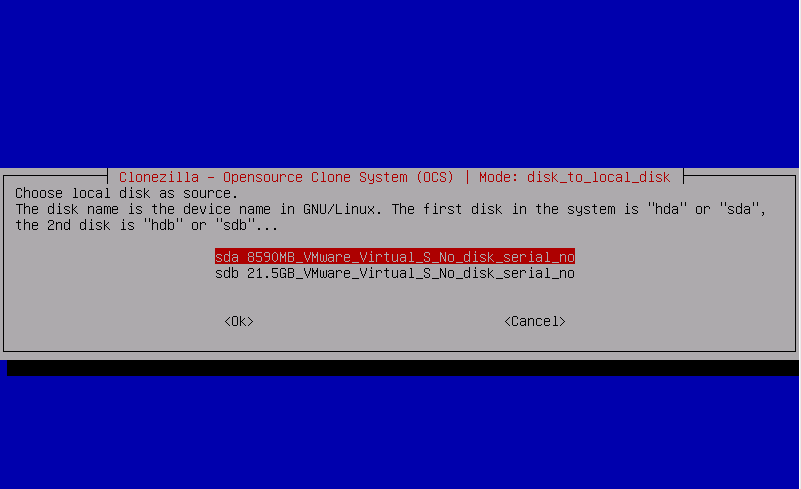
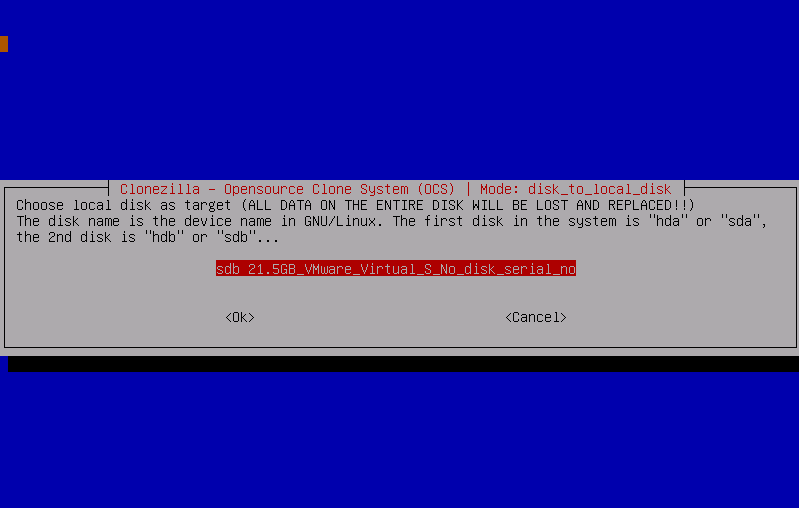
Step 5. Now, please select the source disk.
Step 6. After selecting the target disk, type "y" and press "Enter" 3 times to start cloning. Wait for the clone to complete, select "Poweroff" and your computer will stop. Then, you can use the new hard drive.
Note: As you can see, The whole process of Clonezilla hard drive cloning is more complicated, especially for computer beginners. If you are exploring an easier way to clone a hard drive, you should continue reading.
Clonezilla alternative: Clone hard drive easily and safely
Here, I strongly recommend you to use AOMEI Partition Assistant Standard. It is an all-in-one disk cloning expert, compatible with Windows 11, 10, 8, 7, XP, and Vista. It has a clear graphical user interface and can clone hard drives with just a few clicks. In addition, it has these advantages.
✦ Completely safe: It doesn't carry any bundled software and you can download it safely.
✦ Two cloning options: There are Clone Disk Quickly and Sector-by-Sector Clone. The former only clones the used part of the disk, which means you can clone a larger drive to a smaller drive. The latter supports cloning the entire disk, including bad sectors.
✦ Hot clone tech: It allows you to perform cloning tasks while running Windows. In other words, you don't have to reboot your computer to run the cloning process.
✦ Various excellent features: In addition to cloning, if you just want to migrate OS to another hard drive, you can try "Migrate OS to SSD".
- ★Tips:
- For data disk, Std Edition is enough. If you want to clone system disk, please switch to Pro Edition.
- If you are running Windows Server, AOMEI has Server Edition designed for Windows Server 2022/2019/2016/2012/2008/2003.
Before cloning a hard drive, please connect the new disk to your PC and ensure it can be detected.
Step 1. Click “Clone Disk” in the right menu.

Step 2. Here, select one cloning method according to your needs.

Step 3. In the next window, select the old disk as the source disk and select the new disk as the destination disk. Don’t forget tick the“Optimize the performance of SSD”if the destination disk is an SSD.

Step 4. In this windows, you can resize the partition on the destination disk.

Step 5. At the end, you will be taken to the main interface and to generate the operations, you need to click“Apply”.

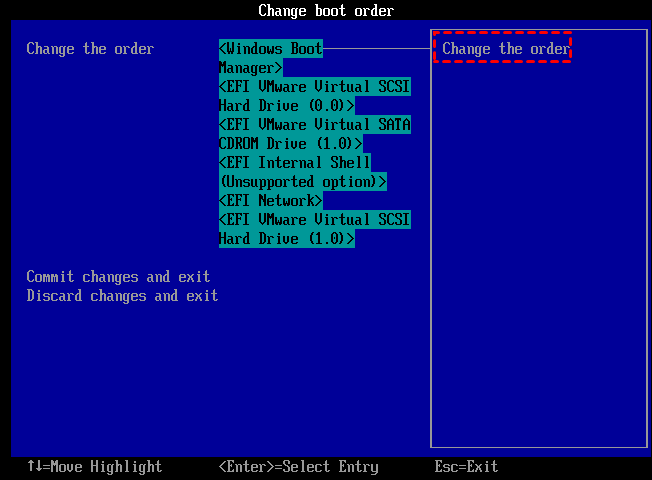
Finally, you may need to set the new disk as the boot drive if you are cloning a system disk.
Conclusion
This is the full guide on Clonezilla hard drive cloning. You can see that Clonezilla has many steps and is very complicated. Fortunately, AOMEI Partition Assistant can help you clone a hard drive easily and safely. In addition, it has more powerful functions waiting for you to unlock!