[Step-by-step Guide] How to Set up a New PC from Flash Drive?
You can learn how to set up a new PC from flash drive with step-by-step guide with pictures.
By Lucas / Updated on May 12, 2023
For many normal users, setting up a new PC is a big problem. It’s common to feel nervous when you need to fix computer problems by yourself if you’re a layman. So, here, we’ll show you how to set up a new PC from flash drive in 3 ways.
How to set up a new PC from flash drive?
- Method 1. Install Windows via bootable USB
- Method 2. Set up a computer from Windows Installation media
- Method 3. Quickly install Windows via OS migration tool
Method 1. Install Windows via bootable USB
In this method, we will show you how to install Windows 11 from bootable media. The steps are the same as Windows 10 installation, if you want to use this way to set up a Windows 10 PC, you can also follow the guide.
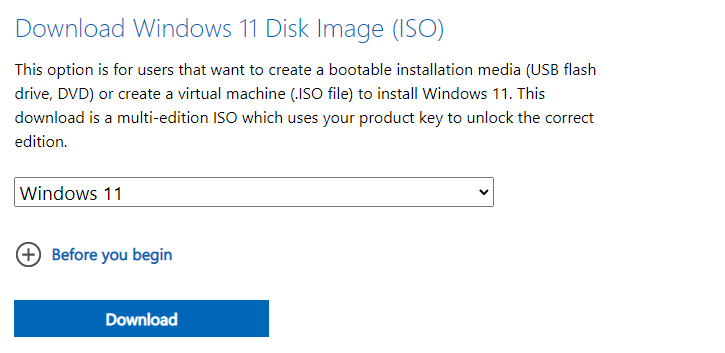
▶ Part 1. Download ISO files from Microsoft's official web
Please download Windows 11 ISO from Microsoft web to make a clean installation.
▶ Part 2. Make a Windows bootable USB in Command Prompt
Note: You need a USB with at least 8GB free space.
First, we need to clean all data on your USB
Step 1. Click “Start”, search “Command Prompt”, right-click the best match, and select “Run as Administrator” to open CMD.
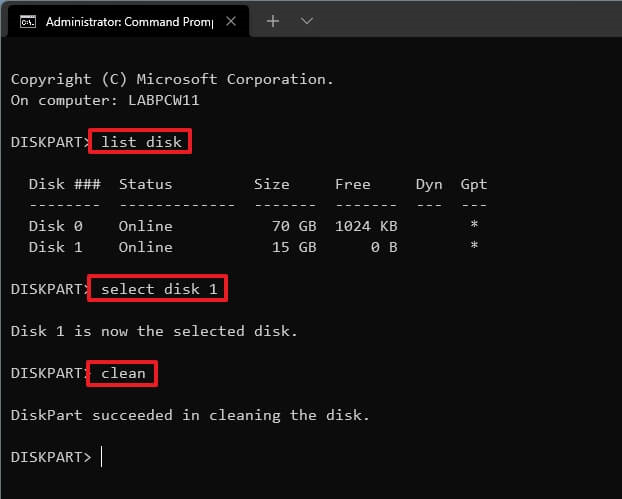
Step 2. In the CMD, please type the following commands and press “Enter” after each command:
diskpart
list disk
select disk 1 (You need to change“1” to the number of your USB)
clean
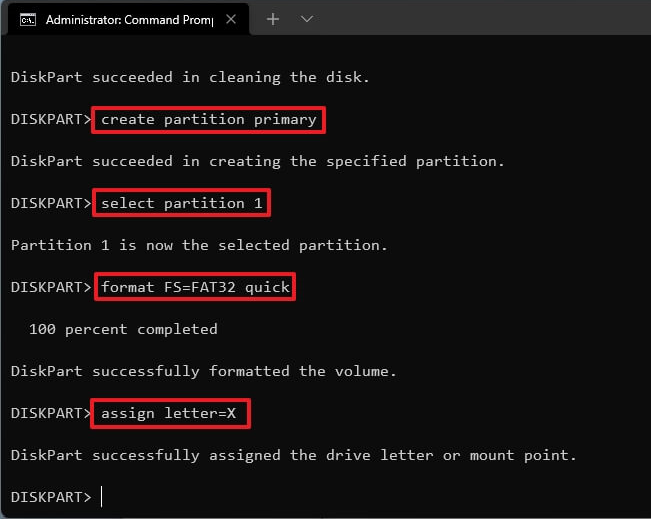
Now, let’s create a primary partition. Please type the following commands and press “Enter” after each command:
create partition primary
select partition 1
format FS=FAT32 quick (If you’re creating a Windows 10 bootable USB and you need Legacy boot, please type: format fs=ntf quick)
assign letter=X (“X” is the letter of the partition, change it to the letter you wish to use.)
exit
Now, you need to open CMD again, and type the following commands and press “Enter” after each command:
PowerShell Mount-DiskImage -ImagePath "C:\path\to\Windows11.iso"(change the “Windows 11” to “Windows 10” if you’re going to set up a Windows 10 PC, and make sure the path is right)
diskpart
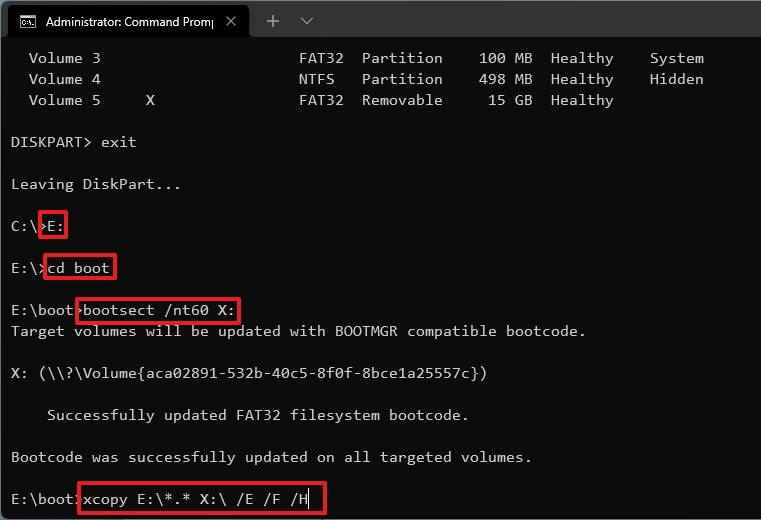
list volume
exit
E:
cd boot
bootsect /nt60 X:
xcopy E:\*.* X:\ /E /F /H (change E and X to the drives with Windows 11/10 ISO image and your USB.)
▶ Part 3. Install Windows from the Bootable flash drive
Now we can use the bootable USB we created to install Windows.
Step 1. Connect the USB to the computer, start the computer and enter BIOS, change the USB as the first boot order. Then save the change, and reboot the computer.
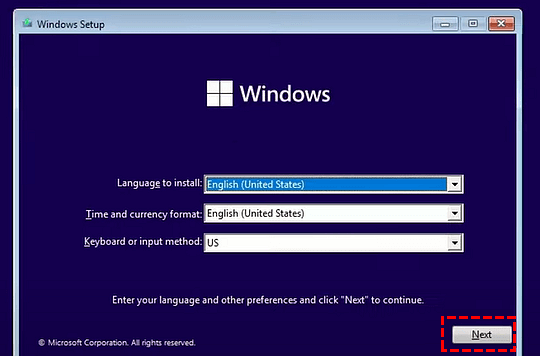
Step 2. You see the Windows Setup window, please follow the order to finish the settings.
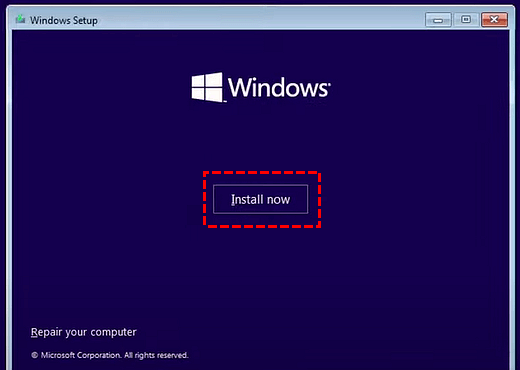
Step 3. Click “Install now”.
Step 4. Choose “I don’t have a product key”.
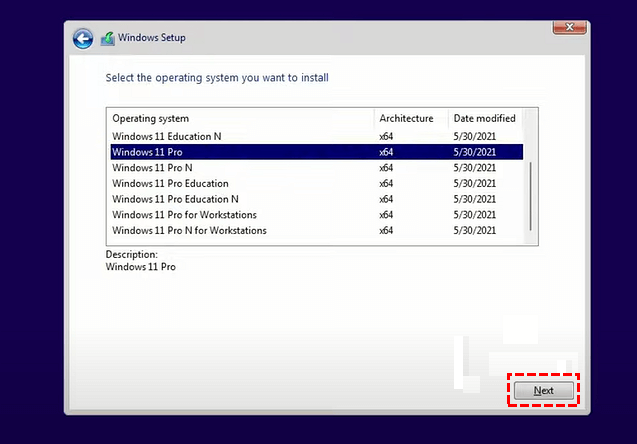
Step 5. Choose an OS edition you wish to install and click “Next”.
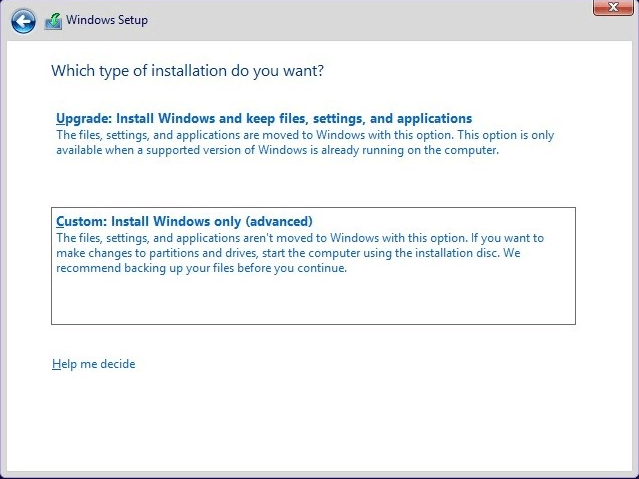
Step 6. Accept the License Term and click “Next”, click “Custom: Install Windows only (advanced)” in the next window.

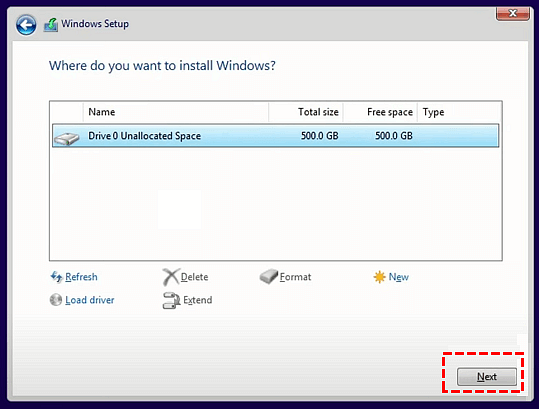
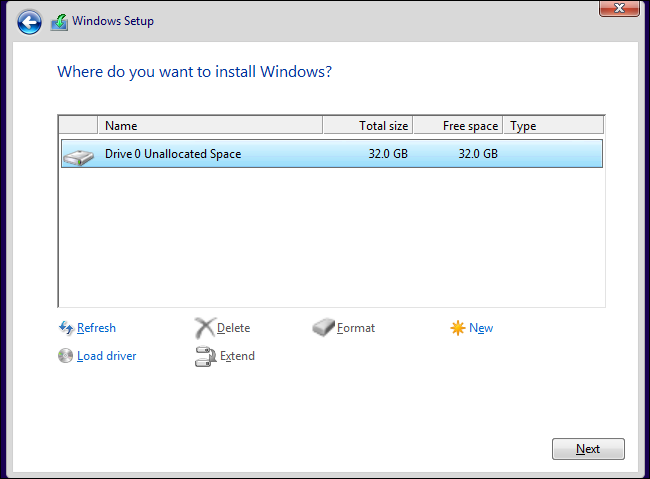
Step 7. Choose the target disk you wish to install Windows 11 OS, then click “Next”.
Step 8. Please wait for the process and your PC will reboot.
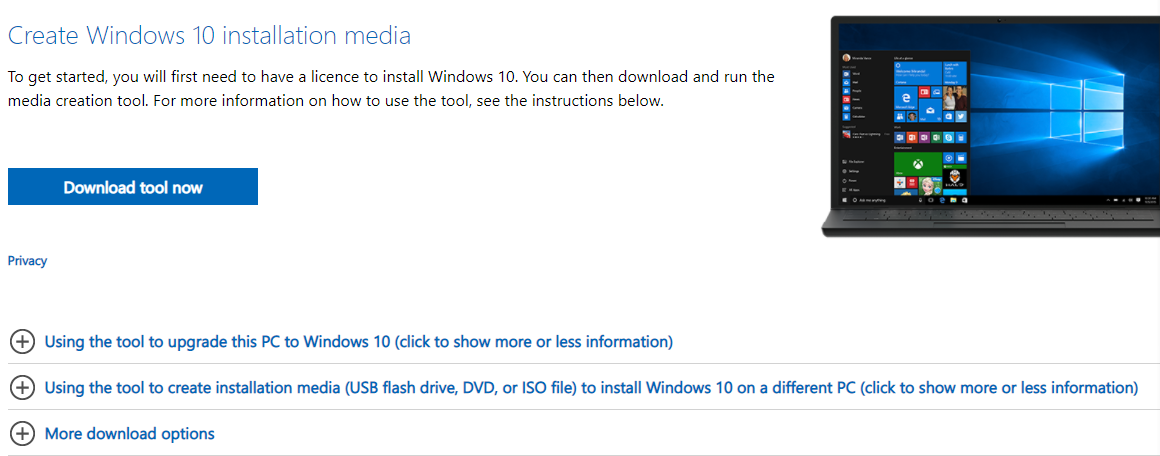
Method 2. Set up a computer from Windows Installation media
Microsoft also has a tool for users to install Windows. In this section, we’ll show you how to set up new Windows 10 PC.
Note: Prepare a USB with at least 8GB free size.
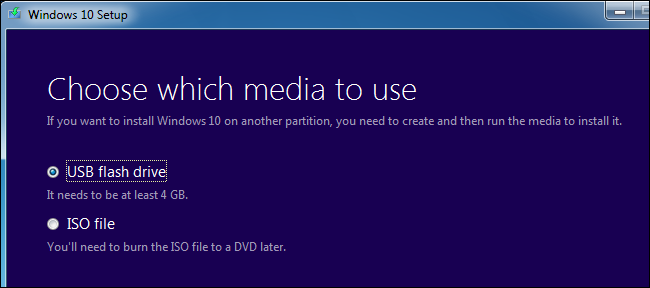
▶ Part 1. Format USB drive
Step 1. Connect your USB to a PC, and wait for the PC to detect it.
Step 2. Download Windows Installation media, and run the tool as an administrator.
Step 3. On the "What do you want to do?" interface, select "Create installation media for another PC", and then select "Next".
Step 4. Choose the language, edition, and 64-bit or 32-bit for Windows 10.
Step 5. Select the media tool you want to use: a “USB flash drive” with a capacity larger than 4GB or an” ISO file”.
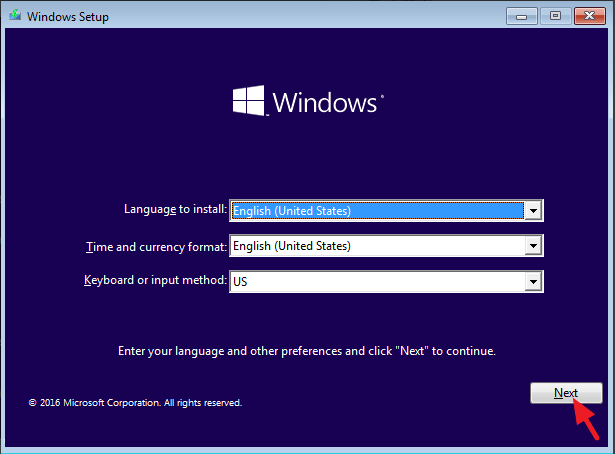
▶ Part 2. Install Windows system
After you create an installation media, you need to access the BIOS to boot the target PC from USB or DVD media and install OS.
Step 1. Restart the target computer, and press the required key as the screen shows. Generally is “DEL” or “F2”.
Step 2. Now, choose the “Language to install”, “Time and currency format”, “Keyboard or input method” and click “Next”.
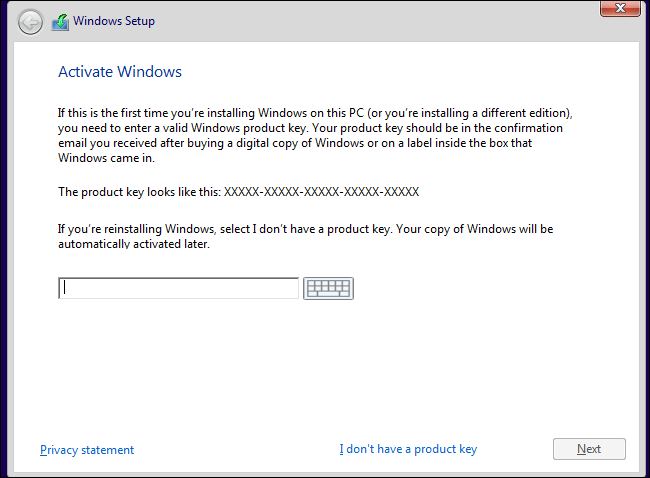
Step 3. In the Setup window, click “Install now”.
Step 4. After the above steps, you will see “Activate Windows”. Enter your key if you have one, if you don’t, please click “I don’t have a product key”.
Step 8. In the new window, select “Custom: Install Windows only (advanced)”.
Step 9. Select the drive you need to install Windows on and click “New” and then click “Next”.
Now your Windows will install and restart several times.
Method 3. Quickly install Windows via OS migration tool
The first two methods might be a little complex but if you wish for a fresh installation, you can choose one of them to set up a new PC. However, for some users who may wish to use a familiar Windows OS setting environment on their new computer, there is an easier way to quickly set up a computer—OS migration.
OS migration refers to use migration tool to clone the system and OS-needed partition and data files from one computer to another, all customized settings will be kept. Users can use the same system on the target computer.
So, if you want to experience your own Windows system on your new computer, OS migration is a better option. Here, we recommend you a handy OS migration tool AOMEI Partition Assistant Professional, a disk and partition management tool for Windows 11/10/8/8.1/7/XP users.
The “Migrate OS to SSD” function can help users transfer the current system to the target disk. When the task is finished, users can plug the disk back into the target PC, and boot that PC into the same system as the original one.
Now, let’s see more details.
Step 1. Connect the disk of the target computer to a Windows computer you want to duplicate. Then, install and run AOMEI Partition Assistant, and click “Clone” on in the top toolbar, and choose “Migrate OS”.

Step 2. Click “Next" in the new window.

Step 3. Choose an unallocated space on your disk.

Step 4. Now you need to resize the size of the partition, and click “Next”.

Step 5. Click "Finish" to continue.
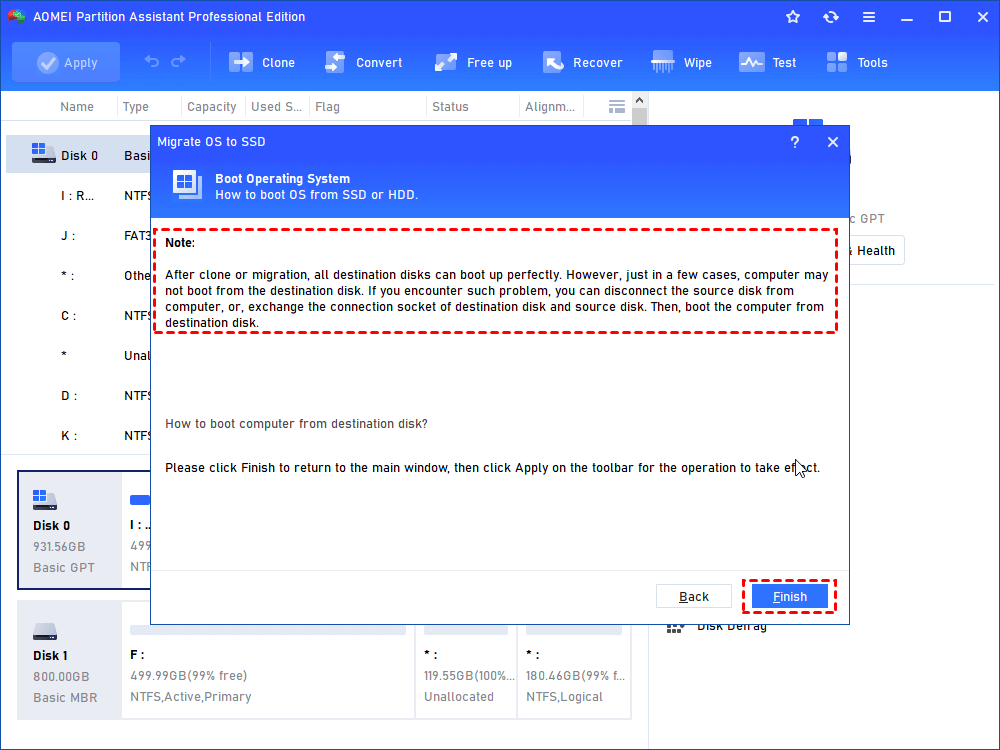
Step 6. Click “Apply” in the upper-left corner.

When the task is finished, you can plug the disk from the target PC back and boot your computer. You might need to change the boot order if the target computer has one more disk.
Conclusion
If you don’t how to set up a new PC from flash drive, hope this guide will help solve this problem. Setting up a computer via fresh installation is a nice choice, but you can also keep your customized Windows installation with AOMEI Partition Assistant.
Besides the OS migration, this practical tool has many helpful features like disk cloning to create the same disk as the original, converting the disk to MBR/GPT without deleting partitions, changing file system between NTFS and FAT32 without formatting, moving apps from one disk to another, and so on.
What’s more, there is the Server Edition for Windows Server 2022/20192016/2012(R2)/2008(R2)/2003 users to conveniently manage their devices.