[5 Ways] How to Fix System Restore Greyed out in Windows 11/10/8/7
Why is your System Restore button gray? Have you solved the problem of System Restore greyed out in Windows 11/10/8.1/8/7? You've come to the right place. This article finds out the reasons behind it and suggests 5 ways to fix System Restore grayed out issue.
By Phoebe / Updated on March 8, 2024
Why is my System Restore greyed out?
I can't get the System Restore to work - why is my System Restore greyed out? I can't enable it and I have no idea how. Please help?"
- Windows Eleven Forum
System Restore is a great Windows feature that creates a snapshot of your system before major changes are made, making it a lifesaver in the event of a failure. But, alas, sometimes the System Restore greyed out, preventing you from achieving inner peace. Here's why:
☞ System protection is turned off: System Restore is disabled by default. You need to turn on the System Restore.
☞ You are not logged in as an administrator: System Restore requires administrative rights to run.
☞ Corrupted system files: If your system files are corrupted, System Restore may not work properly.
☞ Antivirus or security software interference: Sometimes, security software may interfere with system recovery.
☞ Group Policy settings: If your computer is part of a domain network, Group Policy settings may prevent you from accessing System Restore.
☞ Disk space issues: Make sure there is enough free disk space on the drive where System Restore is enabled. Or you need to extend the C drive.
How to fix System Restore greyed out
Here's a comprehensive guide to troubleshooting and resolving System Restore greyed out issues in Windows 10/11 so you can take advantage of the feature effectively again.
First, make sure to enable system protection for each volume on your hard drive, starting with the Windows boot drive (usually the C: drive) and continuing to the other drives. You can do this in one of the following ways:
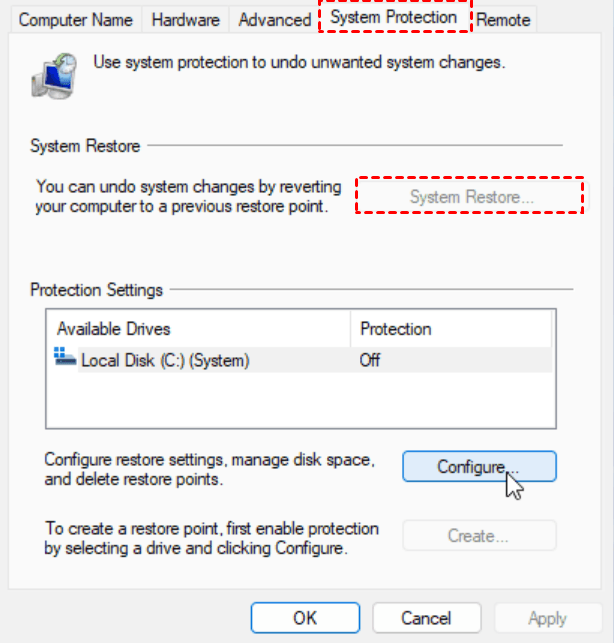
Way 1. Fix System Restore greyed out from System Properties
Whatever the operating system version is, to fix System Restore greyed out Windows 10/11, you can enable the System Restore option in System Properties:
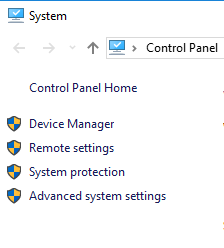
Step 1. Right-click on This PC and go to Properties > System Protection.
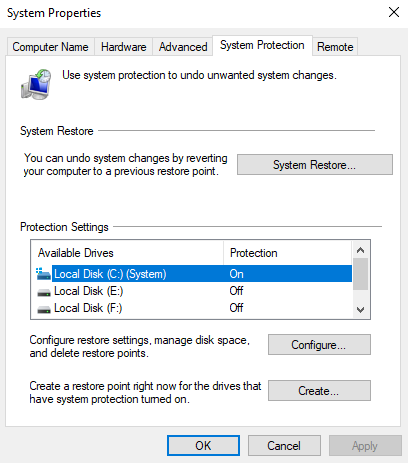
Step 2. Select the required disk and click the Configure button in the System Protection window.
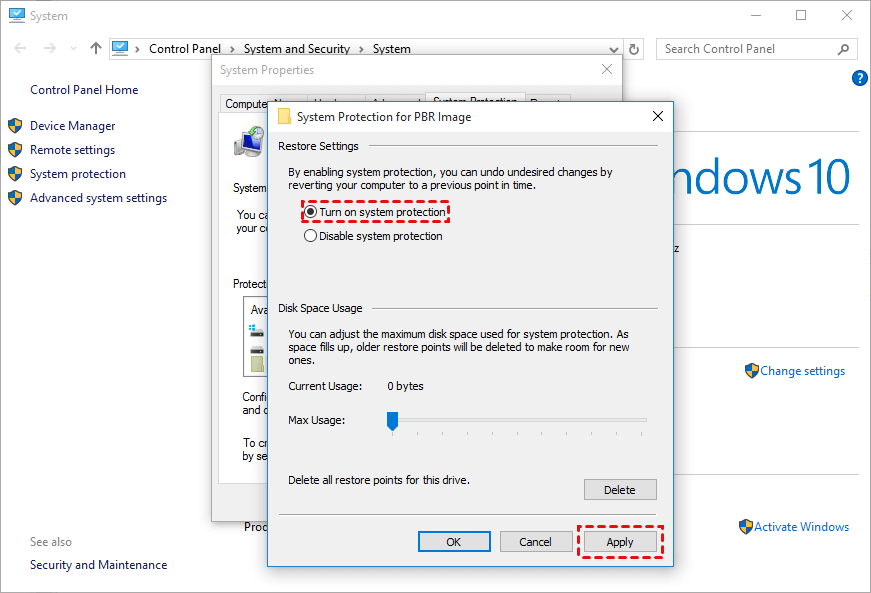
Step 3. In the window that appears, check the Turn on system protection option click Apply, and then click OK.
You can now create a restore point to verify that system protection is active.
Way 2. Fix System Restore greyed out with Volume Shadow Copy Service
Sometimes the Configure button is not clickable (greyed out) in system protection settings. You can run Volume Shadow Copy Service (VSS) to create restore points instead. Follow these steps to enable the service:
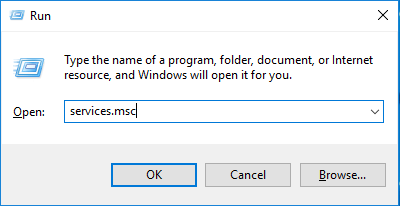
Step 1. Press Windows + R keys at the same time to open the Run dialog box.
Step 2. Type services.msc and press Enter.
Step 3. Find Volume Shadow Copy in the list and double-click it.
Step 4. Set the Startup type to Automatic, and then click Start to start the service.
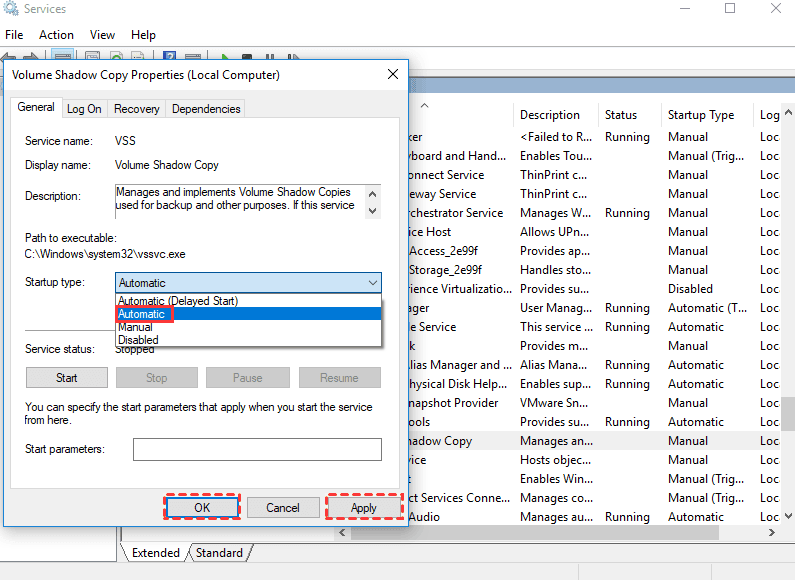
Step 5. Click Apply and OK to save changes and try enabling system protection again.
Way 3. Fix System Restore greyed using Registry Editor
How to enable system protection on drive? Windows Home users can use Registry Editor to fix the System Restore is greyed out issue.
Step 1. Right-click Start and select Run. Enter regedit and click OK.
Step 2. If prompted by User Account Control, select Yes.
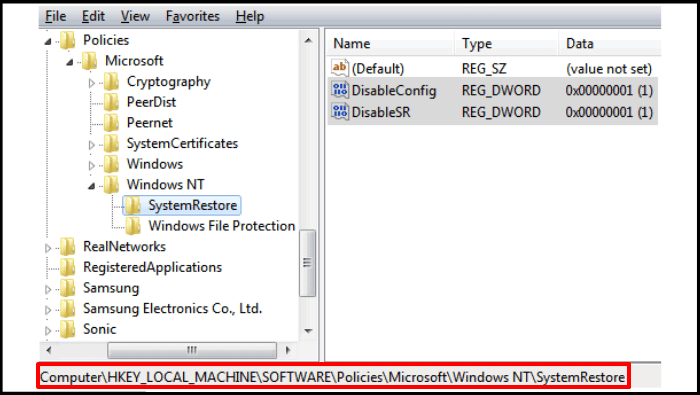
Step 3. Navigate to the following path in Registry Editor:
Computer\HKEY_LOCAL_MACHINE\SOFTWARE\Policies\Microsoft\Windows NT\ SystemRestore
Step 4. Remove Disableconfig and DisableSR from the right pane.
Restart the computer to apply the changes and verify that the System Restore option is enabled.
Way 4. Fix System Restore greyed out via Group Policy Editor
Windows Pro or enterprise edition can use the local group policy editor to control such settings. You need administrator access, then follow the instructions below to enable system restore options on your PC:
Step 1. Press the Windows + R keys at the same time to open the Run dialog box.
Step 2. Enter gpedit.msc and press OK to open Local Group Policy Editor.
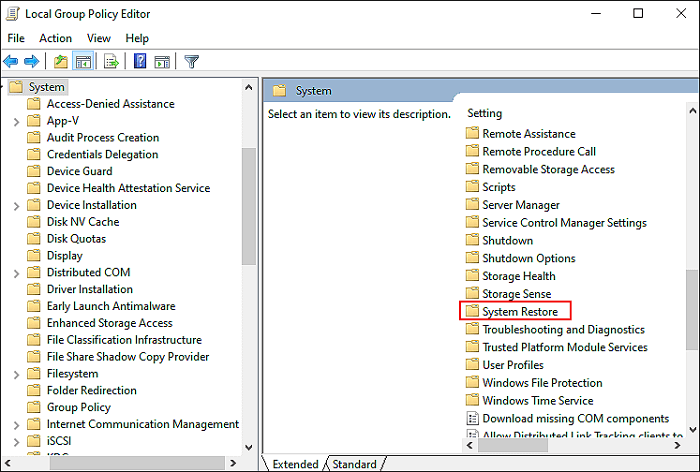
Step 4. Navigate to Computer Configuration > Administrative Templates > System > System Restore.
Step 5. Double-click the Turn off System Restore policy and set it to Disabled. Click OK to confirm.
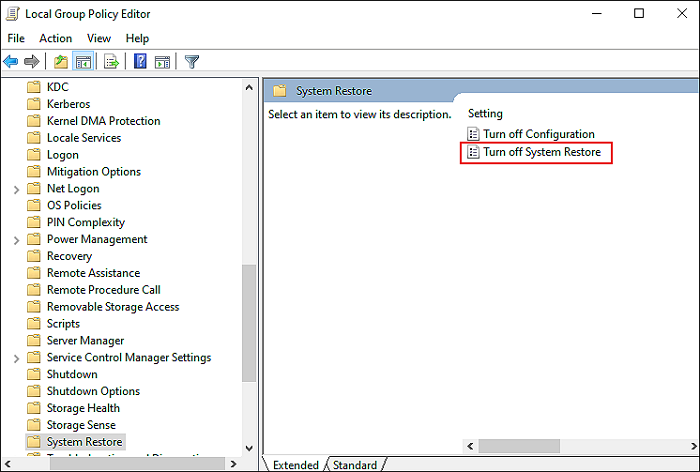
Restart your computer and check if System Restore is enabled.
Way 5. Fix System Restore greyed out from PowerShell
The last option in Windows to enable System Restore Windows 11 is to use PowerShell.
Step 1. Search for powershell in the taskbar and run it as administrator.
Step 2. Execute the following command: and press the Enter key.
Enable-ComputerRestore -Drive "C:\"

Although no success message appears, check the system protection settings to confirm that System Restore is now enabled.
The best alternative to system protection for Windows 11/10/8/7
While System Restore is a useful tool for troubleshooting and system recovery, it has certain limitations: its backups are limited and cannot protect against hardware failure or disk corruption; its reliance on specific recovery points hinders flexibility; and it consumes disk space and affects system performance, among other limitations.
Given these disadvantages, it is recommended to opt for a more comprehensive and safer alternative: system cloning. Cloning ensures that every aspect of the system is preserved for quick replacement in the event of a boot failure, disk upgrade, or other circumstances.
Although native cloning tools are missing in Windows, reliable third-party software such as AOMEI Partition Assistant Professional has filled the gap and caters to various Windows versions including Windows 11/10/8.1/8/7. The software simplifies the process of entire system drive transfer or operating system migration to an alternative SSD/HDD without the need for reinstallation. Additionally, its secure boot feature guarantees successful booting from cloned drives.
Here is a simple guide to clone your system using AOMEI Partition Assistant Professional Edition:
Step 1. Install and start AOMEI Partition Assistant Professional.
Step 2. Navigate to the Clone > Clone Disk.
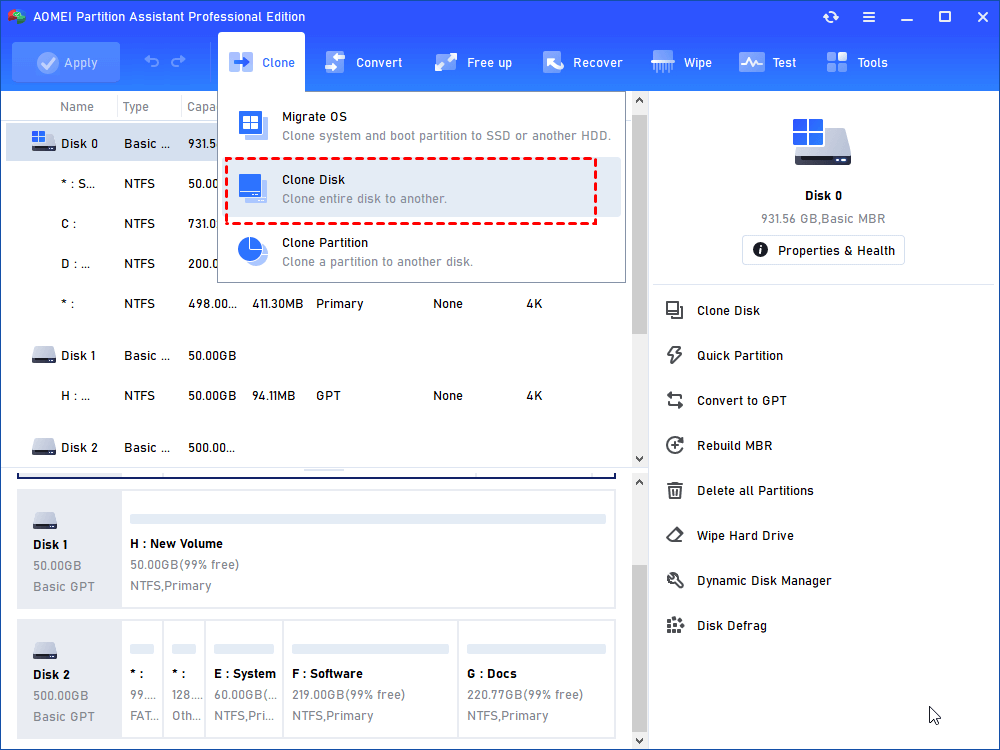
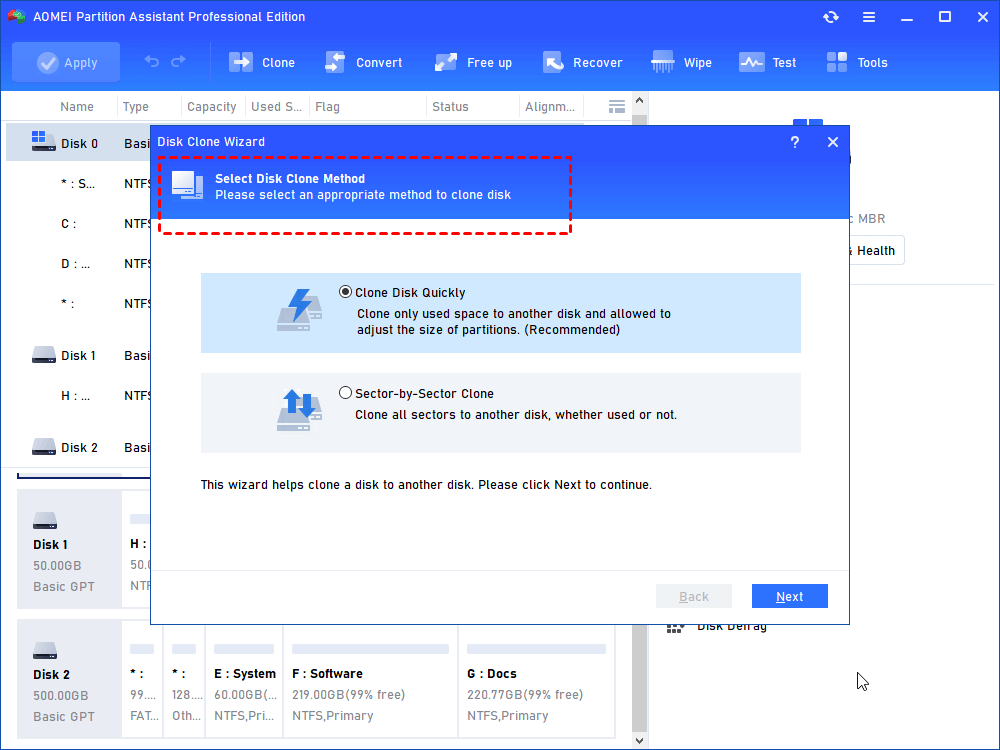
Step 3. Select your preferred disk cloning method. Here we select Clone Disk Quickly to transfer only used sectors which allows you to clone larger drive to smaller drive with enough space.
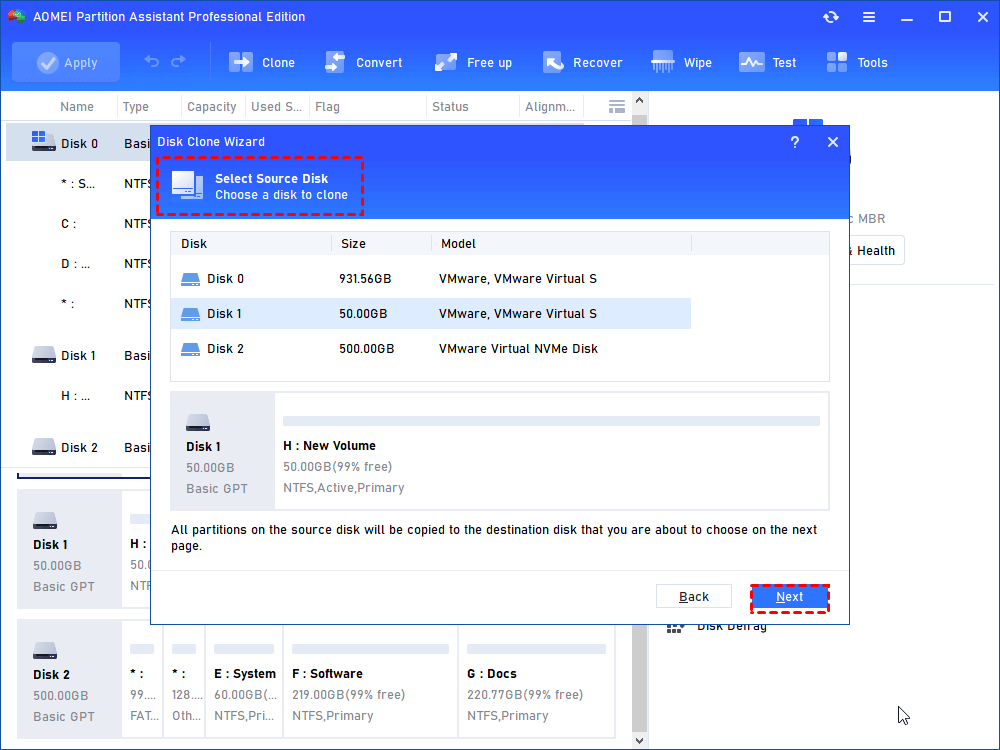
Step 4. Select the original Windows system drive as the source disk and continue.
Step 5. Select the new disk as the target drive. If it is an SSD, check "Optimize SSD Performance of SSD" for 4K alignment.

Step 6. Resize the partitions as needed.
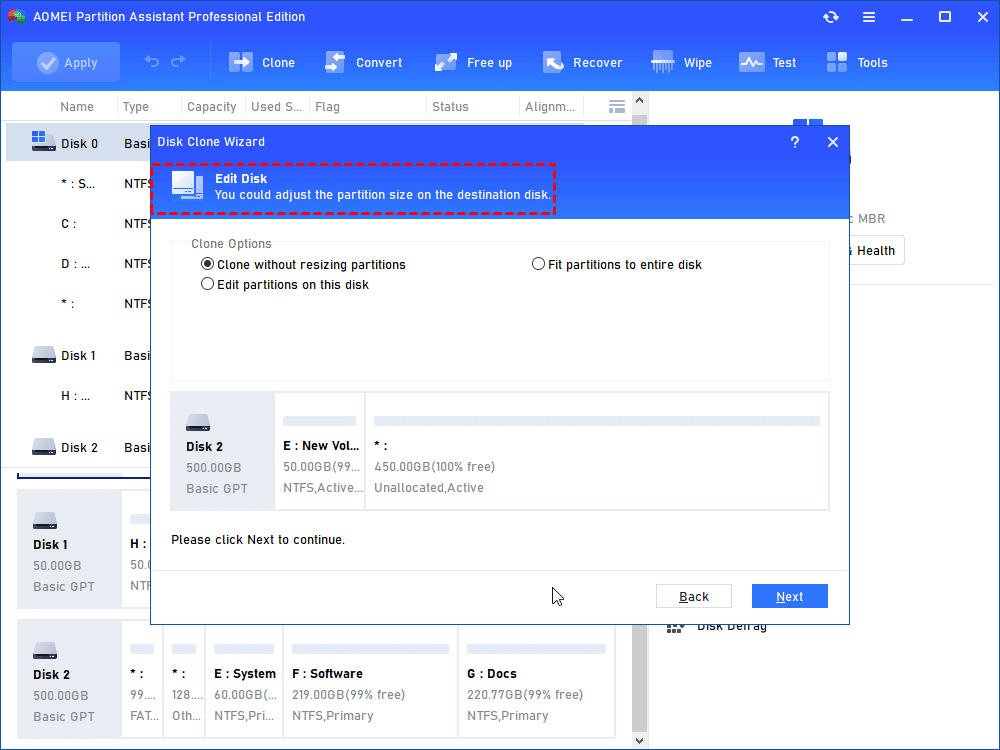
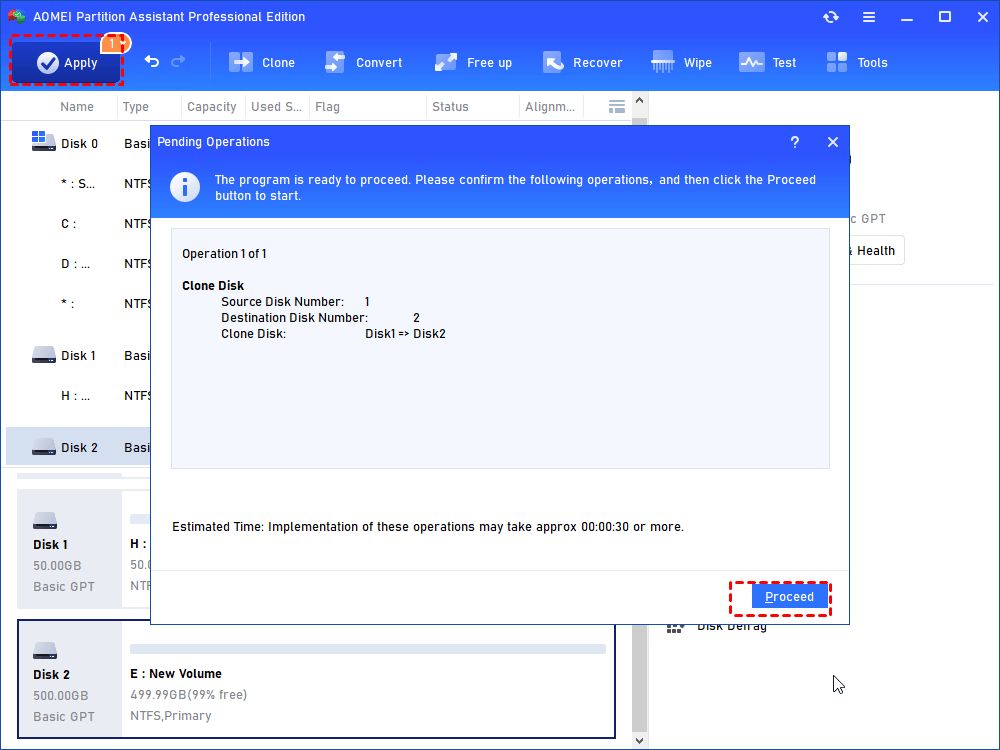
Step 7. Review the note, click Finish, and then click Apply and Proceed to start the process.
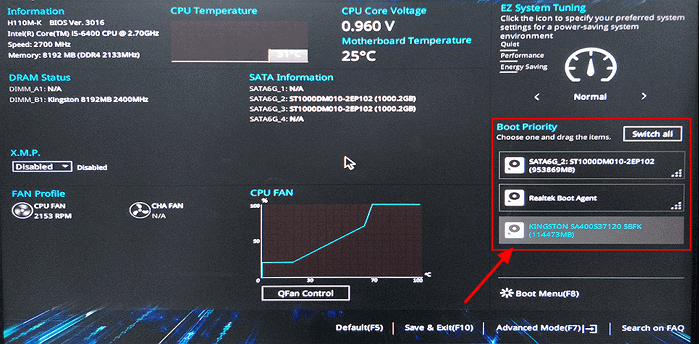
Step 8. If the default system drive does not boot, install the cloned hard drive into your computer.
Step 9. Set the cloned drive as the boot drive to ensure successful booting from the cloned disk.
By following these steps and leveraging reliable software like AOMEI Partition Assistant Professional, you can enhance your system's resilience against potential failures and ensure a seamless recovery process when the need arises.
Final words
The methods provided outline 5 practical ways to resolve System Restore greyed out issues, allowing users to effectively manage system settings. However, for enhanced system protection, it is recommended to maintain a cloned Windows system with AOMEI Partition Assistant Pro so that you can quickly restore your system in the event of an unexpected problem.
In addition to system cloning, this program also has many advanced features. From seamlessly converting MBR to GPT disk without losing data, to allocating the free space to your C drive, and even protecting USB drives with BitLocker, its usefulness goes beyond mere system recovery. In addition, the Server Edition meets the requirements of Windows Server systems and provides comprehensive system management functions.

