[3 Ways] How to Turn off System Restore in Windows 10/11
Can System Restore be stopped? How to turn off System Restore Windows 10/11? Dig deeper into this article and you can get the answers and solutions you want. Before disabling System Restore, we recommend that you clone your system with AOMEI Partition Assistant to protect the system and data on your computer.
By Phoebe / Updated on March 6, 2024
Is it safe to turn off System Restore?
Whether it's safe to turn off System Restore Windows 10/11 depends on your specific situation and how you use your computer. System Restore is a feature in Windows that allows you to restore system files and settings to a previous point in time, which is useful when your system encounters problems.
Here are some considerations to help you decide if it's safe to turn off System Restore:
1. System Stability: If your computer is running smoothly and you are not experiencing any major issues, you may not need to enable System Restore.
2. Backup or clone solution: If you have another reliable backup or clone solution, such as regular system backups or system-cloned drives, you may feel comfortable turning off System Restore.
3. Disk space: System Restore uses disk space to store restore points. If disk space is limited on your system drive and you need to free up space, disabling System Restore can help.
4. Risk Tolerance: Consider your risk tolerance. If you're willing to troubleshoot and fix potential issues without relying on System Restore, you probably don't need to enable it.
Clone your system before turning off System Restore
Before deciding to disable System Restore in Windows 10/11, it is important to consider the potential consequences. While System Restore takes up more space over time, causing potential performance issues, it also lacks critical system and startup files needed for system recovery in the event of a crash. If you choose to turn off System Restore, you must implement alternative system protection Windows 10 measures.
An effective precaution is to clone your system beforehand. Cloning can preserve every aspect of your system, provide a comprehensive boot drive solution, facilitate disk upgrades, and meet other system needs.
Although Windows lacks native cloning tools, you can use reliable third-party software, such as AOMEI Partition Assistant Professional, which is compatible with various Windows versions including Windows 11/10/8.1/8/7. The software allows seamless transfer of the entire system drive or migration of the operating system to another SSD/HDD without reinstallation. Additionally, its secure boot feature ensures successful booting from cloned drives.
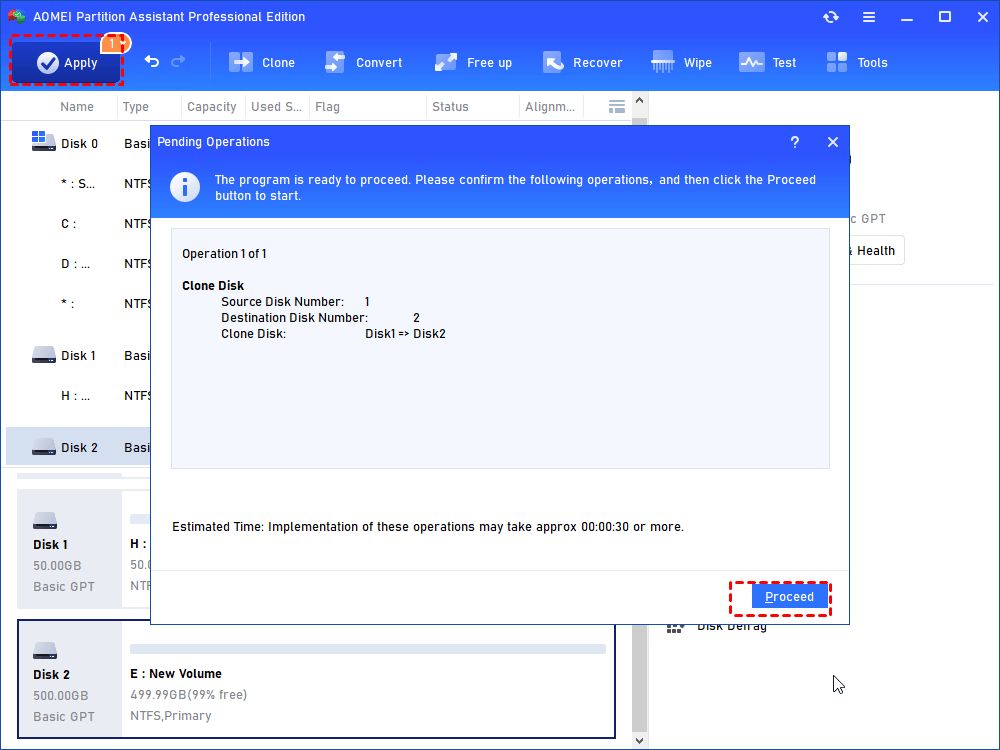
Here is a simple guide to clone your system using AOMEI Partition Assistant Professional Edition:
Step 1. Install and launch AOMEI Partition Assistant Professional Edition.
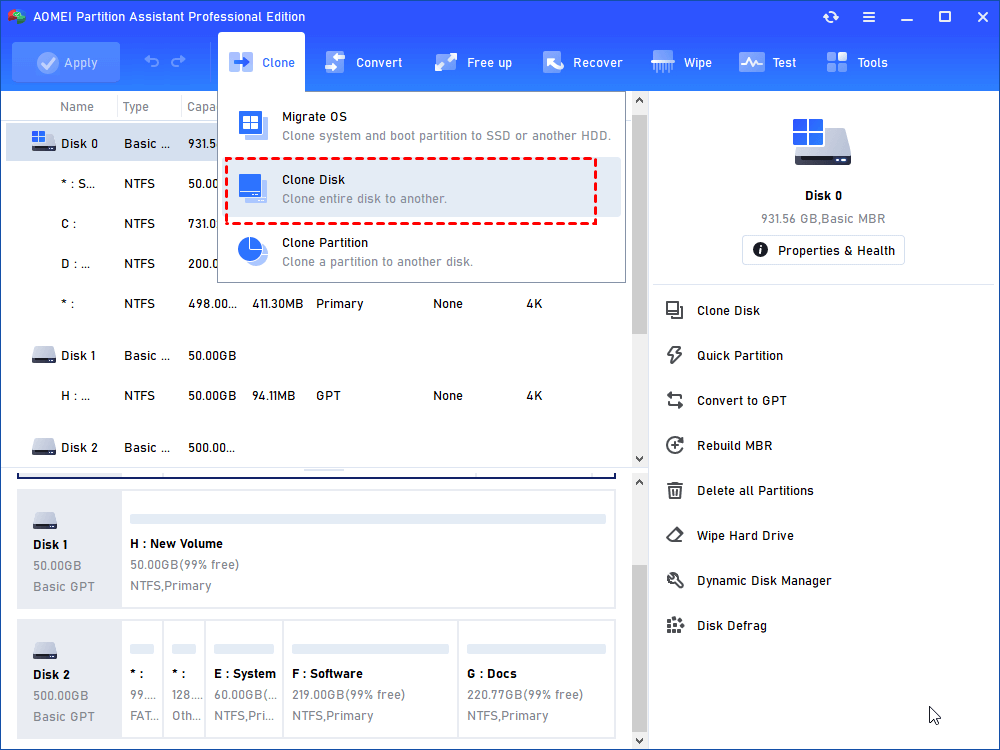
Step 2. Navigate to the Clone > Clone Disk. If you only clone the system partition, choose Migrate OS.
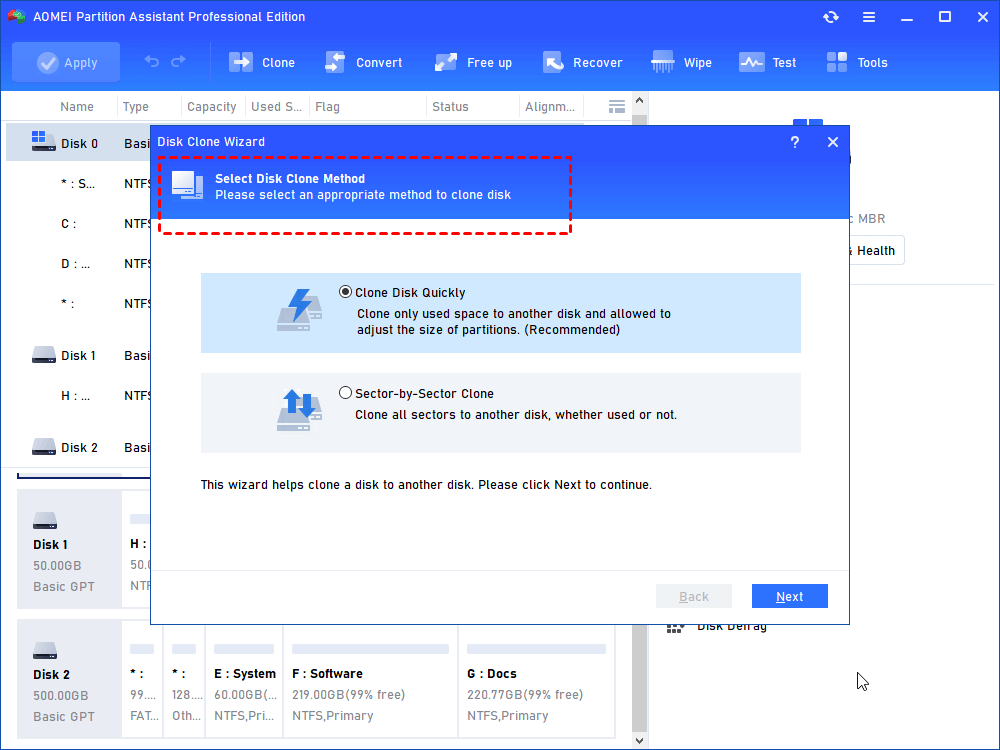
Step 3. Select your preferred disk cloning method.
◊ Clone Disk Quickly: transfer only used sectors, allowing you to clone larger drive to smaller drive.
◊ Sector-by-Sector Clone: Copies used and unused sectors from the source disk, require a larger destination drive.
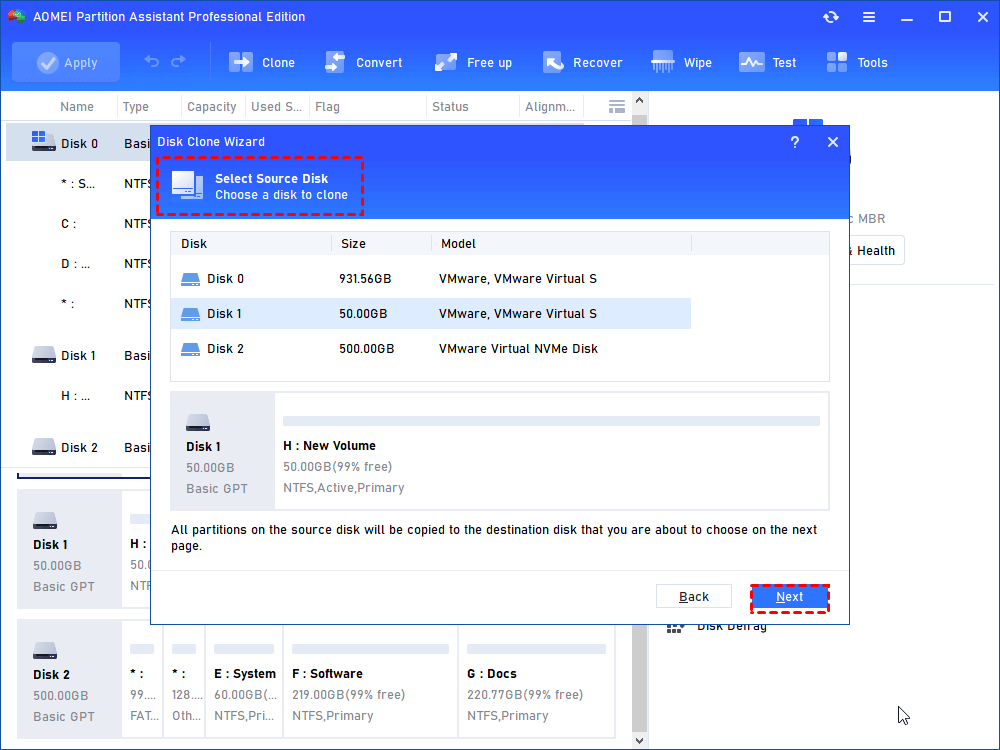
Step 4. Specify the original drive of the Windows system as the source disk and continue.
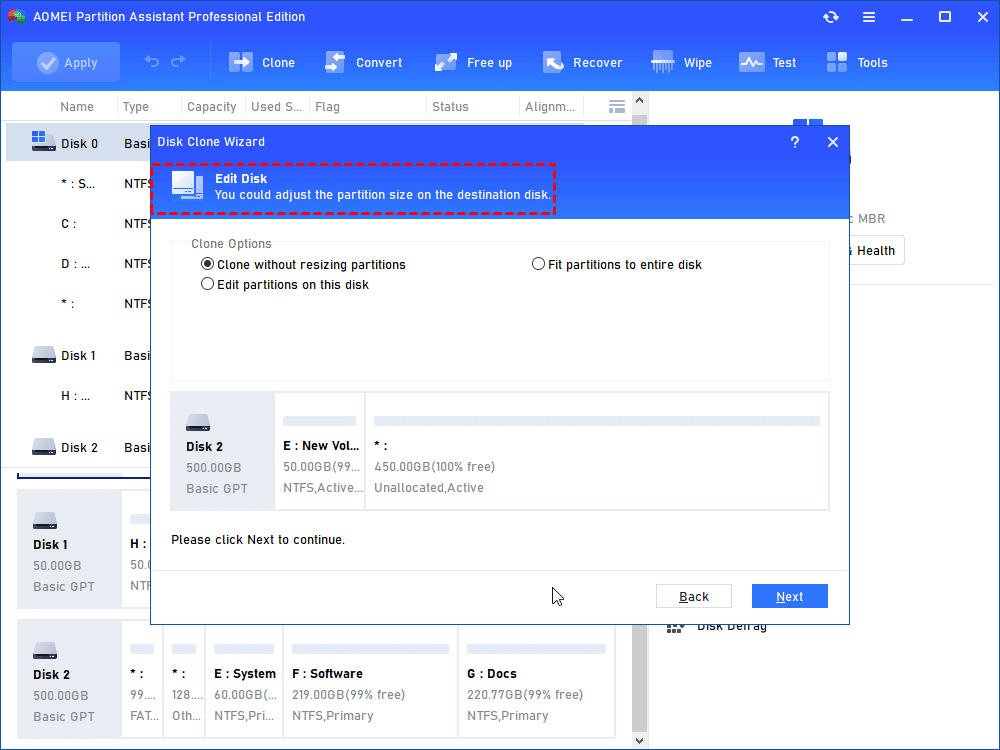
Step 5. Select the new disk as the target and if it is an SSD, enable "Optimize SSD Performance of SSD" for 4K alignment.

Step 6. Resize the partitions on the new drive as needed.
Step 7. Review the settings, click Finish, and then click Apply to start the process.
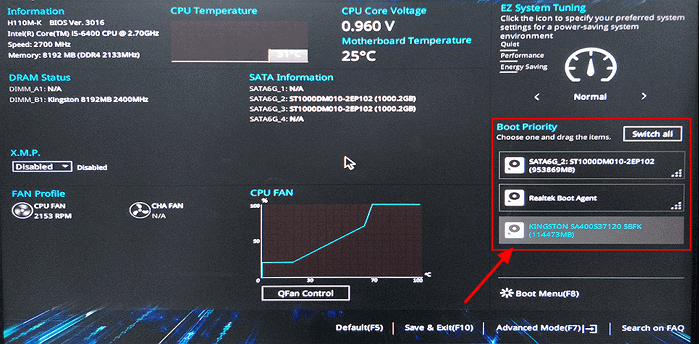
Step 8. If your default system drive won't boot, install the cloned hard drive into your computer instead.
Step 9. Set the cloned drive as the boot drive to ensure successful booting from the cloned disk.
By following these steps and using reliable software to clone your system, you can prevent potential data loss and ensure a smooth system boot without system restoration.
How to turn off System Restore in Windows 10/11
After cloning your system, how to turn off System Restore Windows 10/11? There are three common methods: leveraging System Protection Settings, Group Policy Editor, or Registry Editor. These methods are also effective for disabling System Restore in Windows 7/8/8.1. Below, I'll outline each method and its detailed steps.
Way 1. Turn off System Restore from System protection
Regardless of your Windows version, you can use the following steps to achieve Windows 10 turn off System Restore. Please note that the interface may be slightly different depending on your operating system.
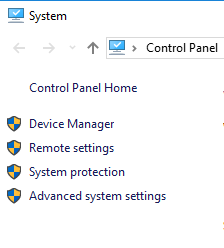
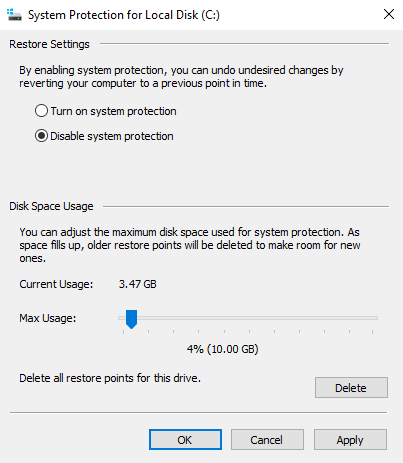
Step 1. Right-click This PC, and navigate to Properties > System Protection.
Step 2. Select the disk on which you want to disable System Restore and click the Configure button.
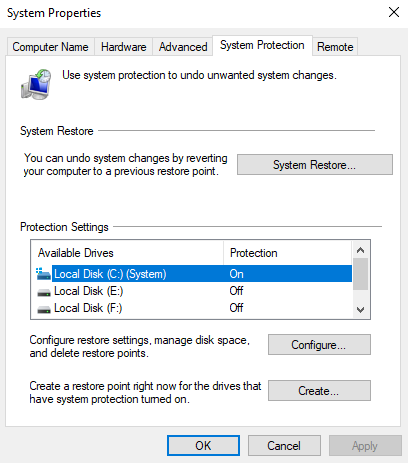
Step 3. Select the Disable system protection check box, and then click OK to confirm. For Windows 7 users, choose Turn off system protection.
Way 2. Disable System Restore via Group Policy Editor
The Local Group Policy Editor is only accessible in Windows 10 Pro, Enterprise, and Education editions. If your system is one of these versions, you can continue using this method; otherwise, return to method 1.
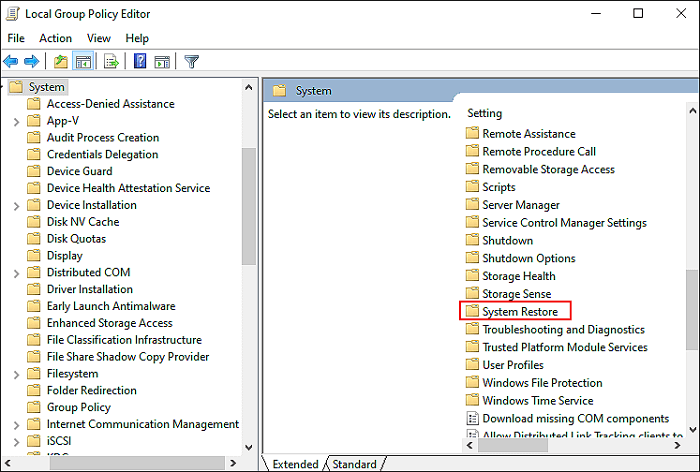
Step 1. Press the Windows + R keys simultaneously to launch the Run dialog box. Enter gpedit.msc and press OK.
Step 2. In the window that opens, navigate to Computer Configuration > Administrative Templates > System > System Restore.
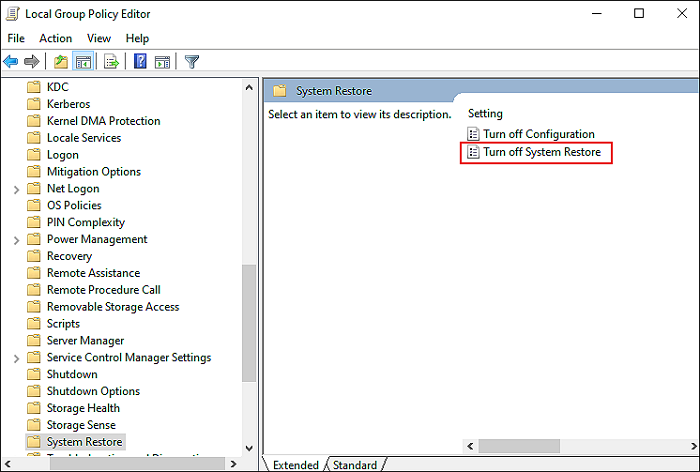
Step 3. Double-click Turn off System Restore, select Enable, and then click OK.
Way 3. Turn off System Restore using Registry Editor
You can choose to disable System Restore through the Registry Editor.
Step 1. Right-click Start on the taskbar and select Run. Enter regedit in the input box and click OK.
Step 2. If the User Account Control (UAC) window appears, select Yes.
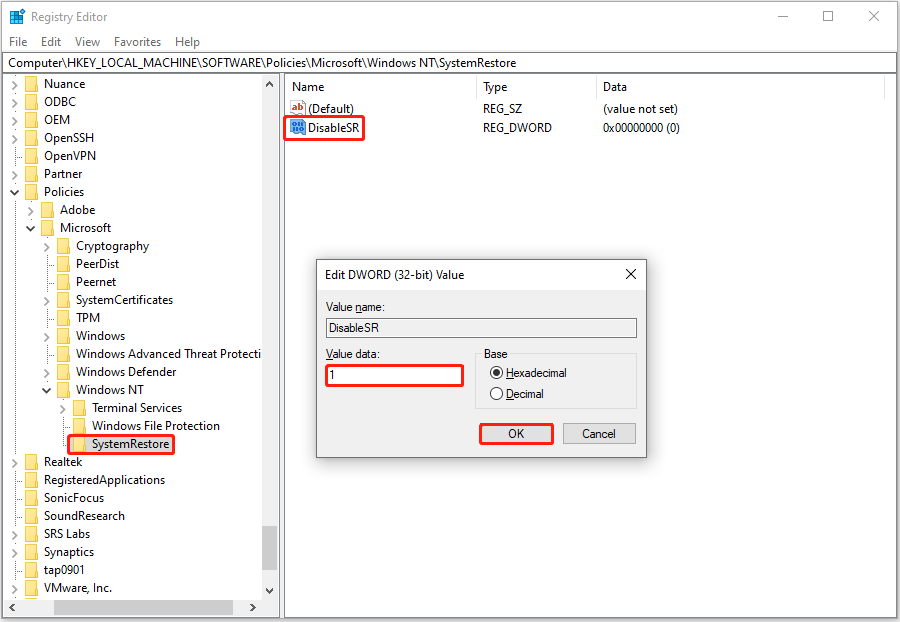
Step 3. In Registry Editor, navigate to the following location:
Computer\HKEY_LOCAL_MACHINE\SOFTWARE\Policies\Microsoft\Windows NT
Create a new key by right-clicking Windows NT, selecting New > Key, and renaming it System Restore.
Step 4. In the left panel, select System Restore, then right-click any empty area in the right panel and select DWORD (32-bit) Value. Name the new value DisableSR.
Step 5. Double-click DisableSR, set the numeric data to 1, and click OK.
Final verdict
The outlined method provides a practical way to turn off System Restore Windows 10/11, ensuring users have control over system settings. However, before implementing any changes, you need to have a cloned Windows 10 system for system recovery in case of unexpected problems. AOMEI Partition Assistant Pro is a highly recommended tool.
In addition to system cloning, PA Pro also has many advanced features. From seamlessly converting MBR to GPT disk without data loss, to expanding the free space on your C drive, and even BitLocker protecting USB drive, its usefulness goes far beyond system recovery. In addition, the Server Edition meets the needs of Windows Server systems and provides comprehensive system management functions.
FAQs about disabling System Restore
Q1. What happens if you interrupt a Windows System Restore?
Interrupting the system recovery process may destabilize the system and may result in missing or corrupted system files, resulting in errors, crashes, and other operational issues.
Q2. Is System Restore on Windows 10 by default?
No, System Restore is disabled by default in Windows 10 and must be manually enabled by the user to function.
Q3. How long should a Windows 10 System Restore take?
Windows 10 system restore typically takes 20 to 45 minutes to complete, not hours.
Q4. How do you know if Windows 10 System Restore is stuck?
If no progress is made after four hours, Windows 10 System Restore may get stuck, especially during installation or registry restore. However, this problem can usually be solved by starting System Restore in Safe Mode or using Startup Repair.
Q5. Does System Restore remove viruses?
Yes, System Restore can effectively remove viruses and repair system damage caused by viruses by replacing corrupted system files and reverting changes to the registry. However, it does not guarantee the complete removal of all malware from the system.

