DiskPart: There Is No Partition Selected Error | Why & How-to Fix?
Sometimes, you may encounter the error “There is no partition selected” on USB drive in DiskPart. Here comes an elaborate analysis of this error, including how to solve the error in Windows 7/8/10/11.
By Lucas / Updated on May 12, 2023
The error: There is no partition selected in DiskPart
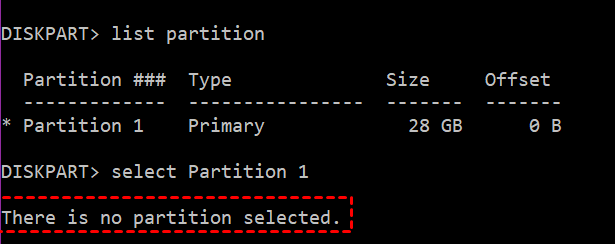
“I need some help, please! I’m trying to format my USB flash drive to get full capacity with DiskPart in Windows 7. Executed list disk > select disk 2 > list partition > delete partition, only to get the prompt ‘There are no partitions selected. Please select a partition, and try again.’ Then I typed select partition 1, another error message prompts ‘There is no partition selected’. What is the problem? Why cannot Windows select my drive?”
That is a help post on Windows 7 DiskPart There is no partition selected trouble in USB drive formatting. Actually, there are other similar prompting messages of DiskPart that bothering many users. For example, you may get DiskPart There is no disk selected error after typing select disk #, or there is no disk selected to list partition after the list partition command. “There are no partitions on this disk to show” error usually means the disk has been cleaned and no partitions existed. You need to create one first.
Why the partition cannot be selected when Windows actually see the drive? Keep reading.
Possible causes for Windows there is no partition selected issue
According to Microsoft, before you can use DiskPart commands on a disk, partition, or volume, you must first list and then select the object to give it focus. When an object has focus, any DiskPart commands that you type act on that object. Please note that the list partition command displays only partitions on the disk that have focus. When you use the list commands, an asterisk (*) appears next to the object with focus. You may want to see more information in DiskPart Command-Line Options.
Some users get the There is no volume selected error just because the partition or volume has been selected by DiskPart ALREADY. Therefore, check if there is an asterisk (*) in front of the object you’d like to select, just like what the user faces in the example. That means the partition has been focused on now.

In terms of USB flash drive, Windows has a standard that may have an impact on the operation of the drive. That would be, Windows only recognize the first primary partition on removable devices including USB flash drive, SD card, memory card, etc. As a result, to format USB drive for example, you have two ways to figure it out, format all partitions on the drive with a different operating system instead of Windows OS, and execute “clean” or “clean all” command in DiskPart.
How to fix there is no partition selected error in Windows easily?
If you still get the “no partition selected” message, Windows cleanmgr.exe may do you a favor in cleaning partitions or volumes.
Clean partition with Windows cleanmgr.exe
Try this command to clean the drive in another way.
1. Click Start and then click Run, or press Win + R key combination to start the Run.
2. In the Run box, input this command and press Enter.
-
c:\windows\SYSTEM32\cleanmgr.exe /f: (where f is the drive letter of the hard drive partition that you’d like to clean)
3. Choose the right drive letter from the drop-down list to clean up.
4. Open Disk Management and find the partition you’ve cleaned just now. Right-click it and select “New Simple Volume” to create a new partition if necessary.
Tips: above method applies to hard drive partition only.
Workaround to fix there is no partition selected in DiskPart
Other than said solution to fix the problem, you actually have an easier way to get things settled down. AOMEI Partition Assistant Standard is a free partition manager that can help you manage your hard drive partition, USB flash drive, SSD, portable hard drive, and SD card efficiently.
In detail, the software allows you to resize partition without data loss, move partition to the left or right side, merge partitions into a bigger one, make partition active, split partition into several ones, delete and format partition thoroughly, create primary and logical partition, copy disk to another, migrate OS to SSD without reinstalling, etc. Facing such comprehensive yet completely free software, don’t you want to free download (Windows 11/10/8/7/XP/Vista supported) and have a try.
Manage partition effectively with freeware
In the first place, install and run AOMEI Partition Assistant on your PC. Connect the USB flash drive or any other drives to your machine when necessary.
▶Format Partition Completely
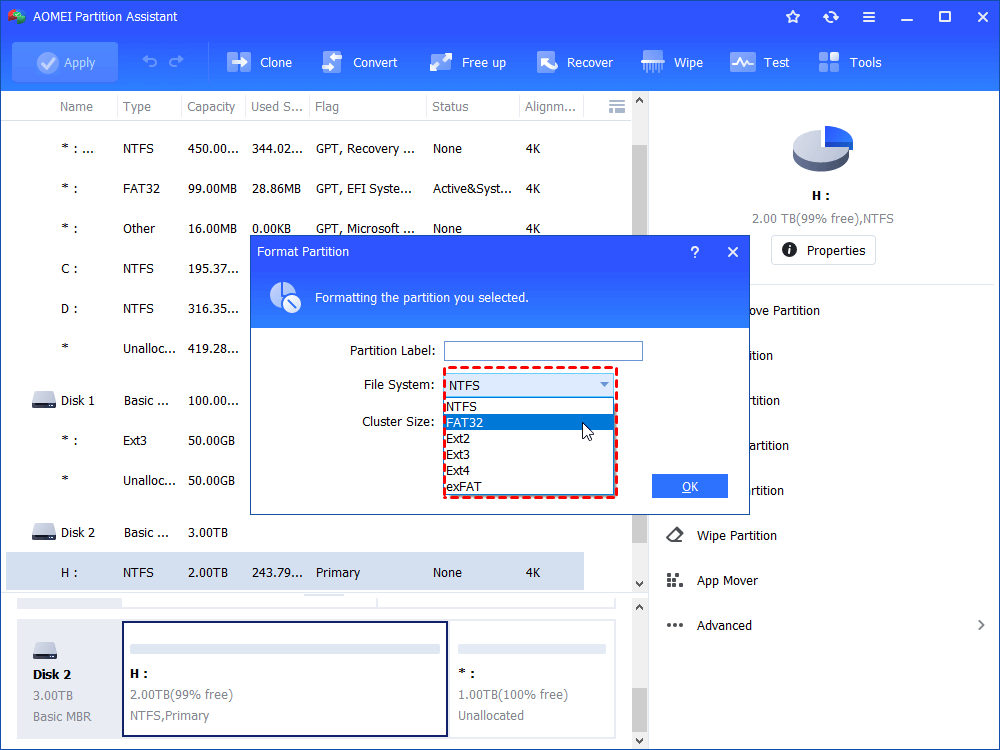
1. Find the partition you’d like to format and right-click it. Select Format Partition from the list.
2. Specify the partition label, file system, and cluster size in the pop-up window. Then click OK.
3. Click Apply on the toolbar and then Proceed in the popping up window to take effect.
Tip: to wipe all data thoroughly on selected partition, please select Wipe Partition at the first step.
▶Mark Partition as Active Easily
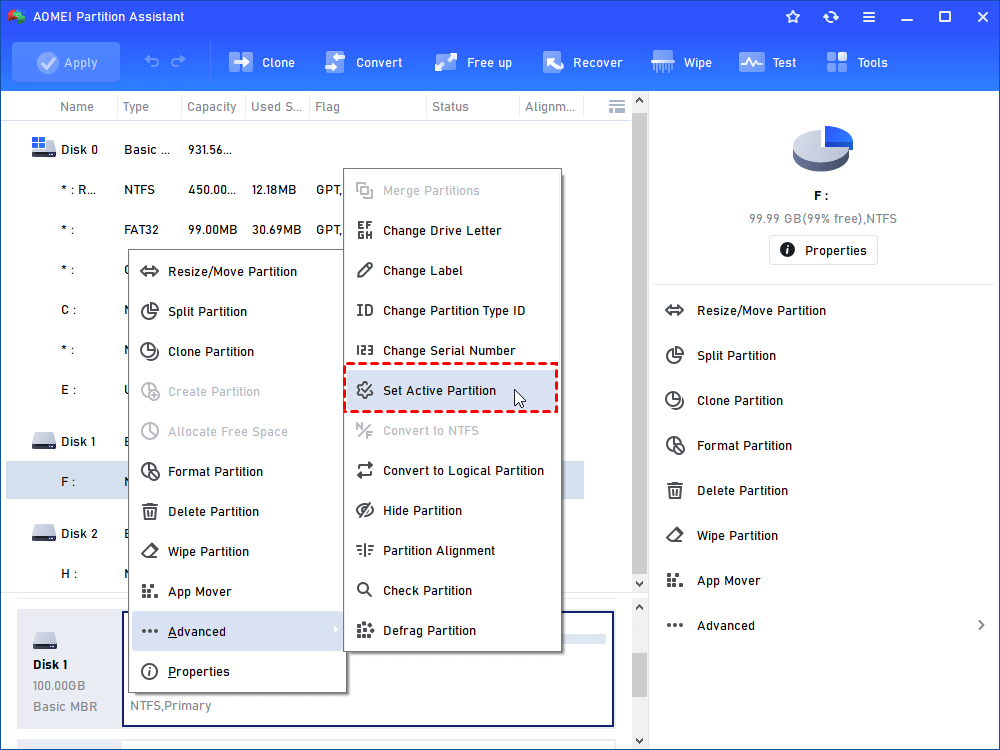
1. Right-click the partition you want to set active and select Advanced > Set Active Partition.
2. Confirm the operation. Finally, click Apply on the toolbar and then Proceed in the popping up window to take effect.
Note: Setting the partition as an active partition may make other primary partitions on the same disk become inactive, because only one active partition (usually system or boot drive) is allowed on a physical hard disk. Be sure that you’ve aware of the risk.
▶Create Partition with Unallocated Space or Existing Partitions
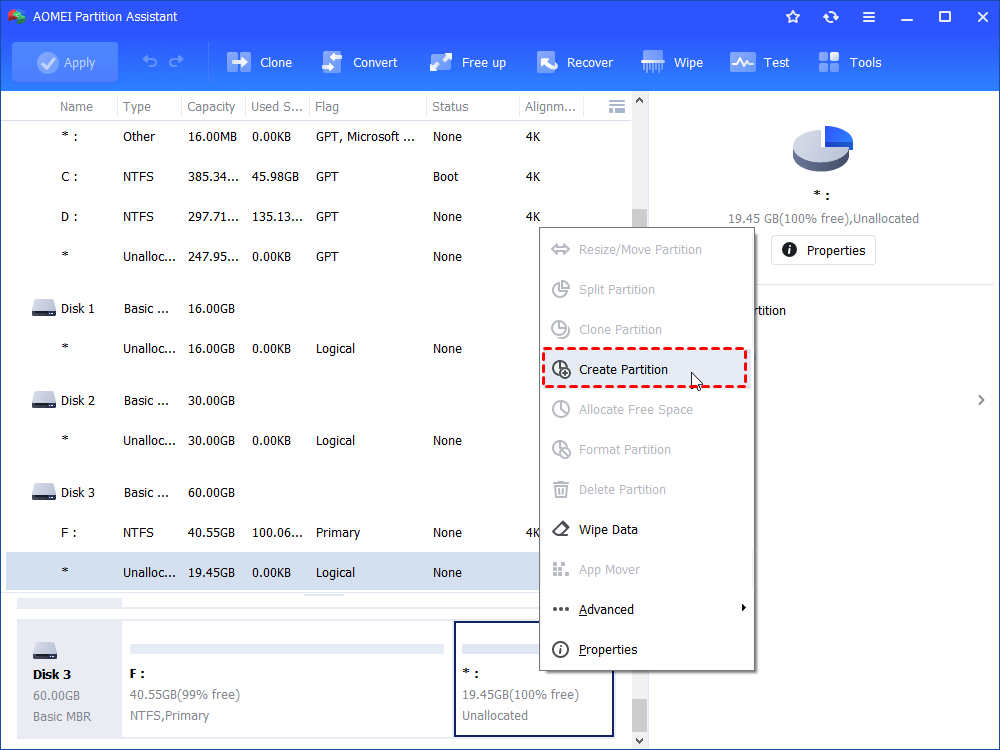
1. Right click an unallocated space or existing redundant partition and select Create Partition.
2. Specify drive letter and partition size. Partition label and file system would be available in Advanced if you create a new partition from existing one.
▶Change Partition Type ID and Serial Number

1. Right-click the target partition, select Advanced and then Change Partition Type ID or Change Serial Number.
2. Select another Type ID from the list or input a new serial number and then click OK.
Tip: this operation needs to be complete in AOMEI Partition Assistant Professional. Please upgrade to get it finished. By the way, command line operations with all said features are also offered in the Professional edition.
Summary
Now you see the trick of Windows 11/10/8/7 and know what to do in terms of there is no partition selected error while perform DiskPart commands on USB drive or other drives. In fact, you have a better way to mange hard drive partition efficiently. AOMEI Partition Assistant also allows you to fix MBR on external drive and internal drive in simple steps as well as securely wipe SSD data without hurting its lifespan.